Showing posts with label Homemade. Show all posts

10.20.2011

Homemade: Cinnamon Roll Cookies

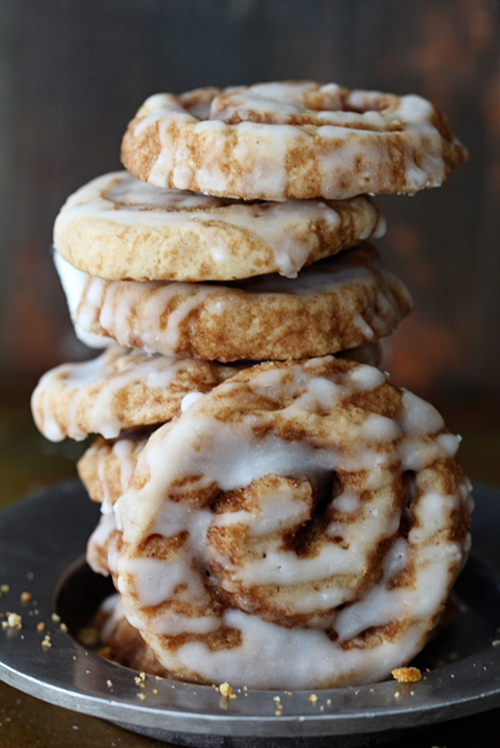
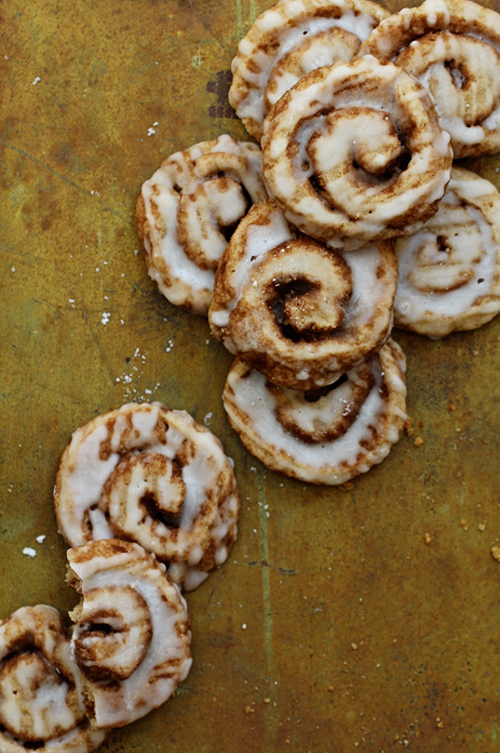
Hey there darlings!  How's your morning going so far?  Mine...medium ;-)  However, it would be a whole lot better if I had some of these...
Homemade
I heart cinnamon rolls!  But cinnamon roll cookies - just genius, I say!  And someone please tell me why do cinnamon rolls always remind me of Fall and Winter?  And why do I CRAVE them at this time...never in Spring or Summer...just Fall and Winter.  I think they are a cozy food, and I always like being cozy in Fall and Winter -so I guess that would be it, no?  But I LOVE the fact that these are cookies...so much easier to serve up...even though I would love to see a cinnamon roll bar at a wedding...maybe mine if  when I ever get married again ;-) 

Anyhoo...wouldn't these make a great midnight snack at a wedding?  I would serve them up (ooh warm would be VERY GOOD) with some coffee or hot chocolate and your guests will be smiling from ear to ear.  Okay, well that might be the alcohol, but still, they would at least be smacking their lips from the deliciousness. 

And if you didn't want to serve them up at the wedding itself, they would still make great favors packaged up all cute.  Just look how lovely they looked stacked...
Homemade
Packaged up all pretty...because really everything is SO MUCH BETTER when packaged up all pretty...and your guests would be happy, happy, happy to take these home I'm sure!

Well darlings, if you would like to make your own...the always FABULOUS Bakers Royale is the place to go....but you can click right HERE to get to the recipe quick! 

Happy baking.  Let me know when they are done, and I will be right over ;-)

P.S. - I am LOVING 'Fall Week'...hope you are too!

~ Ciao

...images via bakers royale

8.18.2011

Handcrafted: Crocheted Bunting

Happy Thursday my dears!  There is so much going on here at LCW and OTMVR that I can barely see straight ;-)  I am starting to repeat myself, getting totally sidetracked and will be in the middle of something and forget what I was doing...I'm keep telling myself that it's just because I am so busy, and not that I am old - HA!  I think I will just keep telling myself that no matter what.  Oh but wait....gotta switch the laundry first. 

(Jeopardy! think music plays here to fill the space.)

Okay, I'm back.  Well I need clean sheets, no?  I swear I always sleep better on clean sheets, don't you agree?  Love clean sheets.   Anyhoo, enough about me losing it and my laundry, and on with this post already.

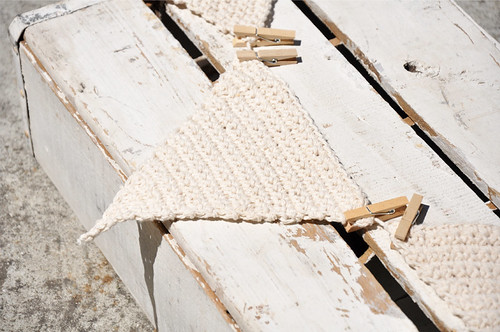
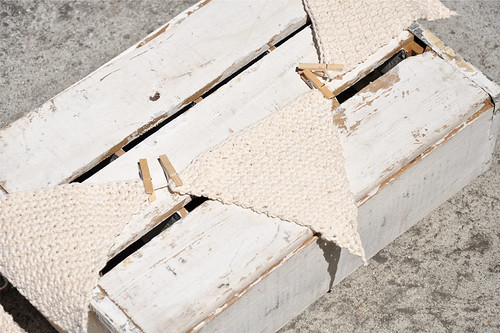
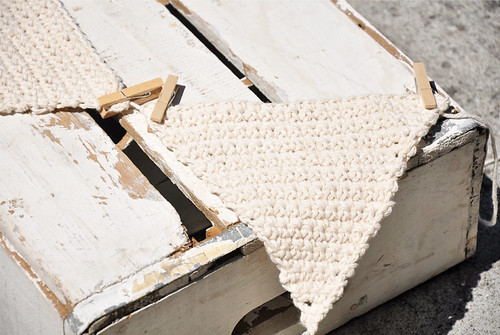
For this first week of 'Handcrafted' I thought it would be fitting to share with you my handcrafted crocheted bunting.  I ADORE this bunting!  Have a look-see...
Crocheted-Bunting-1
Crocheted-Bunting-2
Crocheted-Bunting
I sell this bunting in my Over The Moon Handcrafted Etsy store.  I also offer it up with painted wooden letters attached so you could spell things out like names, just married, sweets, love, welcome, etc...  Each flag measures 7 1/4" tall and 9" wide at top of flag, so they are fairly decent size.  I need to get another picture of it hanging up so everyone can see how darling it really is!

Actually, this is the only item in my store that I do not make myself.  My super creative and oh so talented mom makes this crocheted bunting for me.  And it can be made in any yarn color that you want!

Also, I will be adding some rectangular shaped crocheted bunting to my Etsy store as well.  And that I make.  I however can only make squares...for now.  I've always known how to make squares, yet I am gonna learn how to do triangles...I am! ;-)

P.S. - It is sooooo perfectly sweet for a baby shower or a babies room...as it's nice and soft.  And for the record, I don't have time to watch TV these days...besides Bachelor Pad - hey don't judge! 

~ Ciao

...concept, design, styling, handcrafted & photographed by over the moon vintage rentals

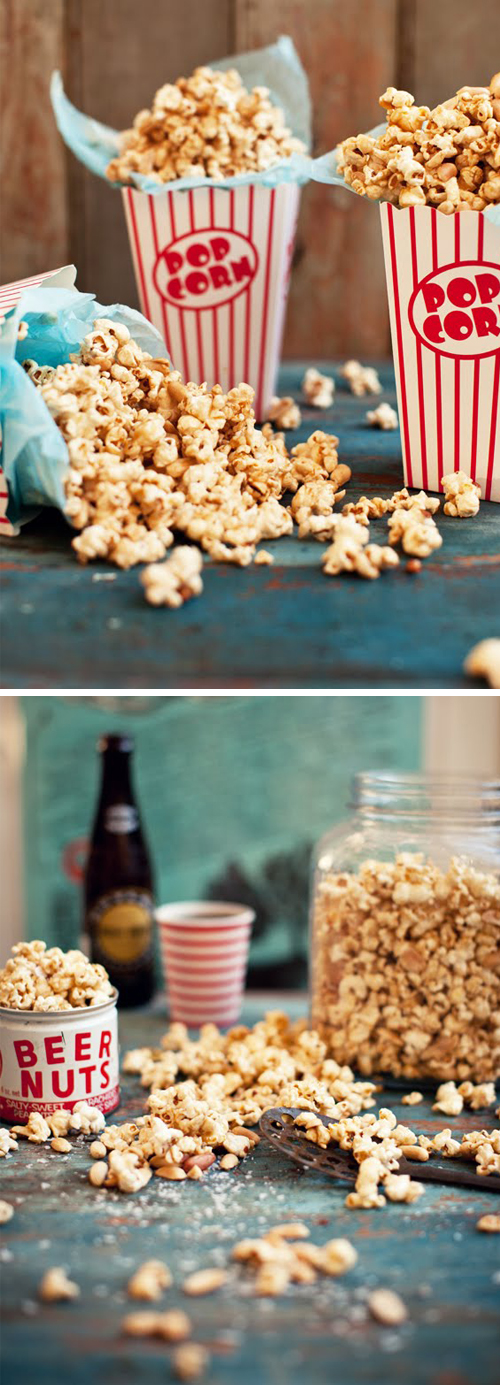
Salted Butterscotch Peanut Popcorn

There's popcorn, and then there's 'Salted Butterscotch Peanut Popcorn'...
Homemade
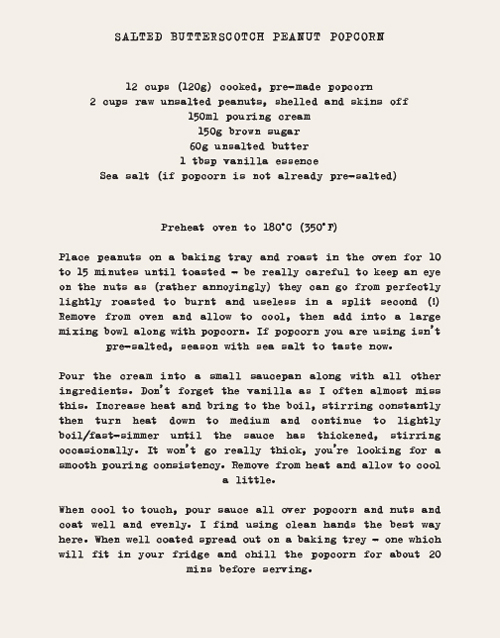
Tell me that this doesn't sound amazing!  OMGoodness, I just added this to my list of things to make ;-)  Wouldn't this make a wonderful treat for your guests?  Or favors for that matter!  They would be saying YUMMY all the way home!

And of course I found this deliciousness on the amazing blog, What Katie Ate!  I adore how she does her recipes...
Homemade
There is lots of other delicious items on her blog, so please make sure you head over there and find some other must makes!  Just don't blame me for drooling ;-)  Enjoy my dears.

~ Ciao

...images and recipe via what katie ate

8.16.2011

Tuesday Thought: Name Change

Wow, what a morning this has been!  I feel like I have spent an entire day working already and it's only 10:45 am...how does that happen?  And yet again, I am late getting this second post up as well...but I have been very productive this morning, and have accomplished bunches of things. 

The first thing I wanted to get accomplished today was opening my Etsy store for Over The Moon.  And I can proudly say that is done.  So - CHECK!  You can see my new, totally empty store right here...OTM Handcrafted...which brings me to the title of this post. 

Since I started LCW, I have always called the items I crafted homemade.  However, I have continued to call things 'homemade' because that is what I started with...but I have been wanting to call things handcrafted for ages now.  So I finally decided to make the change!  From here on out all my 'Homemade' posts will be called 'Handcrafted'...and I just wanted to share that with you, so I don't confuse everyone ;-)   Which I am sure I did, and will with this!

And yes, I know my store is currently empty - but I spent the majority of yesterday photographing most of my handcrafted items for the store.  I plan on working this week getting everything uploaded to Etsy, and should have everything completed by Monday, August 22nd.

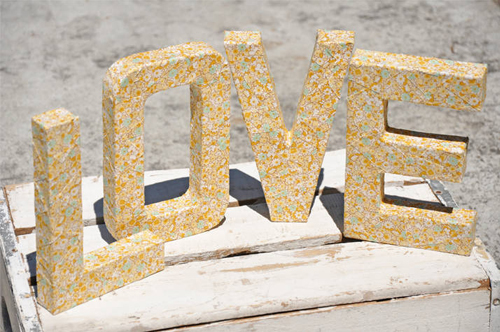
I have lots of new items that will be added to the store that you have not seen yet, like these fabric covered letters, which will be available in the shop later today...
Homemade
Cute, no? 

I can do ANY letters in ANY fabric - either that you choose, or I choose for you. I am selling these by letter - so you can spell out anything you'd like. The letters are covered with fabric pieces, it is NOT decoupaged on...so you can actually feel the fabric. All orders are custom and made once the order is placed. But all the details will be on Etsy. Eeks, can't wait to get everything up for you to see ;-)

So be sure to be ready to check it all out once I announce the 'Grand Opening' of OTM Handcrafted ;-) 

P.S. - I still have a shop for Luna and Chloe on Etsy as well, and I will be sharing what I am doing with that in the next week or so as well!  Think OTM as vintage, and LCW as a bit more glam.  Along with another shop you will be able to find OTM vintage rentals, and handcrafted items in.  See...I've been a very busy, busy girl ;-)

~ Ciao

...handcrafted fabric covered letters & photography by over the moon vintage rentals (aka me!)

Guest Posting on The Loveliest Day

Hi darlings.  I wanted to let you know that I am guest posting for the fabulous Melissa on The Loveliest Day today...
theloveliestday34
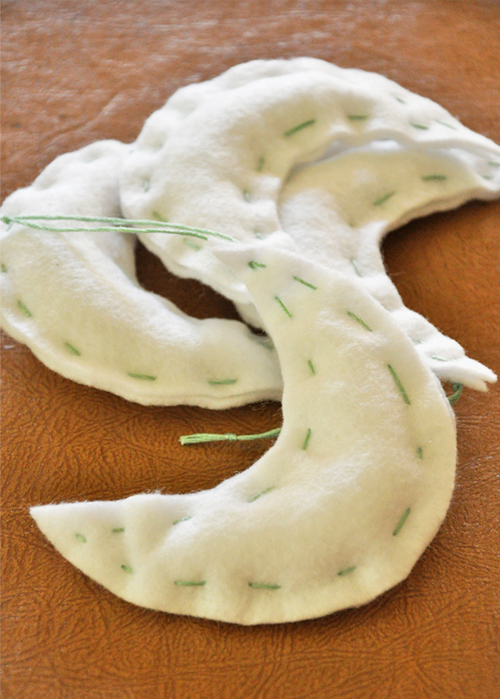
Come see my easy DIY I craftedI  Here's a sneak peek for you...
Moons
Hope to see you there ;-)

~ Ciao

...images via the loveliest day & over the moon vintage rentals

8.11.2011

Homemade: Labels

Hi loves!  Happy Thursday to you.  Aren't you thrilled it's Thursday?  Goodness knows I am.  And I can't wait for the weekend...because for the first time in weeks, I get the opportunity to sleep in.  And let me tell you, I think I deserve it.  I was up on Monday at 4:15 am to take my sister and her family to the airport, and then on Wednesday at 3:55 am to take my mom to the airport.  I think they just like to torture me getting up that early, as usually I am going to bed not too soon before that!  So nothing like going to be at 1:00 am and then waking up at 3:55 am!  Granted, I came home and crawled back in bed but it's never the same as sleeping straight through the night, is it?  And I am not a good sleeper to begin with.  Never have been.  Anyhoo, enough rambling...just wanted you to know how excited I am at the opportunity to sleep in ;-)  Hopefully you too get to sleep in this weekend!

Okay, so on with this post.  Have I told you that I really want to sign up for a sewing class that is taking place at the end of this month?  I just haven't had the opportunity to do so yet.  I had a fabulous sewing machine once, and used to know how to use it...but it was stolen when all my stuff was stolen and I haven't touched one since.  So I thought it would be good for me to take a beginners class to learn the basics all over again, and on the latest machines...as last time I was self taught!

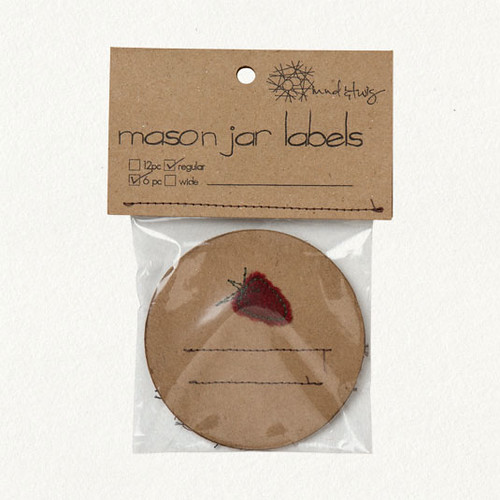
One of the reasons I wanted to take this class was because I had a specific project in mind that I wanted to do.  And of course while my project has something to do with moons (hehe) and other things, these strawberry mason jar labels I just happened to stumble across a matter of minutes ago are kind of along the same lines...
Details
So stay tuned my dears - I am going to sign up for the class at the end of the month, and will hopefully be able to share my special project with you sometime not to long after that!  Well, that is if it all works out ;-)

In the mean time, you just might want to pick up some of these labels, as they are just too dang cute!  How cute would they be on favors of homemade strawberry jam?  And they have tomato ones too!  I'm thinking homemade salsa for those ;-)  Yet, you know me...they would make DARLING escort cards - with your guests name on the first line, and table number on the second...hint, hint!
~ Ciao

...image via terrain

7.21.2011

Homemade: Doily Mason Jars

I am thrilled that it's Thursday, aren't you?  It means another 'Homemade' post and one more day until the weekend.  And I am so looking forward to this weekend as I will most likely be crafting for 12 hours straight each day!!!  Anyone wanna come join me?  I'll make cocktails ;-)  Come on - what's better then cocktails and crafts?  Hehe.

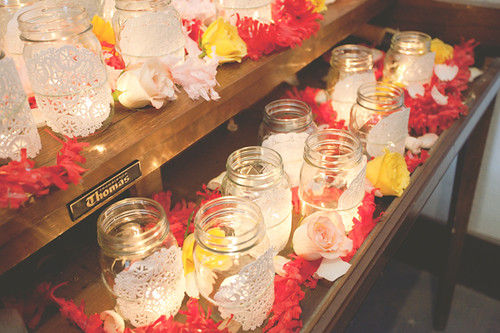
Alright, enough bribing outta me...and onto this 'Homemade' post.  You have to love when a homemade project only requires four items to make, don't you?  Have a look-see at these doily adorned mason jars... 
Homemade
Just lovely, no?  And all you need for this project are:  mason jars, doilies, candles, and some twine or string...and viola simply stunning candlelight!  However, you could use a little, just a teeny tiny bit, of spray adhesive to make sure the doilies stayed in place instead of sliding around the jars for setup...but it's totally optional.

Hmmm...maybe I will make some of these up real quick so I can then craft by candlelight!  So then it will be crafting, cocktails and candlelight...now that's the way I like to craft ;-)

~ Ciao

...photography by arrow & apple via style me pretty

Fizz & Frills

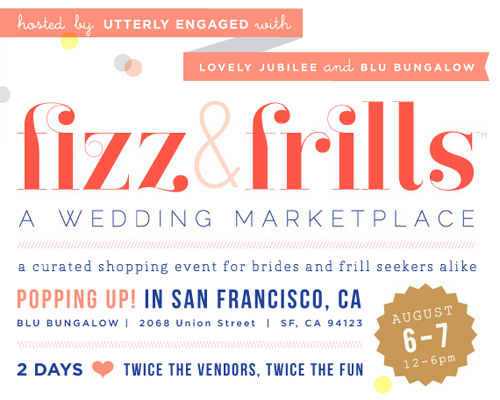
Hi loves!  Do you remember me hinting at something yesterday in my first post?  I know the fabulous Aleah at Valley and Co. noticed...thank you and mwah!  Well this is what I was hinting about...
Fizz & Frills
Over The Moon Vintage Rentals (aka me...hehe) is going to be a vendor at Fizz & Frills for both days, and I couldn't be more elated about it!  I kept debating about applying to be a vendor for my homemade items...but finally I took the leap and applied.  And now I am so glad I did as this will be my first event ;-)

I will be selling and taking orders for my homemade custom designs.  I have been a busy little bee trying to get ready for this event, and am in the process of creating some new homemade items that I can't wait to share with you once the event is over.

There will be lots of Fizz & Frills, and other vendors as well so you DON'T WANT TO MISS THIS!  Make sure to get your tickets HERE!!!  And I will see you there...can't wait to say 'hi' ;-)

~ Ciao
...image via fizz and frills

7.14.2011

Homemade: Spool Invites

How is your Thursday going so far loves?  Fabulous I hope!  Mine started off a little slow and running behind, but I am definitely on track now ;-)  I think it's the weather here.  We went from a high in the 90's last week to yesterday with a high of 71 and today 72!  Not normal for July in Northern California.  However it is nice to get a break from the heat...but it somehow throws me off a bit.  I know the heat is going to start back up on Sunday, so I think I am going to try and enjoy this little cool streak.

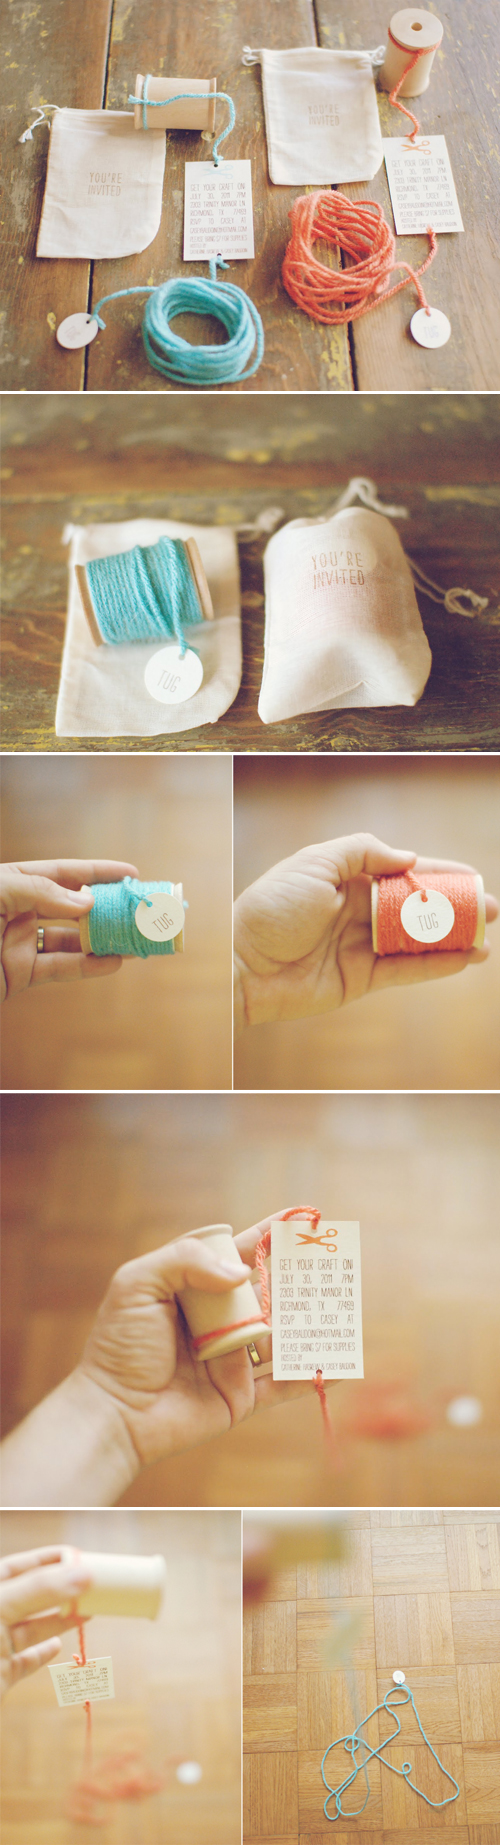
Anyhoo loves - I have a darling homemade post for you today.  No, it's not my own...but it sure is super cute!  PERFECT for a bridal shower.  I stumbled across this fabulous idea via Creature Comforts (love Ez's blog), who found it on Casey's lovely little blog called My Life as a Sugar Lander.

Casey created these DARLING invites for a craft party that I just LOVE!  Here have a look-see for yourself...
Homemade
Darling, no?

Yet, I think these would make wonderful invites for a bridal shower or bridesmaids lunch!  However, you could always turn them into save the dates instead of invites too ;-)  Instead of scissors at the top, have an illustration of a knot or whatever your pretty little imaginations can dream up!

This is one invite that I am sure, at some point, I will make. 

P.S. - This is a cute for baby shower too...announcing whether it's a boy or girl...or even announcing you are expecting!

~ Ciao

...images via my life as a sugar lander

7.12.2011

Tuesday Thought: Paper Flowers

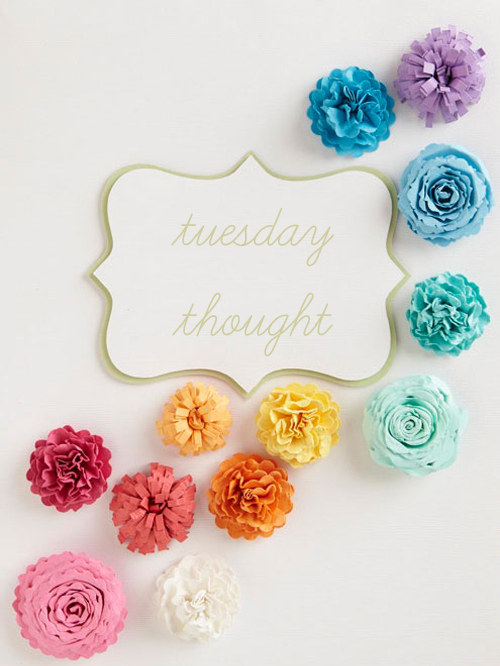
Ahh another Tuesday, another Tuesday Thought!  And a darling thought I have for you today.  It's funny how you find something and think it's soooo fabulous...only to go to another blog and see the same thing in one of their posts!  You know what I am talking about, right?  Well that was exactly what happened when I stumbled upon this fabulous idea...
Tuesday Thought
I immediately said - oh I am saving that for my Tuesday Thought post...and then I run across it on The Wedding Chicks right here.  We both must have been looking in the same places ;-))  However, when I originally saw it I had one thought that popped into my head instantly...go figure.

So here is your Tuesday Thought for today:  While these would make fabulous decorations at your event, why don't you use them as escort cards!  With such an amazing array of cardstock these days you could do one color for each table...or have one color of the rainbow at each table with a table number!  Either way, I think they would be over the moon. 

And what I love most is that these are an easy DIY with the step-by-step directions for three different flowers right here.  But as always there are lots of ways to use - as a backdrop to your ceremony area, on the cake, as bouts for the boys, or group a bunch together and make a bouquet for the girls, or attach a clip and wear in your hair...lots of options really!

Oh you bet your buttons this is another project that just got added to my never ending list of to do's ;-)

~ Ciao

...image via scrapbooks etc.

7.07.2011

Inspiration to Creation 1: The Projects - Part 2

Hey darlings - are you ready for Part 2 of 'The Projects'?  Good.  Let's get started shall we?  As I have 2 projects for you again today!

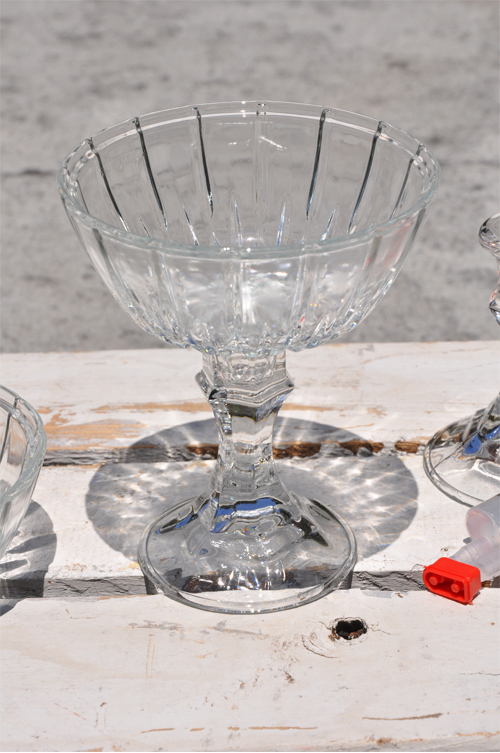
Do you remember me mentioning that one of the projects I said I would show you was using 2 dollar store items to create something?  Well the 2 items are a candlestick and a candy dish...and if you combine the two together you get this...
IC-5
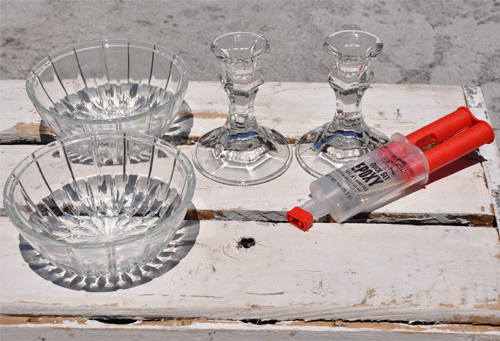
A compote!  Pretty cool, no?  So here is what you need in order to make a compote...
IC-6

  1. A glass candlestick - $1.00
  2. A glass candy dish (it comes with a lid) - $1.00
  3. Epoxy or other strong glue
Be extremely careful please if using epoxy, and follow directions exactly!  To make just place epoxy around top rim of candlestick and then place the candy dish on top.  Wipe off any excess glue if needed.  That's it my dears!

The reason I chose to make compotes is that I wanted to show you that you can make one for $2.00 and some epoxy.  So even if you wanted or needed 100 of them the cost is still pretty low...so a very cost effective idea to be used on wedding tables!  Granted, the candy dish bottom isn't very big, but it still works and still looks fabulous ;-)

And here is our second project for today...
Inspiration to Creation
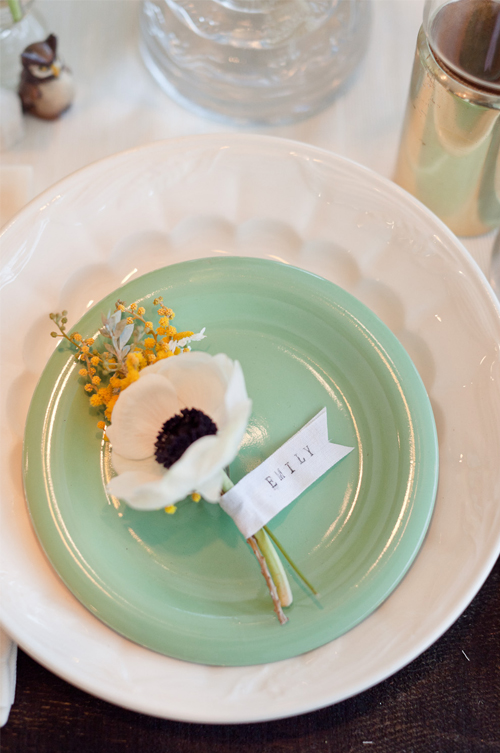
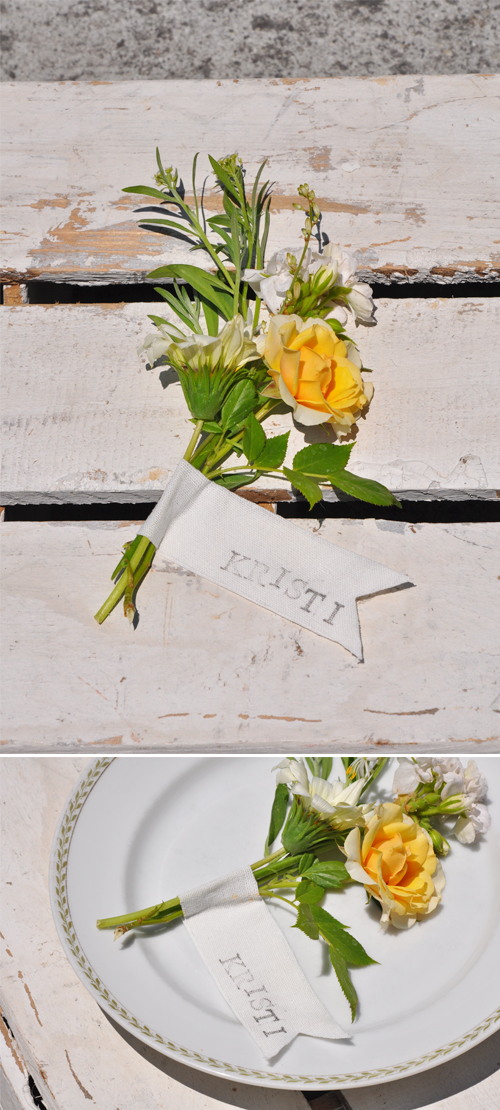
Fabric stamped ribbon posy tags (yep, that's what I'm calling them).  And below is the list of items you need to make them...
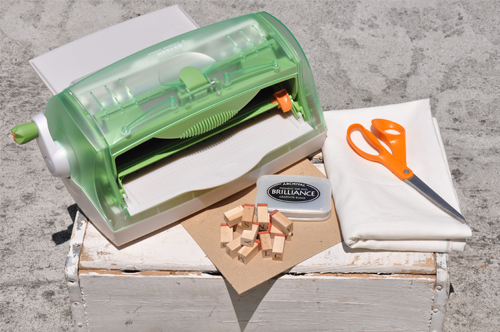
IC7
  1. A Xyron machine - however spray adhesive would work if you don't have one.  I do like using the Xyron machine as it gives the material a back and makes it much easier to cut.
  2. Fabric - I used linen
  3. Scissors
  4. Letter stamps
  5. Stamp pad
  6. Flowers - not pictured above
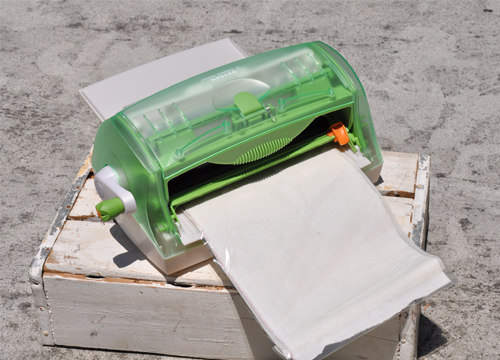
First, you might need to iron the material to make sure it is flat.  Cut a piece of material off, and run it through the Xyron machine.
IC-8
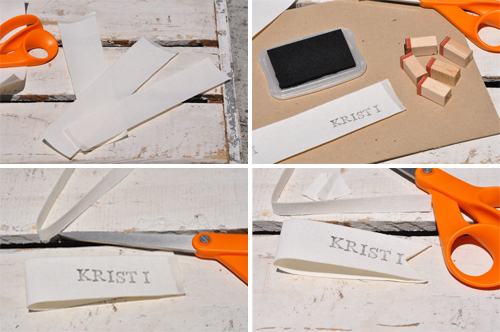
Once you have run the fabric through the machine, trim it off from the machine and remove the top protective film layer.  Next cut the material into strips, stamp a name onto one end, fold it over and trim off excess fabric so sides are even and then cut a sideways 'v' into it...
IC-9
Next you will need to make a posy.  I just used flowers from around the yard for this photo shoot.  And lastly, remove the backing from the fabric (or now is the time to use fabric spray on the backside of the fabric if you are doing it that way), place your posy onto the sticky side, fold over the fabric and press to stick it together.  The end result should look something like this...
IC-10
Soooo CUTE. 

I have to tell you that I stamped both ends...as the first one, the one above on the plate that you see I didn't press quite hard enough and didn't center my name!  However, if you look at the one above where I show the stamps and cutting...I did a much better job the second time.  Just wished I would have remembered to use the better side when I made the posy - eeks, so sorry it's light and isn't centered! 

Anyhoo, I hope you enjoyed these fun projects today.  As always, I love doing them ;-).  I will see you tomorrow my dears - when I will pull all the elements together and finish the table.

~ Ciao

...concept, design, styling & photography by luna and chloe weddings except for image 3 with photography by our labor of love via honey and poppies

7.06.2011

Inspiration to Creation 1: The Projects

So finally happy it's lunch time, as I am starving!  Goodness, this girl needs to eat...which I will be doing as soon as I get this post finished ;-)

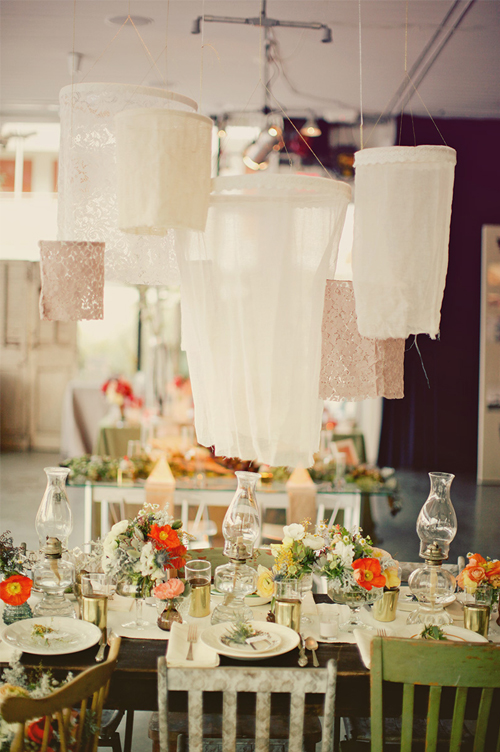
So today's part of the Inspiration to Creation series is 'The Projects' - better known around LCW as homemade.  There are two projects in particular that I wanted to do for you today.  The first one being the fabric chandeliers.  Remember, the inspiration...
Inspiration to Creation Projects
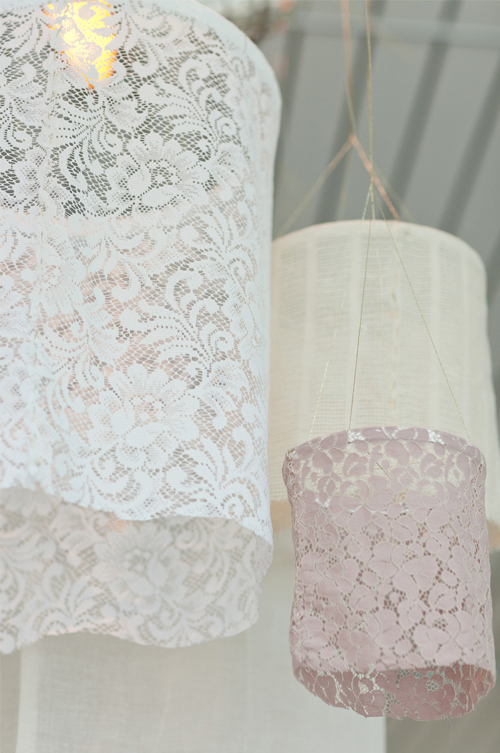
And a close up for you...
Inspiration to Creation Projects
I love them, don't you?

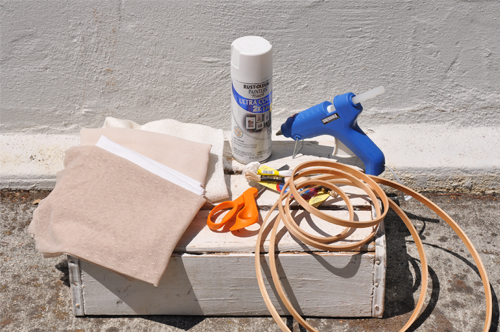
Alrighty - here is what you need to recreate them:
IC-2

  1. Embroidery Hoops - always an odd number
  2. White Spray Paint - optional
  3. Variety of different fabrics in sheer and lightweight materials
  4. Glue gun
  5. Thread/String
  6. Scissors
  7. Needle and Thread - optional
First:  Take apart your embroidery hoops - we are only going to be using the inner portion of the hoops for this project.  Once you have all your inner hoops, if you want to spray paint them like the hoops in the inspiration picture then now is the time to do so.  ***However, so that I can reuse my hoops again I am not going to spray paint mine.  I try and recycle as much as I can, and save some money at the same time.

Second:  When the paint is dry, working with one hoop at a time, take a piece of fabric and wrap it around one hoop.  Mark the spot on the fabric where it should be cut, then cut the fabric to size.  Do this for all the remaining hoops and fabric. 

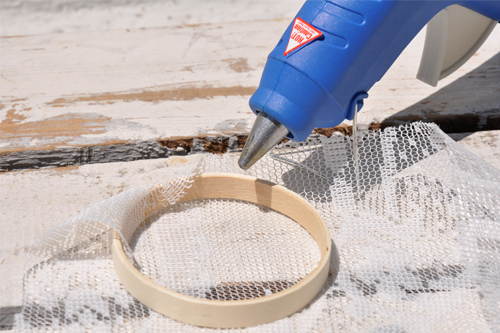
Third:  Once all hoops and fabrics are measured, run the glue gun around a portion of the inside of the hoop.  Working quickly so the glue doesn't dry, place the end of the fabric onto the glue from the outside of the hoop!  Remember - you want the outer portion of the hoop covered, so you MUST start from the outer side of the hoop and fold the fabric over to the glue on the inside.  Continue this process until all the fabric is glued to the inside of the hoop.
IC-3
Fourth:  When the glue is dry you are ready to add the string to hang the hoop from.

Fifth:  If you want you can stitch up the ends on the hoop so the fabric is attached together and doesn't hang open you can do so.  Just keep in mind you don't want to pull the thread too hard as you stitch otherwise it will pull the fabric and it will hang funny.  This is optional...you could always take a short cut and add a drop of glue or even a glue dot (I heart glue dots and this was my quick and easy way) in a couple spots to keep the fabric together.  But really, it's your choice loves :-)

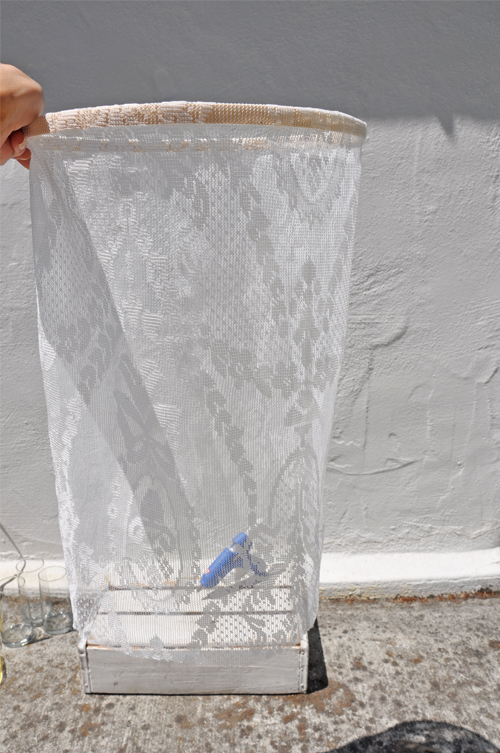
And here is your finished product...minus the thread/string to hang...oopsies forgot about that when I took the picture...
IC-4
So sorry about my hand in the picture - there was just no place to hang it from...so I thought I would just hold it ;-)  Hard to hold something and take a picture at the same time!  However, it really does look cute...and I can't wait to see it and more over the table!

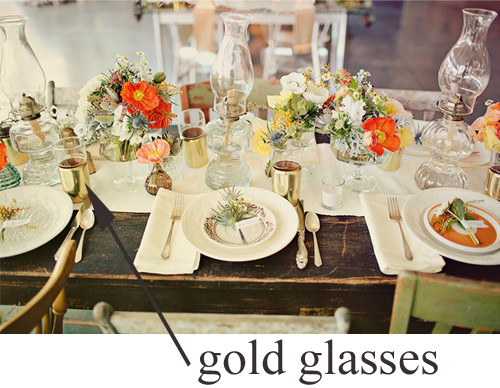
The second project is recreating the gold glasses...
Inspiration to Creation Projects
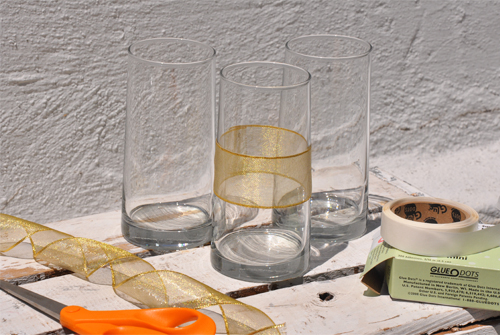
You can always look for glasses with gold detail(s) at garage sales and antique stores to use for your event.  However a super quick, easy and cost effective option is always to add a gold ribbon around plain clear glasses...
IC-1
Gotta admit - NOT my fave...but it works and will pull in a nice little pop of gold onto the table.  I was thinking of the option of painting them - which I did...but it was time consuming after a primer, two coats of paint and a sealer, and the end result looked like gold painted glasses.  Eeks - not the look I was going for.  I actually like the ribbon better, if you can believe that.  I have one other option that I will try tonight, and if I like I will share with you tomorrow! 

Tomorrow I am showing you two more projects to make in order to recreate this table...and then Friday I will be putting it all together for you!  I'm off to eat now...see you tomorrow with more goodness ;-)

~ Ciao

...images 1 and 6 photography brandon kidd, image 2 photography by our labor of love via honey and poppies, and all other photography by luna and chloe weddings

7.01.2011

{Possible New Series} Inspiration to Creation: The Inspiration

Happy Friday my dears!  I am so tickled that this is a long weekend, as goodness knows I need one ;-)  So tell me - do you have any fabulous plans for the weekend?  Going anywhere?  Or staying home and hanging with friends and family?  Me? I am staying local this year, and have a variety of things to do ;-)

I have been doing some thinking around here lately.  And since LCW is in the process of getting a new look, I was thinking about adding another new series to the blog as well.  I know I just added 'Aisle Style'  which is fun, but I really want to add something that will really help readers (whether you are a bride or not) on how to recreate looks they love.  I know most of us heard the feedback about how brides felt about photo shoots, so I was thinking about taking a photo shoot and breaking it down, so anyone could recreate the look themselves.  A photo shoot all at once can always be overwhelming, but broken down by element, I think, makes it much easier, don't you?  

Since this is a 'possible' new series, I am hoping your feedback will provide me with whether I should make this a monthly series or not.  The way I was thinking of doing this new series was to do it over a week.  So the first day will be the inspiration, the next couple days will be taking an element and recreating it, of course with a DIY, if possible, thrown in as well, and the final day, Friday, will be putting it all together - a wrap of of the week so to speak.  Goodness, I hope that make sense! 

And with Monday being a Holiday for the 4th of July, I thought I would post the inspiration for you today, and then follow up with the rest of the series on Tuesday through Friday next week.  So are you ready for your inspiration?  Well here it is...
On the Table
I know I used a picture of this table in my Picture Perfect Palette No. 7 that I posted last Friday, however after seeing the picture again I remembered how much I ADORED the table decor, and would love to recreate it.  So off I went on a hunt to find more pictures for this series, and lucky me, I found a bunch!

Now keep in mind, I am just one person with a limited amount of money for this new series, so it isn't going to be a perfect match!  Goodness, I don't even have a table that looks like that...so you get the idea here.  Yet, I will break down the elements, and show you a DIY or two that would let you recreate something similar ;-)

So are you with me my dears?  I know I have a full line up of posts each week already, and am still trying to decide how to post this new series - add a third post a day for one week a month?  Cut out one of my normal posts one week a month?  Hmm, something I will be definitely thinking about over the weekend!  To me, that is the hardest part of this new series...well that - the name of the series (still might change it), and not have unlimited funds to recreate!

My dears, I hope you have a SPECTACULAR and SPARKLY 4th of July weekend! I will see you back here on Tuesday, as I am not planning on posting until then. So may you all find some sweetness of your own this weekend! Mwah.

P.S. - Also be on the lookout for LCW's First Annual Cake Week starting on July 18th with a fabulous cake posted every day.  That's five straight days of yummy goodness.  And I decided that every year from here on out on the week of my and my sister's birthday will be Cake Week!  Oh and do I have some pretty cakes lined up for you ;-)


~ Ciao

...images via & photography by brandon kidd
6.24.2011

Picture Perfect Palette No. 7

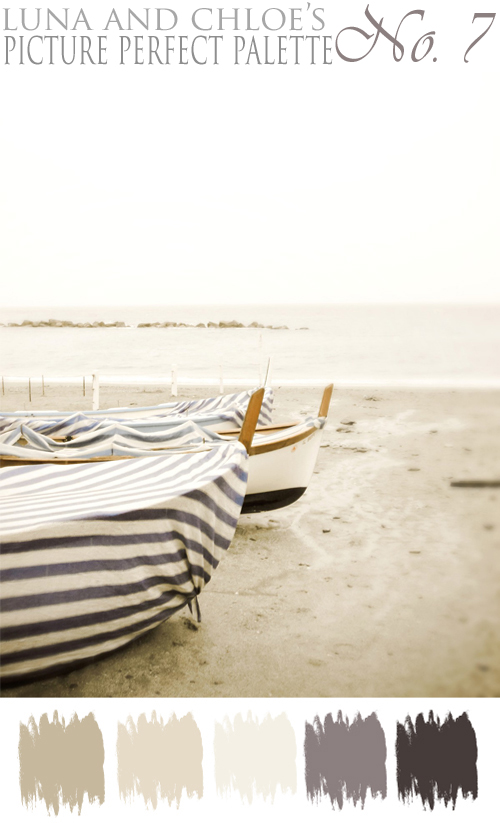
Yes, it's official...as determined on my previous post today - I'm on a nautical kick!  So I am going to continue on that kick today with a beach inspired Picture Perfect Palette. 

And I know it has been a while since my last PPP post, so I am hoping that this one makes up for it!  So without further ado, here is PPP No. 7...
Picture Perfect Palette No. 7
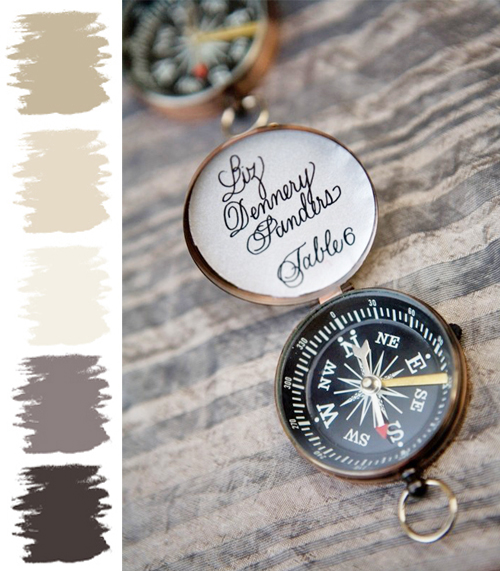
Such a pretty and calm palette.  Tell me my previous 'Darling Detail' post of the compass escort cards wouldn't be perfect with this palette?  Oh, I think it works perfectly...
Picture Perfect Palette
And while I know this palette is too bland or blah for most people (however, I do LOVE it), it is a wonderful base for a color palette.  By adding just one color to this palette, whether it be orange, green, yellow, etc...you can create a bunch of fabulous events.

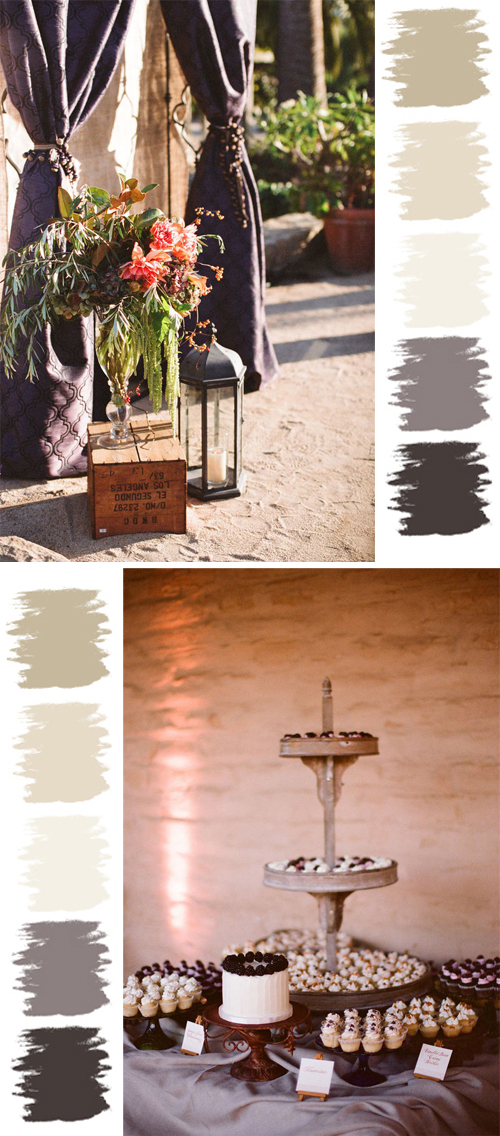
So let's just jump right into this first example of this palette, shall we?  First up is some gorgeous outdoor event inspiration.  Have a look-see at the fabulous curtains...
Picture Perfect Palette
I love how the venue fits into this palette - from the sand/dirt floor to the fabulous walls.  And by the addition of some gorgeous material set against the beige linen, it makes for quite a gorgeous backdrop.  Carrying the color of the material over to the dessert table, it still keeps in line with the color palette.  Don't the desserts fit perfectly with the palette as well?

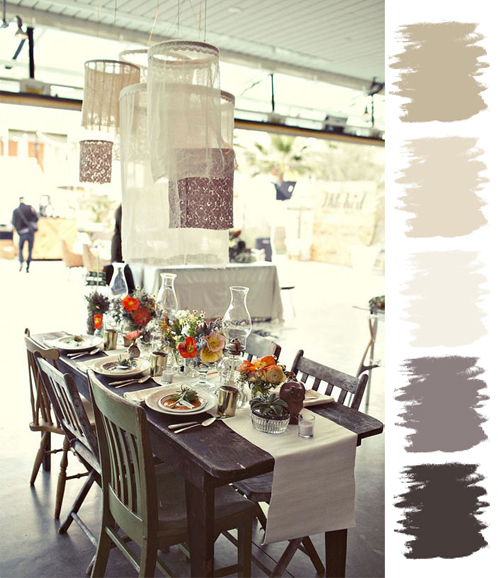
Up next is this homespun, homemade, vintage table...
Picture Perfect Palette
I ADORE the look and feel of this decor.  And look what the addition of just a hint of orange to this palette can create.  Amazing, no?

And moving on from a homespun, vintage style - lets go to the other end of the spectrum with some elegant winter inspired decor.  Here the addition of deep, rich green is brought in, however, still in small batches...
Picture Perfect Palette
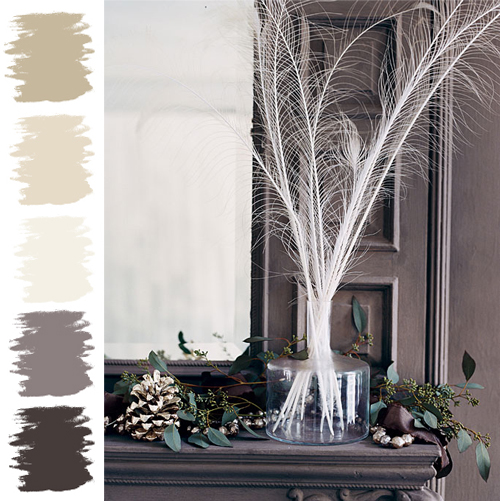
Eeks - I love the way it's used here too!  Just picture charcoal linens, white plates, clear glass vases in a variety of sizes filled with white feathers as centerpieces.  A couple of painted pine cones (a beigy metallic is what I am picturing) and greenery on the table mixed among the vase(s) on the table would add a natural but elegant look.  Lots of candles on the table would complete the look.  Yet, some silky ribbon (possibly tied around the napkin or wrapped around a menu card) in a deep, rich color would be a fabulous addition as well.  Do you see it?  Fabulous, no?
Ahh, so there you have it my dears - a Picture Perfect Palette!  Hmm - that's one palette used four different ways, if you include the beach/compass inspiration...always amazing to see how you can incorporate it into any style of event.  Goodness, I love doing these posts; hope you love them as well.  Here's to a lovely weekend - may it be as fabulous as you!  I'll see you Sunday.

~ Ciao

~ image via pretty stuff, image via lh calligraphy, photography by beaux arts photographie via style me pretty, image via 100 layer cake & domino

6.23.2011

Homemade: Paper Wrapped Cans

Holy moly - I can't believe it's Thursday already!  Yippee - one more day until the weekend ;-)  And I heart weekends ;-)  However, I must not forget that today is Thursday, and that means it's time for a 'Homemade' post!

I kind of have been on a kick with cans lately.  A couple of weeks ago I did a 'Homemade' post about spray painting them and using as centerpieces...see here if you missed it.  So today I thought I would bring you one more quick and easy peasy homemade idea using cans.  How about paper wrapped cans as centerpieces?  Here have a look-see at what I am talking about...
Homemade
Darling, no?  I adore all the different papers used, as well as how some cans are covered more than others.  And how fabulous is it that you are recycling?  Love it as every bit helps!

To make all you have to do is wash and clean the cans.  Let them dry completely.  Then determining the width of the paper just cut it to size.  I would then spray the back of the paper with spray adhesive and adhere to the can - viola!  Pretty centerpieces that most definitely 'Homemade' ;-)

I have vision of lots and lots of pretty papers swirling in my head right now!  Can you imagine all the paper options - aye, aye, aye so many to choose from!

~ Ciao

...photography by janae shields via style me pretty

6.16.2011

Homemade: Fabric Bows

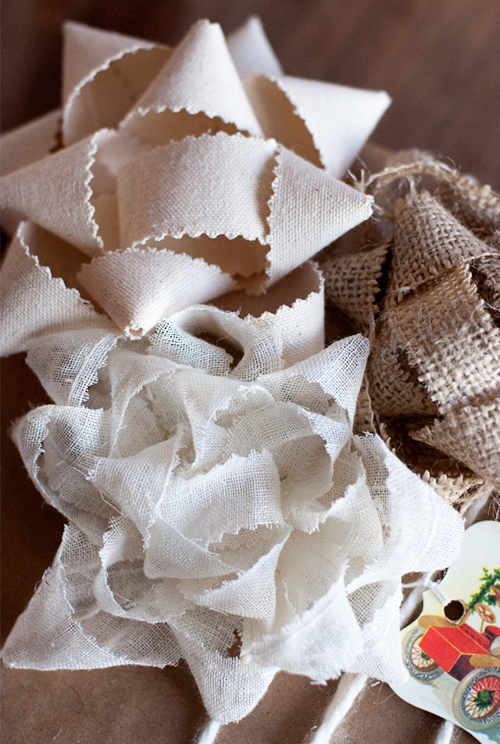
Happy Thursday darlings!  How fabulous are these homemade bows... 
Homemade
Eeks - I am loving the materials they are made out of...burlap, linen and cotton!  And to make you really only need some material (of course), pinking shears (scissors would work just fine), a stapler and a glue gun...really that's it!  Check out the step by step DIY right here.  I so need to try making these ASAP!

I want to try making smaller ones which would be perfect to adorn escort cards, and I want to see if I can make big ones for decoration...my head is spinning already with ways in which to use ;-)

~ Ciao

...image via for the love found via poppytalk

6.15.2011

Darling Detail No. 13: Frosted Roses

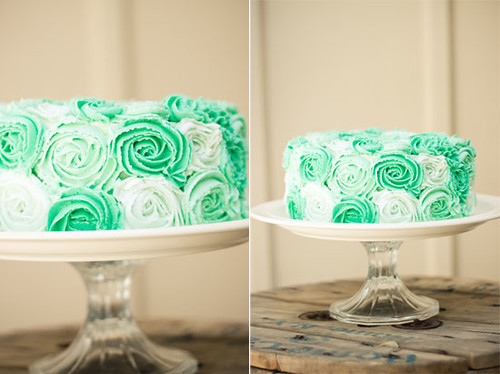
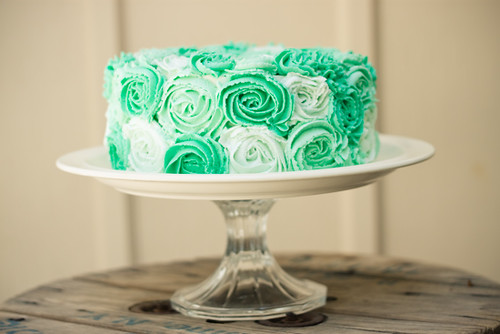
Now these frosted roses really are darling...
Cake 
Cake
cake
And in the most perfect shades of green!  Goodness, I am just loving the color.  Oh and wait - it gets better - yes, better.  You can make these yourself with the step by step DIY created by Strawberry Chic.  See better ;-) 

Hmm, I think if you added some bunting it would be the perfect wedding cake, don't you?  However, I will probably be trying this technique on the next cake I bake I love it that much!

~ Ciao

...images via strawberry chic

6.02.2011

Homemade: Bottle Centerpieces

Yes, it's that time again...time for another Homemade post!  And since I have been all about simple homemade projects, I thought I would post another one for you this week as well. 

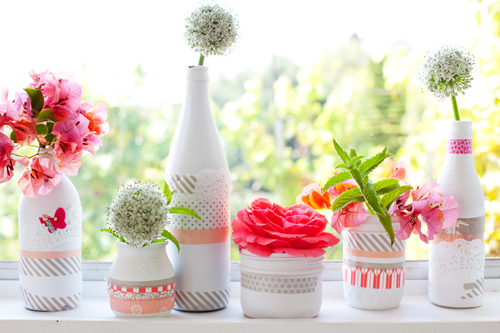
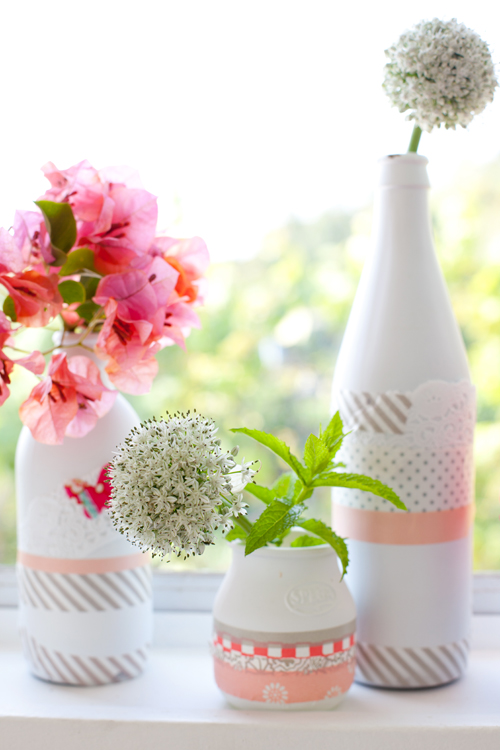
So today's project I found over on Decor8 (love Holly's blog).  Leslie from A Creative Mint (love her blog too) is a contributor on Decor8, and creates these amazing Color Me Pretty posts.  For May's Color Me Pretty post Leslie included this simple DIY of spray painted bottles that are adorned with washi tape and some paper doilies.  And I thought that they would make lovely centerpieces (I have posted about spray painted can centerpieces here)...have a look-see...
Homemade
For this project you just need three things:  spray paint, washi tape and some paper doilies.  Spray paint your bottles whatever color you choose, let dry and then add washi tape and if you like paper doilies here and there - and that's it!  The result, a darling simple centerpiece idea...
Homemade
So pretty.  And with so many spray paint and washi tape colors - your options are endless! 

Happy Thursday loves!  Hope you're having a fabulous day ;-) 

~ Ciao

...images via decor8

Over the Moon

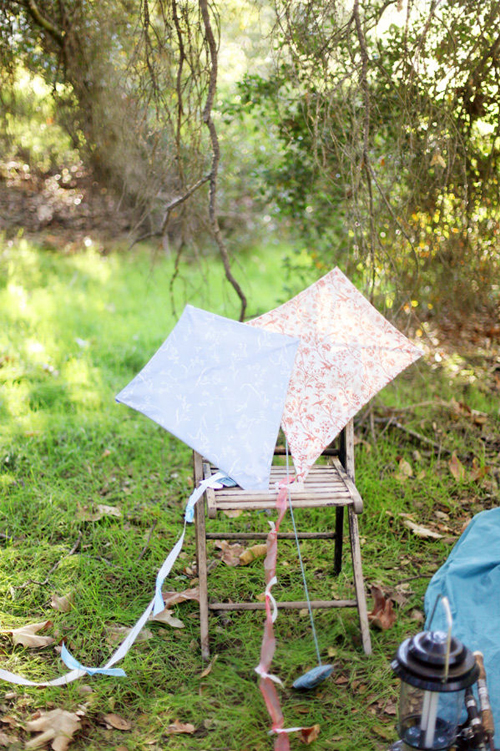
...about kites at weddings - especially homemade ones!
Over The Moon
I would love to have the kites flying during the wedding and reception.  A breezy locale would be perfect to fly these homemade wonders. 

Or I would make bunches of smaller ones, offer one up to each guest and have them all fly them at the same time - can you even imagine the pictures?  Eeks!  And I might even take it a step further and have the guests write a wish on a piece of ribbon or fabric, tie it to the tail and then fly them!

Even if flying the kites isn't involved, they sure would make for some pretty and whimsy decor.  It would be 'KITETASTIC' (yep, a new Kristism), wouldn't you agree?

~ Ciao

...image via style me pretty

5.26.2011

Homemade: Ribbon and Lace Table Runner

Happy Thursday loves!  Goodness - I seriously can't even believe that it is Thursday already...where has this week gone?  And why did it go by so fast?  Aye, aye, aye am I behind on lots of things this week ;-)  Eeks...and to think that this weekend is Memorial Day weekend is even more crazy!  Okay...whoever stole May away from me...I would like it back now...please!

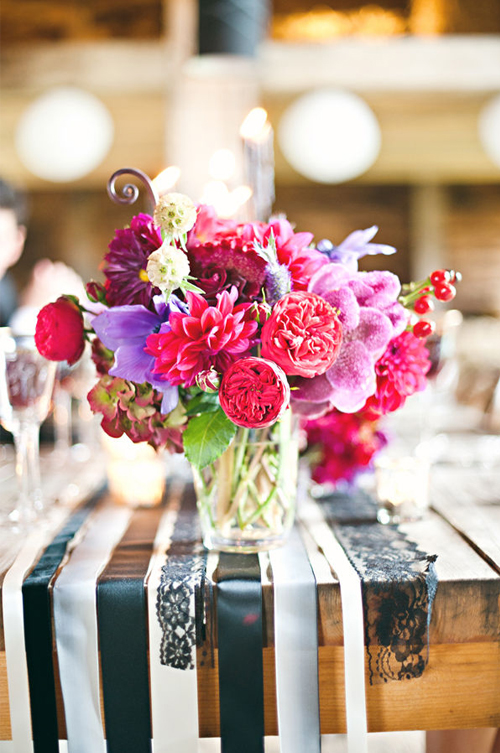
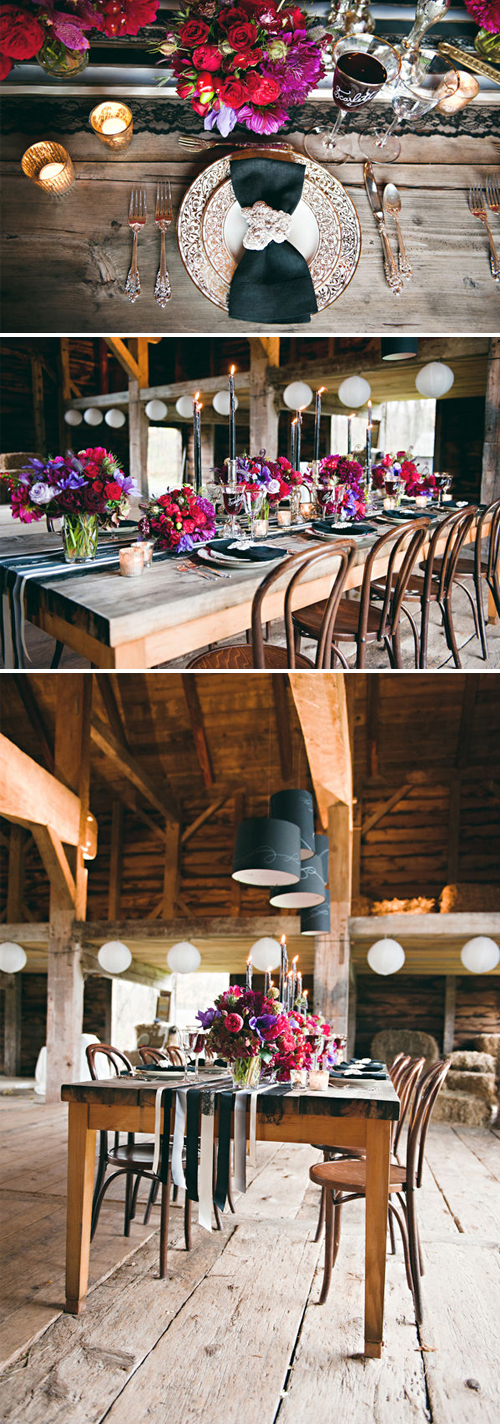
And with weeks flying by like this one, it's no wonder I can't seem to find the time to do a homemade project these days!  I am really hoping to get back into doing my own homemade projects again....as I miss them!  However, I do have probably one of the easiest projects to date for you today!  Have a look-see at this ribbon and lace table runner...
Darling Detail
To make a ribbon and/or lace table runner, all you need is ribbon and/or lace and a pair of scissors.  Just run the ribbon the length of the table and trim.  Here are a couple more pictures for you...
Homemade
See easy peasy!  And makes quite a lovely statement, no? 

~ Ciao

...photography by trent bailey via style me pretty