Happy Thursday my dears! Please forgive my absence yesterday - I was working on a couple big projects that NEEDED to get done. And I still have a couple more projects that need to be finished...one big, but super duper special one that I am mailing to my sisay for my niece's birthday party in December ;-)
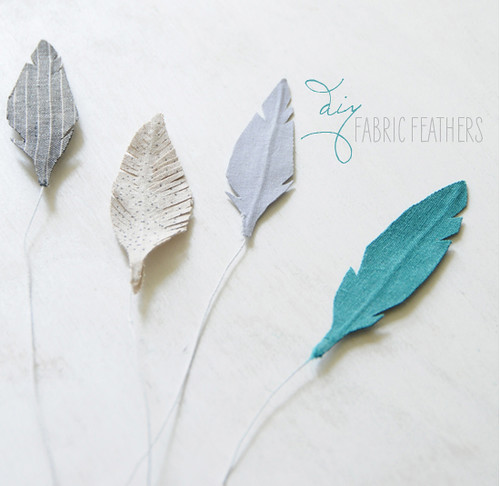
So while I off crafting and playing catch up, I thought I would pop in and share with you, in case you missed it, this fabulous DIY by Ez of Creature Comforts that was featured on 100 Layer Cake a couple months back...
What I love about this is that there are three ways to make these lovely feathers! And since I have been on such a bow and arrow kick lately...feathers just seem fitting, do they not? Not to mention that I think there was a week a couple months back that I posted feathers all week long ;-)
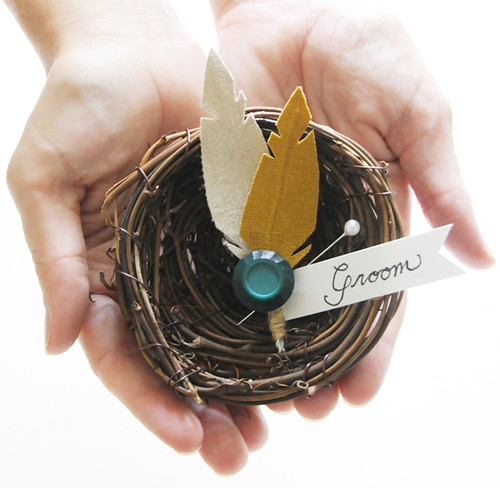
Anyhoo, I see soooo many ways in which to use these lovelies. Yes, you can use them as bouts, in your hair or adorning napkins, but they would also be fun to use on an escort table, and on a bigger scale as table markers, or even a table runner...you get the idea ;-)
Have fun feathering your nest, table, hair, etc...my dears!
~ Ciao
...photography by creature comforts via 100 layer cake
Showing posts with label DIY. Show all posts
11.17.2011
9.29.2011
Handcrafted: Twine Table Numbers
Yay! It's time for another 'Handcrafted' post. I don't know about you loves, but I always love handcrafted elements at ANY event...especially a wedding ;-) It just adds that extra touch, don't you think?
I mentioned in my earlier post that I had a DARLING handcrafted idea for you today! Here is one of the thoughts that swirled and twirled around in my head after seeing all the lovely shades of beige and soft white yesterday. And while I did NOT actually make this, I am sure it would work and be fabulous! (I just might have to mock one up this weekend, and show you how it turned out.)
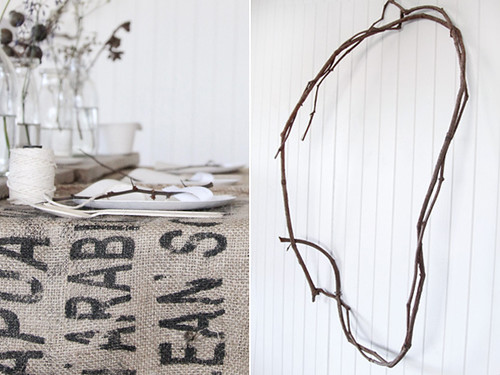
Anyhoo, my idea came from this picture....
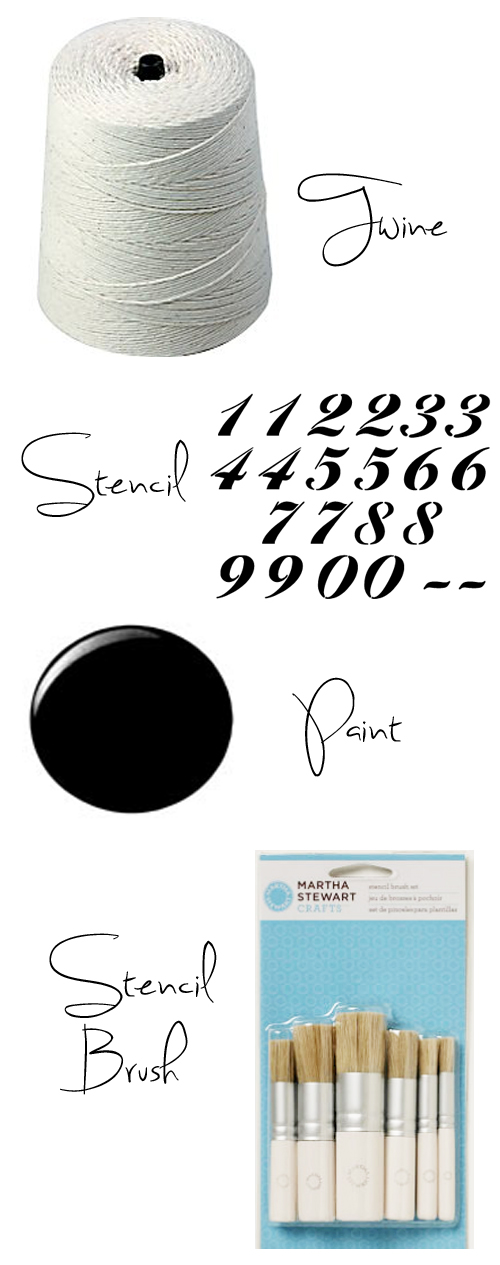
In the picture on the left, do you see the twine on the end of the table there? Yes, that's the main element needed for this project;-) You see, as soon as I saw it I thought it would make a great table number! All you would have to do is paint a table number on. So loves, here are the things you would need:
So I am sure there is a color that would work for you!
Also, you know I always have lots of ideas - so I just have to tell you that a table number on a stick placed inside the hole at the top of the twine would be cute too ;-)))
Here's is where you can find everything you need for this handcrafted project:
I mentioned in my earlier post that I had a DARLING handcrafted idea for you today! Here is one of the thoughts that swirled and twirled around in my head after seeing all the lovely shades of beige and soft white yesterday. And while I did NOT actually make this, I am sure it would work and be fabulous! (I just might have to mock one up this weekend, and show you how it turned out.)
Anyhoo, my idea came from this picture....
In the picture on the left, do you see the twine on the end of the table there? Yes, that's the main element needed for this project;-) You see, as soon as I saw it I thought it would make a great table number! All you would have to do is paint a table number on. So loves, here are the things you would need:
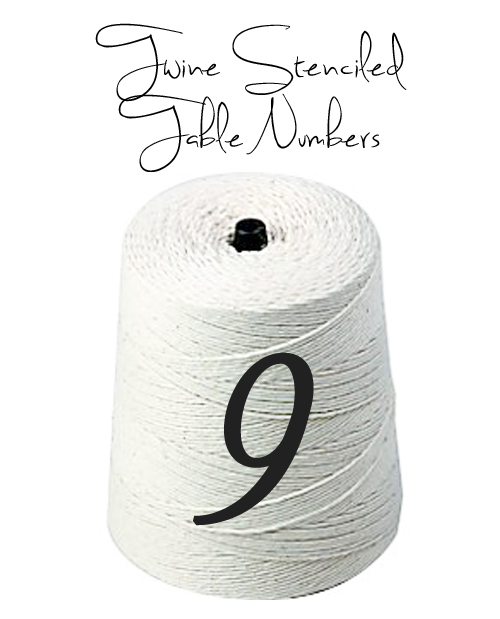
All you need to do is hold the stencil on, dip your stencil brush in paint (or paint brush would work too...just be careful to stay within the stencil), and stencil the number onto the twine! It might take more than one coat. However, I think you could probably stamp a number on, or use a sharpie and write on as well. And here is an idea of what it would look like...
Twine table numbers! How fabulous, and easy is that? And just think you could use any color paint you want - it doesn't have to be black. Just look at all the oh so pretty paint options Martha Stewart now has at Michaels...So I am sure there is a color that would work for you!
Also, you know I always have lots of ideas - so I just have to tell you that a table number on a stick placed inside the hole at the top of the twine would be cute too ;-)))
Here's is where you can find everything you need for this handcrafted project:
The Shopping List:
~ Ciao
Labels:
Bakers Twine,
DIY,
Handcrafted,
Stencil,
Table Numbers
8.16.2011
Guest Posting on The Loveliest Day
Hi darlings. I wanted to let you know that I am guest posting for the fabulous Melissa on The Loveliest Day today...
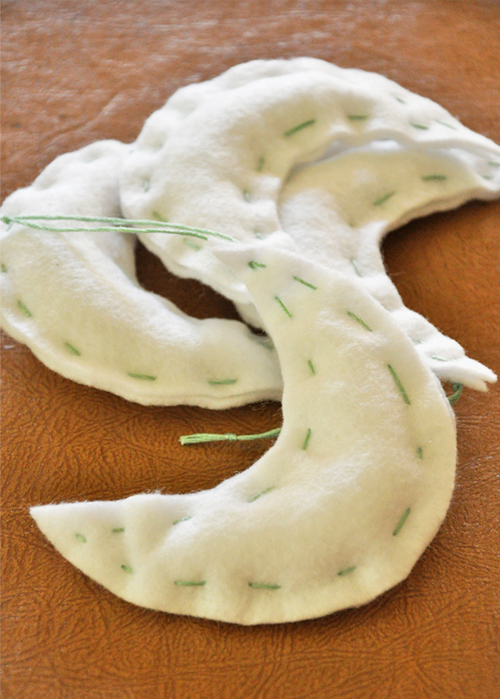
Come see my easy DIY I craftedI Here's a sneak peek for you...
Hope to see you there ;-)
~ Ciao
...images via the loveliest day & over the moon vintage rentals
Come see my easy DIY I craftedI Here's a sneak peek for you...
Hope to see you there ;-)
~ Ciao
...images via the loveliest day & over the moon vintage rentals
Labels:
DIY,
Escort Cards,
Favors,
Guest Post,
Handcrafted,
Homemade,
Moons,
White
7.14.2011
Homemade: Spool Invites
How is your Thursday going so far loves? Fabulous I hope! Mine started off a little slow and running behind, but I am definitely on track now ;-) I think it's the weather here. We went from a high in the 90's last week to yesterday with a high of 71 and today 72! Not normal for July in Northern California. However it is nice to get a break from the heat...but it somehow throws me off a bit. I know the heat is going to start back up on Sunday, so I think I am going to try and enjoy this little cool streak.
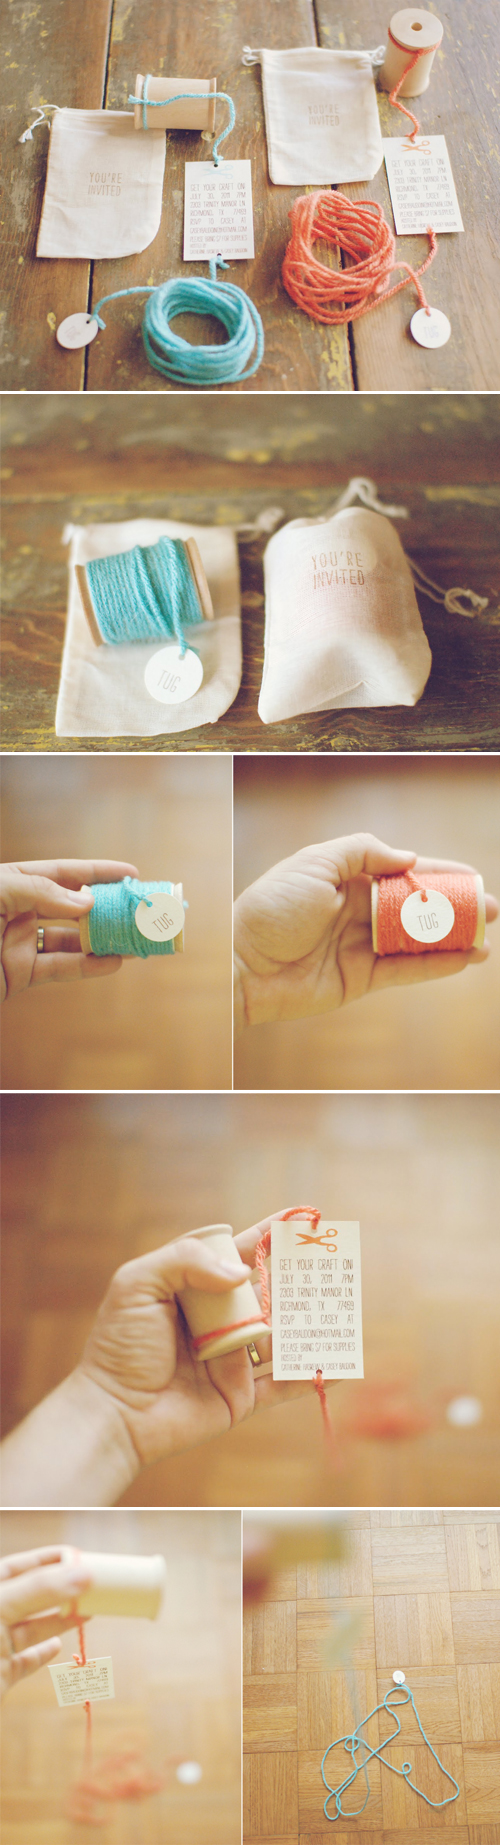
Anyhoo loves - I have a darling homemade post for you today. No, it's not my own...but it sure is super cute! PERFECT for a bridal shower. I stumbled across this fabulous idea via Creature Comforts (love Ez's blog), who found it on Casey's lovely little blog called My Life as a Sugar Lander.
Casey created these DARLING invites for a craft party that I just LOVE! Here have a look-see for yourself...
Darling, no?
Yet, I think these would make wonderful invites for a bridal shower or bridesmaids lunch! However, you could always turn them into save the dates instead of invites too ;-) Instead of scissors at the top, have an illustration of a knot or whatever your pretty little imaginations can dream up!
This is one invite that I am sure, at some point, I will make.
P.S. - This is a cute for baby shower too...announcing whether it's a boy or girl...or even announcing you are expecting!
~ Ciao
...images via my life as a sugar lander
Anyhoo loves - I have a darling homemade post for you today. No, it's not my own...but it sure is super cute! PERFECT for a bridal shower. I stumbled across this fabulous idea via Creature Comforts (love Ez's blog), who found it on Casey's lovely little blog called My Life as a Sugar Lander.
Casey created these DARLING invites for a craft party that I just LOVE! Here have a look-see for yourself...
Darling, no?
Yet, I think these would make wonderful invites for a bridal shower or bridesmaids lunch! However, you could always turn them into save the dates instead of invites too ;-) Instead of scissors at the top, have an illustration of a knot or whatever your pretty little imaginations can dream up!
This is one invite that I am sure, at some point, I will make.
P.S. - This is a cute for baby shower too...announcing whether it's a boy or girl...or even announcing you are expecting!
~ Ciao
...images via my life as a sugar lander
Labels:
DIY,
Homemade,
Invitations,
Save the Dates,
Spools
7.12.2011
Tuesday Thought: Paper Flowers
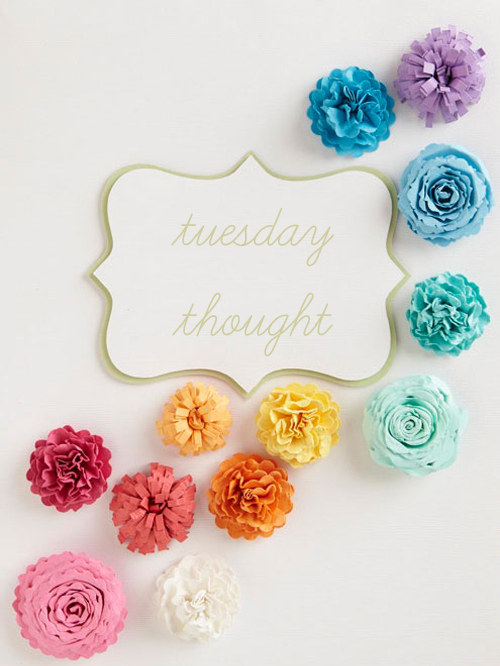
Ahh another Tuesday, another Tuesday Thought! And a darling thought I have for you today. It's funny how you find something and think it's soooo fabulous...only to go to another blog and see the same thing in one of their posts! You know what I am talking about, right? Well that was exactly what happened when I stumbled upon this fabulous idea...
I immediately said - oh I am saving that for my Tuesday Thought post...and then I run across it on The Wedding Chicks right here. We both must have been looking in the same places ;-)) However, when I originally saw it I had one thought that popped into my head instantly...go figure.
So here is your Tuesday Thought for today: While these would make fabulous decorations at your event, why don't you use them as escort cards! With such an amazing array of cardstock these days you could do one color for each table...or have one color of the rainbow at each table with a table number! Either way, I think they would be over the moon.
And what I love most is that these are an easy DIY with the step-by-step directions for three different flowers right here. But as always there are lots of ways to use - as a backdrop to your ceremony area, on the cake, as bouts for the boys, or group a bunch together and make a bouquet for the girls, or attach a clip and wear in your hair...lots of options really!
Oh you bet your buttons this is another project that just got added to my never ending list of to do's ;-)
~ Ciao
...image via scrapbooks etc.
I immediately said - oh I am saving that for my Tuesday Thought post...and then I run across it on The Wedding Chicks right here. We both must have been looking in the same places ;-)) However, when I originally saw it I had one thought that popped into my head instantly...go figure.
So here is your Tuesday Thought for today: While these would make fabulous decorations at your event, why don't you use them as escort cards! With such an amazing array of cardstock these days you could do one color for each table...or have one color of the rainbow at each table with a table number! Either way, I think they would be over the moon.
And what I love most is that these are an easy DIY with the step-by-step directions for three different flowers right here. But as always there are lots of ways to use - as a backdrop to your ceremony area, on the cake, as bouts for the boys, or group a bunch together and make a bouquet for the girls, or attach a clip and wear in your hair...lots of options really!
Oh you bet your buttons this is another project that just got added to my never ending list of to do's ;-)
~ Ciao
...image via scrapbooks etc.
Labels:
DIY,
Escort Cards,
Homemade,
Paper,
Paper Flowers,
Tuesday Thought
7.07.2011
Inspiration to Creation 1: The Projects - Part 2
Hey darlings - are you ready for Part 2 of 'The Projects'? Good. Let's get started shall we? As I have 2 projects for you again today!
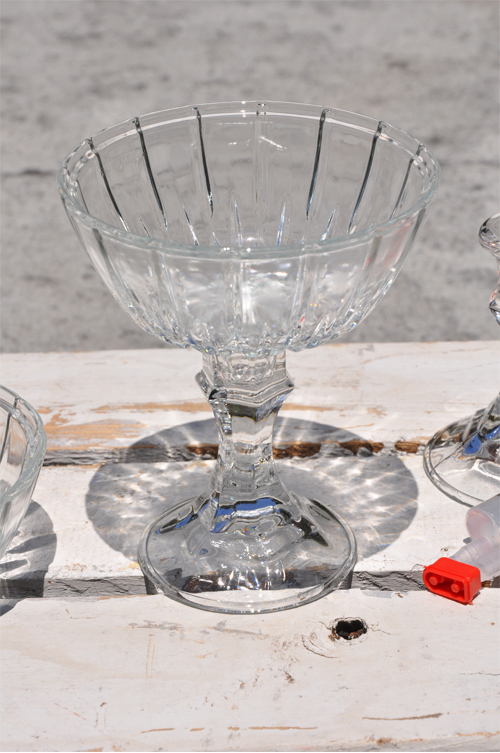
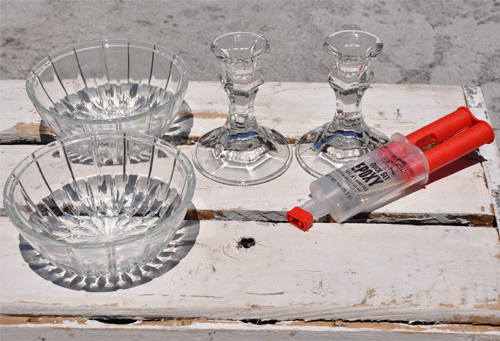
Do you remember me mentioning that one of the projects I said I would show you was using 2 dollar store items to create something? Well the 2 items are a candlestick and a candy dish...and if you combine the two together you get this...
A compote! Pretty cool, no? So here is what you need in order to make a compote...
The reason I chose to make compotes is that I wanted to show you that you can make one for $2.00 and some epoxy. So even if you wanted or needed 100 of them the cost is still pretty low...so a very cost effective idea to be used on wedding tables! Granted, the candy dish bottom isn't very big, but it still works and still looks fabulous ;-)
And here is our second project for today...
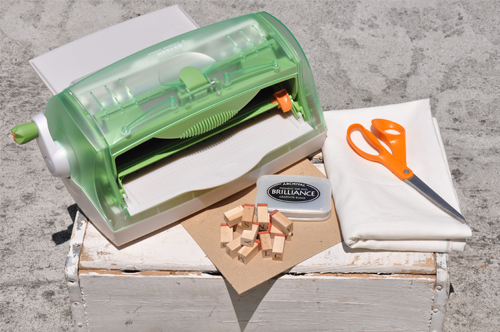
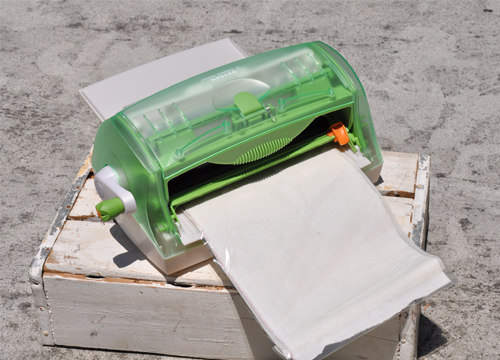
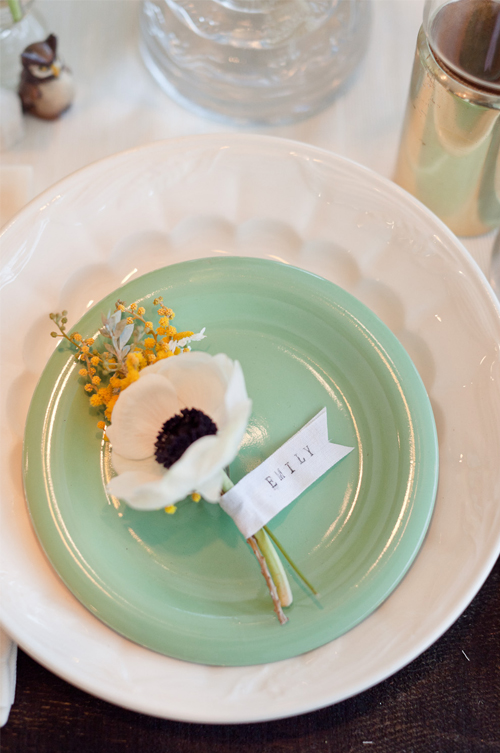
Fabric stamped ribbon posy tags (yep, that's what I'm calling them). And below is the list of items you need to make them...
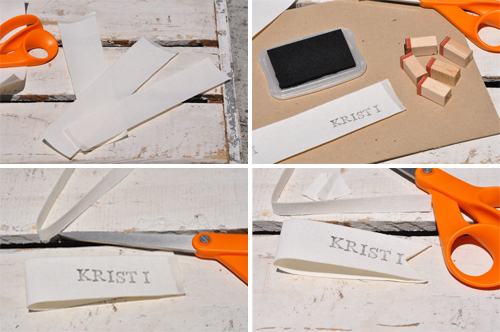
Once you have run the fabric through the machine, trim it off from the machine and remove the top protective film layer. Next cut the material into strips, stamp a name onto one end, fold it over and trim off excess fabric so sides are even and then cut a sideways 'v' into it...
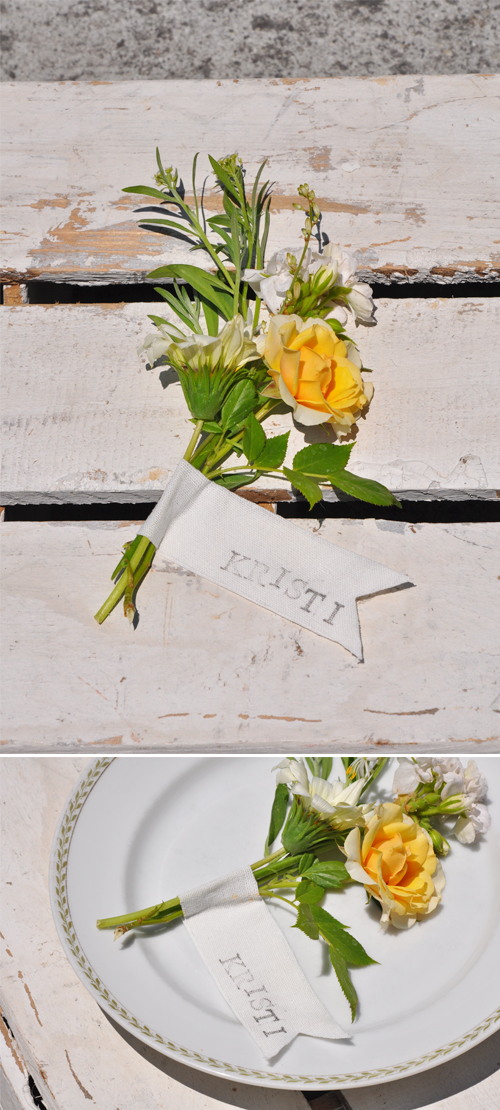
Next you will need to make a posy. I just used flowers from around the yard for this photo shoot. And lastly, remove the backing from the fabric (or now is the time to use fabric spray on the backside of the fabric if you are doing it that way), place your posy onto the sticky side, fold over the fabric and press to stick it together. The end result should look something like this...
Soooo CUTE.
I have to tell you that I stamped both ends...as the first one, the one above on the plate that you see I didn't press quite hard enough and didn't center my name! However, if you look at the one above where I show the stamps and cutting...I did a much better job the second time. Just wished I would have remembered to use the better side when I made the posy - eeks, so sorry it's light and isn't centered!
Anyhoo, I hope you enjoyed these fun projects today. As always, I love doing them ;-). I will see you tomorrow my dears - when I will pull all the elements together and finish the table.
~ Ciao
...concept, design, styling & photography by luna and chloe weddings except for image 3 with photography by our labor of love via honey and poppies
Do you remember me mentioning that one of the projects I said I would show you was using 2 dollar store items to create something? Well the 2 items are a candlestick and a candy dish...and if you combine the two together you get this...
A compote! Pretty cool, no? So here is what you need in order to make a compote...
- A glass candlestick - $1.00
- A glass candy dish (it comes with a lid) - $1.00
- Epoxy or other strong glue
The reason I chose to make compotes is that I wanted to show you that you can make one for $2.00 and some epoxy. So even if you wanted or needed 100 of them the cost is still pretty low...so a very cost effective idea to be used on wedding tables! Granted, the candy dish bottom isn't very big, but it still works and still looks fabulous ;-)
And here is our second project for today...
Fabric stamped ribbon posy tags (yep, that's what I'm calling them). And below is the list of items you need to make them...
- A Xyron machine - however spray adhesive would work if you don't have one. I do like using the Xyron machine as it gives the material a back and makes it much easier to cut.
- Fabric - I used linen
- Scissors
- Letter stamps
- Stamp pad
- Flowers - not pictured above
Once you have run the fabric through the machine, trim it off from the machine and remove the top protective film layer. Next cut the material into strips, stamp a name onto one end, fold it over and trim off excess fabric so sides are even and then cut a sideways 'v' into it...
Next you will need to make a posy. I just used flowers from around the yard for this photo shoot. And lastly, remove the backing from the fabric (or now is the time to use fabric spray on the backside of the fabric if you are doing it that way), place your posy onto the sticky side, fold over the fabric and press to stick it together. The end result should look something like this...
Soooo CUTE.
I have to tell you that I stamped both ends...as the first one, the one above on the plate that you see I didn't press quite hard enough and didn't center my name! However, if you look at the one above where I show the stamps and cutting...I did a much better job the second time. Just wished I would have remembered to use the better side when I made the posy - eeks, so sorry it's light and isn't centered!
Anyhoo, I hope you enjoyed these fun projects today. As always, I love doing them ;-). I will see you tomorrow my dears - when I will pull all the elements together and finish the table.
~ Ciao
...concept, design, styling & photography by luna and chloe weddings except for image 3 with photography by our labor of love via honey and poppies
Labels:
Details,
DIY,
Homemade,
Inspiration to Creation,
Place Cards,
Posies,
Tags
7.06.2011
Inspiration to Creation 1: The Projects
So finally happy it's lunch time, as I am starving! Goodness, this girl needs to eat...which I will be doing as soon as I get this post finished ;-)
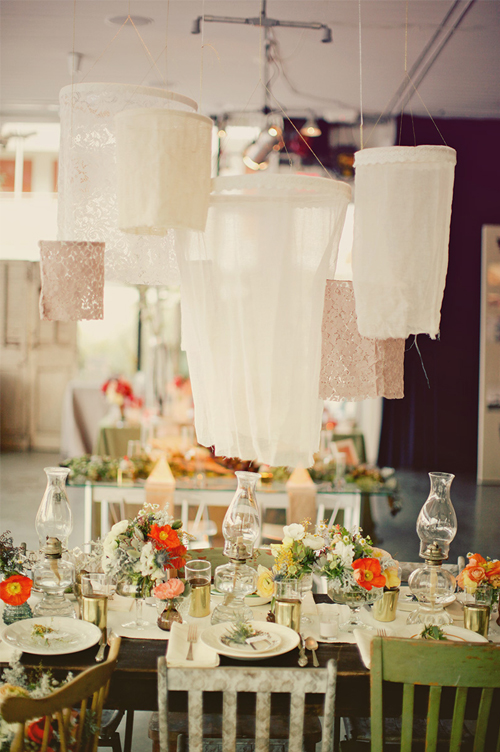
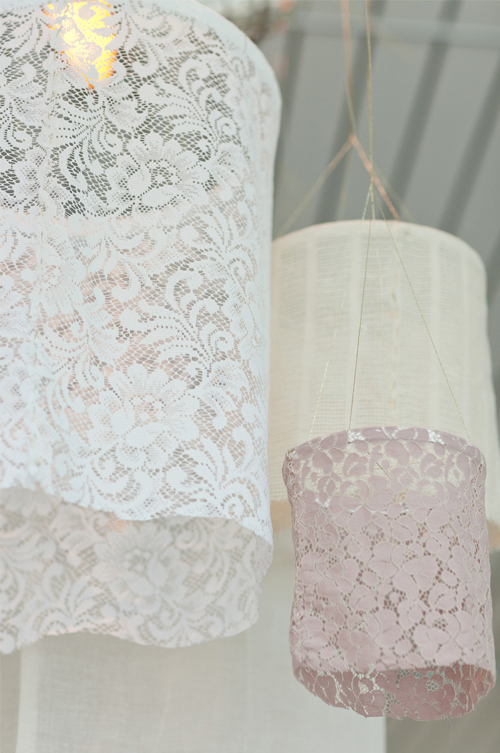
So today's part of the Inspiration to Creation series is 'The Projects' - better known around LCW as homemade. There are two projects in particular that I wanted to do for you today. The first one being the fabric chandeliers. Remember, the inspiration...
And a close up for you...
I love them, don't you?
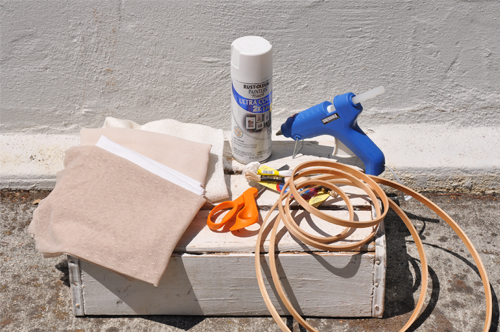
Alrighty - here is what you need to recreate them:
Second: When the paint is dry, working with one hoop at a time, take a piece of fabric and wrap it around one hoop. Mark the spot on the fabric where it should be cut, then cut the fabric to size. Do this for all the remaining hoops and fabric.
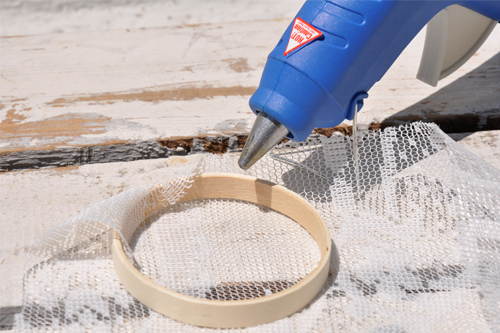
Third: Once all hoops and fabrics are measured, run the glue gun around a portion of the inside of the hoop. Working quickly so the glue doesn't dry, place the end of the fabric onto the glue from the outside of the hoop! Remember - you want the outer portion of the hoop covered, so you MUST start from the outer side of the hoop and fold the fabric over to the glue on the inside. Continue this process until all the fabric is glued to the inside of the hoop.
Fourth: When the glue is dry you are ready to add the string to hang the hoop from.
Fifth: If you want you can stitch up the ends on the hoop so the fabric is attached together and doesn't hang open you can do so. Just keep in mind you don't want to pull the thread too hard as you stitch otherwise it will pull the fabric and it will hang funny. This is optional...you could always take a short cut and add a drop of glue or even a glue dot (I heart glue dots and this was my quick and easy way) in a couple spots to keep the fabric together. But really, it's your choice loves :-)
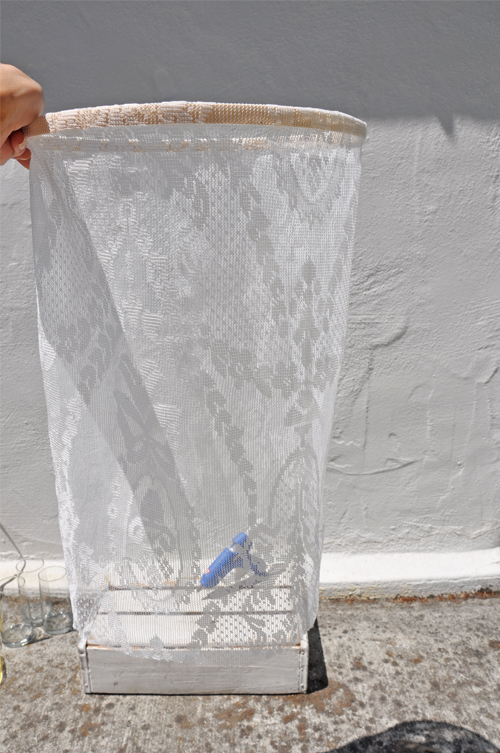
And here is your finished product...minus the thread/string to hang...oopsies forgot about that when I took the picture...
So sorry about my hand in the picture - there was just no place to hang it from...so I thought I would just hold it ;-) Hard to hold something and take a picture at the same time! However, it really does look cute...and I can't wait to see it and more over the table!
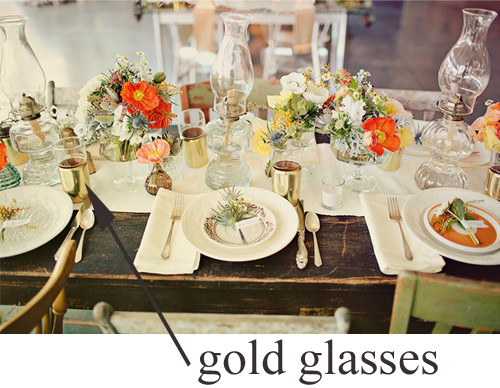
The second project is recreating the gold glasses...
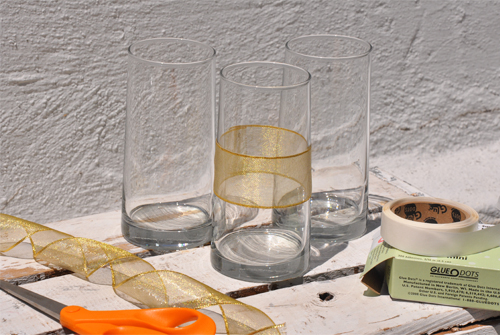
You can always look for glasses with gold detail(s) at garage sales and antique stores to use for your event. However a super quick, easy and cost effective option is always to add a gold ribbon around plain clear glasses...
Gotta admit - NOT my fave...but it works and will pull in a nice little pop of gold onto the table. I was thinking of the option of painting them - which I did...but it was time consuming after a primer, two coats of paint and a sealer, and the end result looked like gold painted glasses. Eeks - not the look I was going for. I actually like the ribbon better, if you can believe that. I have one other option that I will try tonight, and if I like I will share with you tomorrow!
Tomorrow I am showing you two more projects to make in order to recreate this table...and then Friday I will be putting it all together for you! I'm off to eat now...see you tomorrow with more goodness ;-)
~ Ciao
...images 1 and 6 photography brandon kidd, image 2 photography by our labor of love via honey and poppies, and all other photography by luna and chloe weddings
So today's part of the Inspiration to Creation series is 'The Projects' - better known around LCW as homemade. There are two projects in particular that I wanted to do for you today. The first one being the fabric chandeliers. Remember, the inspiration...
And a close up for you...
I love them, don't you?
Alrighty - here is what you need to recreate them:
- Embroidery Hoops - always an odd number
- White Spray Paint - optional
- Variety of different fabrics in sheer and lightweight materials
- Glue gun
- Thread/String
- Scissors
- Needle and Thread - optional
Second: When the paint is dry, working with one hoop at a time, take a piece of fabric and wrap it around one hoop. Mark the spot on the fabric where it should be cut, then cut the fabric to size. Do this for all the remaining hoops and fabric.
Third: Once all hoops and fabrics are measured, run the glue gun around a portion of the inside of the hoop. Working quickly so the glue doesn't dry, place the end of the fabric onto the glue from the outside of the hoop! Remember - you want the outer portion of the hoop covered, so you MUST start from the outer side of the hoop and fold the fabric over to the glue on the inside. Continue this process until all the fabric is glued to the inside of the hoop.
Fourth: When the glue is dry you are ready to add the string to hang the hoop from.
Fifth: If you want you can stitch up the ends on the hoop so the fabric is attached together and doesn't hang open you can do so. Just keep in mind you don't want to pull the thread too hard as you stitch otherwise it will pull the fabric and it will hang funny. This is optional...you could always take a short cut and add a drop of glue or even a glue dot (I heart glue dots and this was my quick and easy way) in a couple spots to keep the fabric together. But really, it's your choice loves :-)
And here is your finished product...minus the thread/string to hang...oopsies forgot about that when I took the picture...
So sorry about my hand in the picture - there was just no place to hang it from...so I thought I would just hold it ;-) Hard to hold something and take a picture at the same time! However, it really does look cute...and I can't wait to see it and more over the table!
The second project is recreating the gold glasses...
You can always look for glasses with gold detail(s) at garage sales and antique stores to use for your event. However a super quick, easy and cost effective option is always to add a gold ribbon around plain clear glasses...
Gotta admit - NOT my fave...but it works and will pull in a nice little pop of gold onto the table. I was thinking of the option of painting them - which I did...but it was time consuming after a primer, two coats of paint and a sealer, and the end result looked like gold painted glasses. Eeks - not the look I was going for. I actually like the ribbon better, if you can believe that. I have one other option that I will try tonight, and if I like I will share with you tomorrow!
Tomorrow I am showing you two more projects to make in order to recreate this table...and then Friday I will be putting it all together for you! I'm off to eat now...see you tomorrow with more goodness ;-)
~ Ciao
...images 1 and 6 photography brandon kidd, image 2 photography by our labor of love via honey and poppies, and all other photography by luna and chloe weddings
Labels:
Chandelier,
DIY,
Embroidery Hoops,
Fabric,
Homemade,
Inspiration to Creation
7.05.2011
Tuesday Thought: Vintage Tape Dispenser
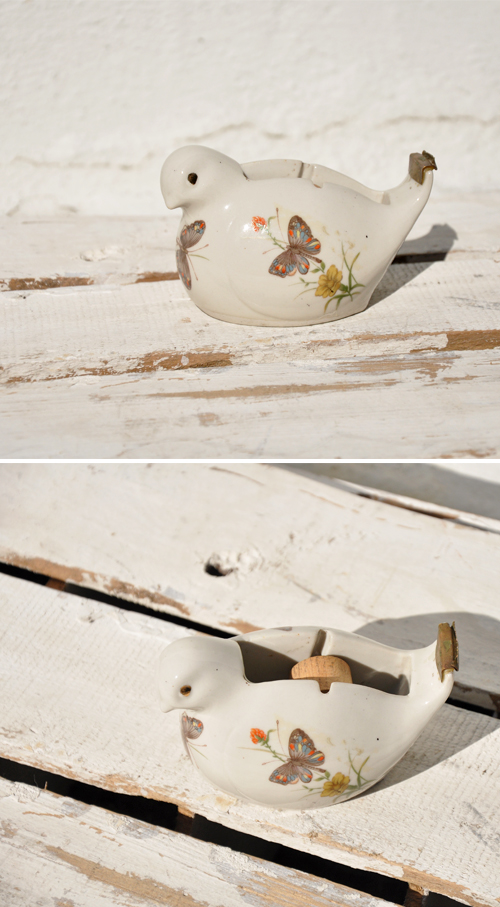
Oh dears - do I have a cute Tuesday Thought for you today! I found this vintage porcelein bird tape dispenser and knew exactly how I wanted to use it - because I think by now you know I don't really ever use things as they are intended ;-) Anyhoo, here is the bird in all of its cuteness...
I am calling him 'Golden Eye' as his eyes are gold - hehe!
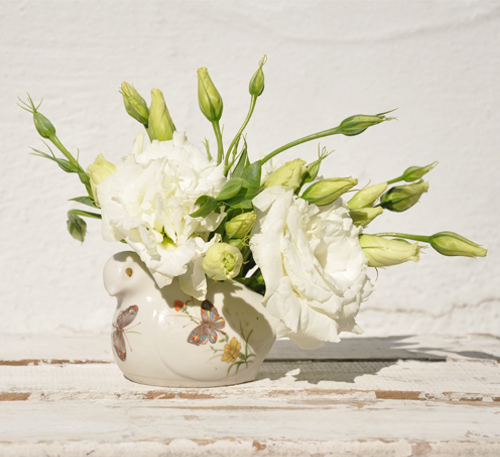
So here is your Tuesday Thought: Remove the tape holder/spinner piece, and use the vintage tape dispenser as a vase and fill it with flowers! Here, I made a little arrangement just for you...
Oh tell me that isn't just CUTE!?!
~ Ciao
...concept, design, styling & photography by luna and chloe weddings
I am calling him 'Golden Eye' as his eyes are gold - hehe!
So here is your Tuesday Thought: Remove the tape holder/spinner piece, and use the vintage tape dispenser as a vase and fill it with flowers! Here, I made a little arrangement just for you...
Oh tell me that isn't just CUTE!?!
~ Ciao
...concept, design, styling & photography by luna and chloe weddings
Labels:
Bud Vases,
DIY,
Flowers,
Tape Dispenser,
Tuesday Thought,
Vintage,
White
6.23.2011
Homemade: Paper Wrapped Cans
Holy moly - I can't believe it's Thursday already! Yippee - one more day until the weekend ;-) And I heart weekends ;-) However, I must not forget that today is Thursday, and that means it's time for a 'Homemade' post!
I kind of have been on a kick with cans lately. A couple of weeks ago I did a 'Homemade' post about spray painting them and using as centerpieces...see here if you missed it. So today I thought I would bring you one more quick and easy peasy homemade idea using cans. How about paper wrapped cans as centerpieces? Here have a look-see at what I am talking about...
Darling, no? I adore all the different papers used, as well as how some cans are covered more than others. And how fabulous is it that you are recycling? Love it as every bit helps!
To make all you have to do is wash and clean the cans. Let them dry completely. Then determining the width of the paper just cut it to size. I would then spray the back of the paper with spray adhesive and adhere to the can - viola! Pretty centerpieces that most definitely 'Homemade' ;-)
I have vision of lots and lots of pretty papers swirling in my head right now! Can you imagine all the paper options - aye, aye, aye so many to choose from!
~ Ciao
...photography by janae shields via style me pretty
I kind of have been on a kick with cans lately. A couple of weeks ago I did a 'Homemade' post about spray painting them and using as centerpieces...see here if you missed it. So today I thought I would bring you one more quick and easy peasy homemade idea using cans. How about paper wrapped cans as centerpieces? Here have a look-see at what I am talking about...
Darling, no? I adore all the different papers used, as well as how some cans are covered more than others. And how fabulous is it that you are recycling? Love it as every bit helps!
To make all you have to do is wash and clean the cans. Let them dry completely. Then determining the width of the paper just cut it to size. I would then spray the back of the paper with spray adhesive and adhere to the can - viola! Pretty centerpieces that most definitely 'Homemade' ;-)
I have vision of lots and lots of pretty papers swirling in my head right now! Can you imagine all the paper options - aye, aye, aye so many to choose from!
~ Ciao
...photography by janae shields via style me pretty
6.15.2011
Darling Detail No. 13: Frosted Roses
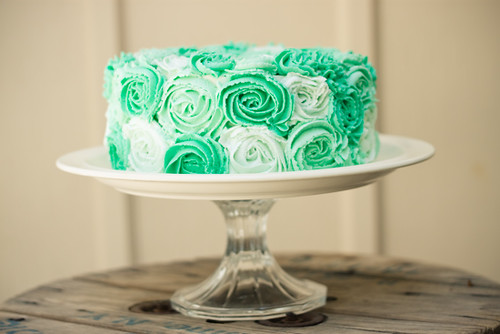
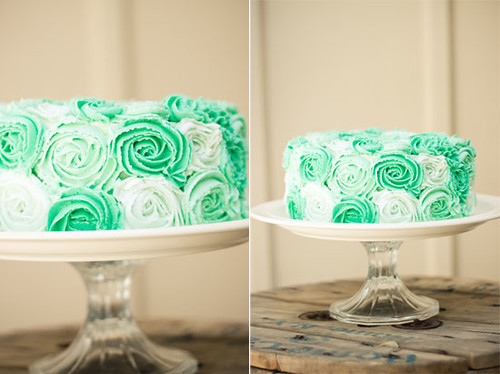
Now these frosted roses really are darling...
And in the most perfect shades of green! Goodness, I am just loving the color. Oh and wait - it gets better - yes, better. You can make these yourself with the step by step DIY created by Strawberry Chic. See better ;-)
Hmm, I think if you added some bunting it would be the perfect wedding cake, don't you? However, I will probably be trying this technique on the next cake I bake I love it that much!
~ Ciao
...images via strawberry chic
And in the most perfect shades of green! Goodness, I am just loving the color. Oh and wait - it gets better - yes, better. You can make these yourself with the step by step DIY created by Strawberry Chic. See better ;-)
Hmm, I think if you added some bunting it would be the perfect wedding cake, don't you? However, I will probably be trying this technique on the next cake I bake I love it that much!
~ Ciao
...images via strawberry chic
6.02.2011
Homemade: Bottle Centerpieces
Yes, it's that time again...time for another Homemade post! And since I have been all about simple homemade projects, I thought I would post another one for you this week as well.
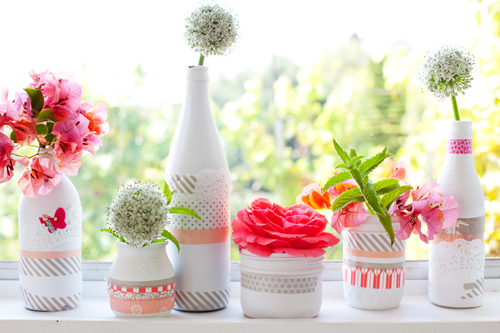
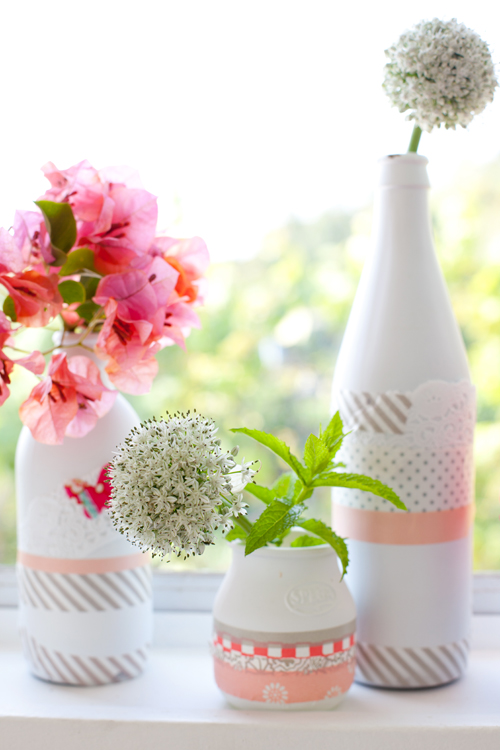
So today's project I found over on Decor8 (love Holly's blog). Leslie from A Creative Mint (love her blog too) is a contributor on Decor8, and creates these amazing Color Me Pretty posts. For May's Color Me Pretty post Leslie included this simple DIY of spray painted bottles that are adorned with washi tape and some paper doilies. And I thought that they would make lovely centerpieces (I have posted about spray painted can centerpieces here)...have a look-see...
For this project you just need three things: spray paint, washi tape and some paper doilies. Spray paint your bottles whatever color you choose, let dry and then add washi tape and if you like paper doilies here and there - and that's it! The result, a darling simple centerpiece idea...
So pretty. And with so many spray paint and washi tape colors - your options are endless!
Happy Thursday loves! Hope you're having a fabulous day ;-)
~ Ciao
...images via decor8
So today's project I found over on Decor8 (love Holly's blog). Leslie from A Creative Mint (love her blog too) is a contributor on Decor8, and creates these amazing Color Me Pretty posts. For May's Color Me Pretty post Leslie included this simple DIY of spray painted bottles that are adorned with washi tape and some paper doilies. And I thought that they would make lovely centerpieces (I have posted about spray painted can centerpieces here)...have a look-see...
For this project you just need three things: spray paint, washi tape and some paper doilies. Spray paint your bottles whatever color you choose, let dry and then add washi tape and if you like paper doilies here and there - and that's it! The result, a darling simple centerpiece idea...
So pretty. And with so many spray paint and washi tape colors - your options are endless!
Happy Thursday loves! Hope you're having a fabulous day ;-)
~ Ciao
...images via decor8
Labels:
Bottles,
Centerpieces,
Details,
DIY,
Homemade,
On the table
5.26.2011
Homemade: Ribbon and Lace Table Runner
Happy Thursday loves! Goodness - I seriously can't even believe that it is Thursday already...where has this week gone? And why did it go by so fast? Aye, aye, aye am I behind on lots of things this week ;-) Eeks...and to think that this weekend is Memorial Day weekend is even more crazy! Okay...whoever stole May away from me...I would like it back now...please!
And with weeks flying by like this one, it's no wonder I can't seem to find the time to do a homemade project these days! I am really hoping to get back into doing my own homemade projects again....as I miss them! However, I do have probably one of the easiest projects to date for you today! Have a look-see at this ribbon and lace table runner...
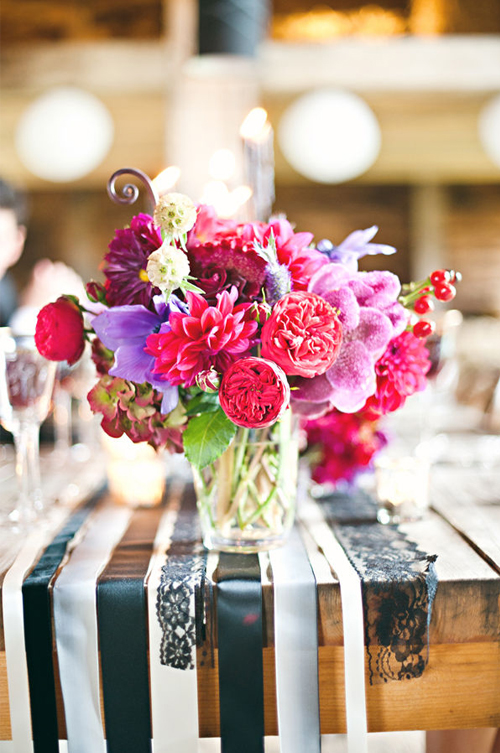
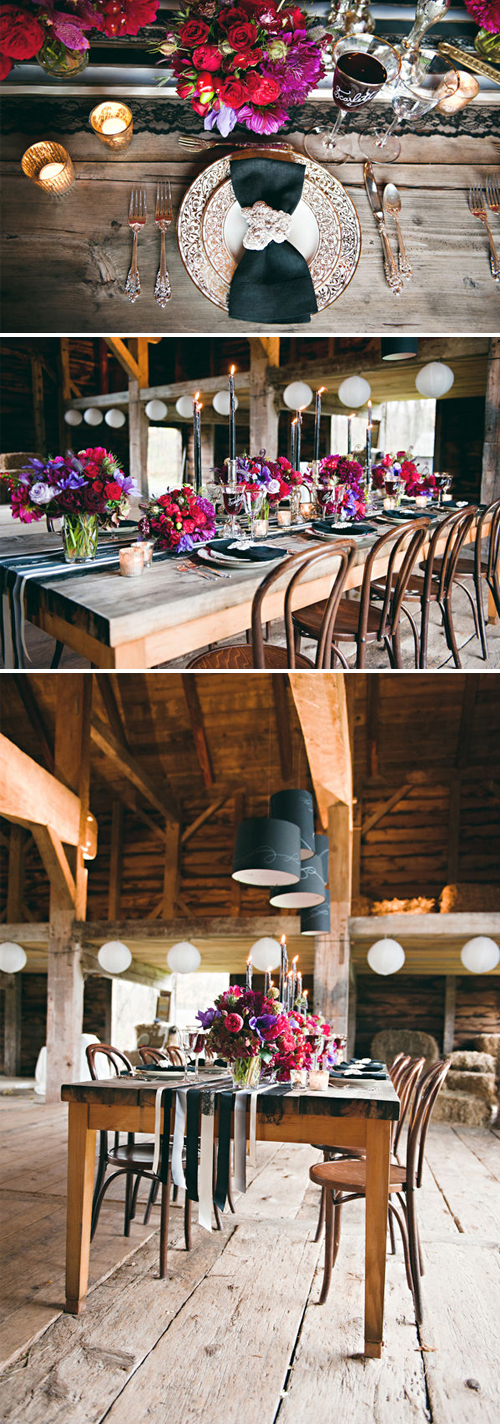
To make a ribbon and/or lace table runner, all you need is ribbon and/or lace and a pair of scissors. Just run the ribbon the length of the table and trim. Here are a couple more pictures for you...
See easy peasy! And makes quite a lovely statement, no?
~ Ciao
...photography by trent bailey via style me pretty
And with weeks flying by like this one, it's no wonder I can't seem to find the time to do a homemade project these days! I am really hoping to get back into doing my own homemade projects again....as I miss them! However, I do have probably one of the easiest projects to date for you today! Have a look-see at this ribbon and lace table runner...
To make a ribbon and/or lace table runner, all you need is ribbon and/or lace and a pair of scissors. Just run the ribbon the length of the table and trim. Here are a couple more pictures for you...
See easy peasy! And makes quite a lovely statement, no?
~ Ciao
...photography by trent bailey via style me pretty
5.19.2011
Homemade: Flower Filled Peat Pots
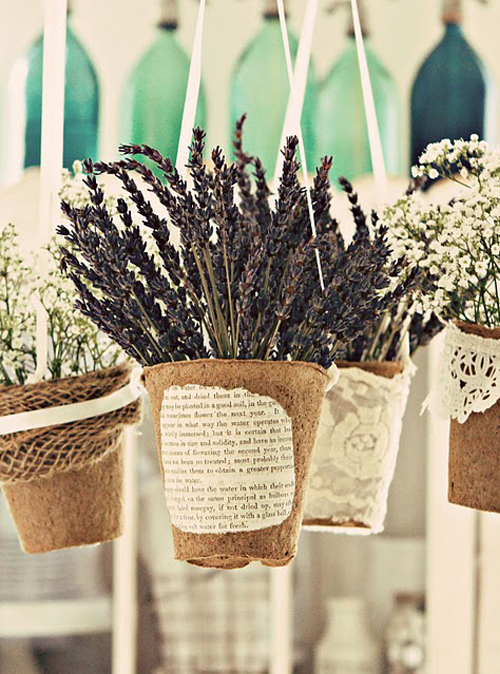
Happy Thursday loves! Is everyone having a wonderful week so far? Well if not, the good news is tomorrow is Friday...woohoo. I love Fridays ;-) However, before I get too excited about tomorrow, I thought I would share this fabulous little idea I spotted over one of my favorite blogs, French Larkspur. Every time I go there I am inspired! It is eco-friendly, cost effective and a farily easy DIY! Here have a look-see at these hanging flower filled peat pots...
Darling, no? To get the how to and see more pictures, click right here. However, you only need some peat pots (I bought some at Home Depot for a couple of dollars for a bunch of them), dried flowers (any dried flower would work), ribbon and some embellishments to make your own. And I love that not only can they be decorated in so many ways, but that you can also use them on the table! Oh me likey ;-)
P.S. - I also have a super duper easy Homemade post on Over The Moon Vintage Rentals too. Click right here to see!
~ Ciao
...image via french larkspur
Darling, no? To get the how to and see more pictures, click right here. However, you only need some peat pots (I bought some at Home Depot for a couple of dollars for a bunch of them), dried flowers (any dried flower would work), ribbon and some embellishments to make your own. And I love that not only can they be decorated in so many ways, but that you can also use them on the table! Oh me likey ;-)
P.S. - I also have a super duper easy Homemade post on Over The Moon Vintage Rentals too. Click right here to see!
~ Ciao
...image via french larkspur
Labels:
Baby's Breath,
Book Pages,
DIY,
Flowers,
Hanging,
Homemade,
Lace,
Lavender,
Peat Pots,
Vintage
5.05.2011
Homemade: Can Centerpieces
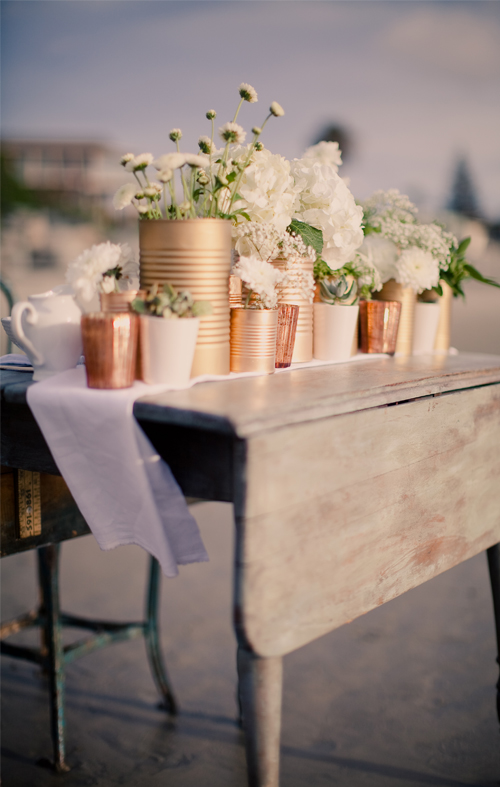
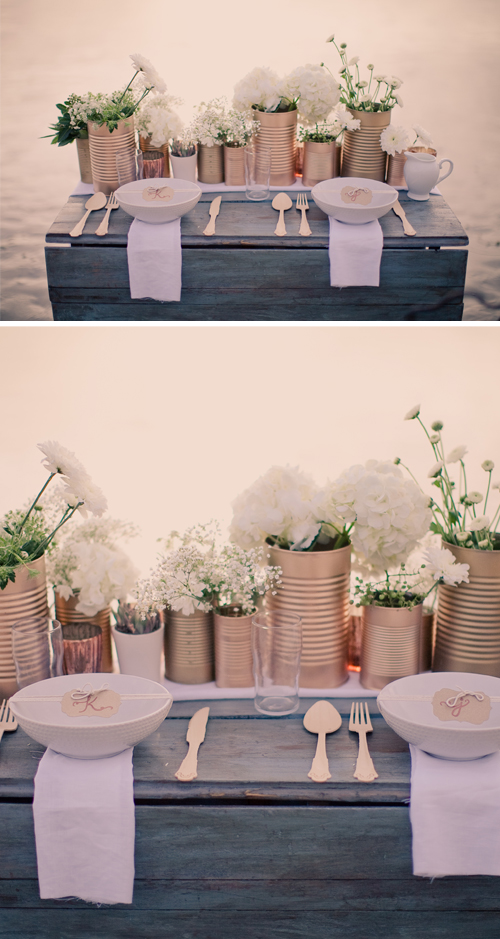
It's Thursday my dears! Which means it's almost the weekend (yippee), and it's also time for a little homemade project. While I DID NOT create these or take the pictures below, I do think this is a super duper easy idea...which I am sure you have seen before (but I adore the color of these). However, I love these that were created by Katie Jayne of Jayne Weddings. All you need are some cans and some spray paint! Just have a look-see at these gold and copper cuties...
Another view...
Not only is this a simple homemade project, but you are also recycling, cans are easy to come by and you can paint them any color (or multiple colors) you want! So grab some cans and get spraying my dears ;-)
P.S. - Happy Cinco De Mayo loves! Is it time for a margarita yet? ;-)
~ Ciao
...photography by joey kennedy via found vintage rentals & green wedding shoes & concept and creation by jayne weddings
Another view...
Not only is this a simple homemade project, but you are also recycling, cans are easy to come by and you can paint them any color (or multiple colors) you want! So grab some cans and get spraying my dears ;-)
P.S. - Happy Cinco De Mayo loves! Is it time for a margarita yet? ;-)
~ Ciao
...photography by joey kennedy via found vintage rentals & green wedding shoes & concept and creation by jayne weddings
Labels:
Cans,
Centerpieces,
DIY,
Homemade,
Spray Paint
4.15.2011
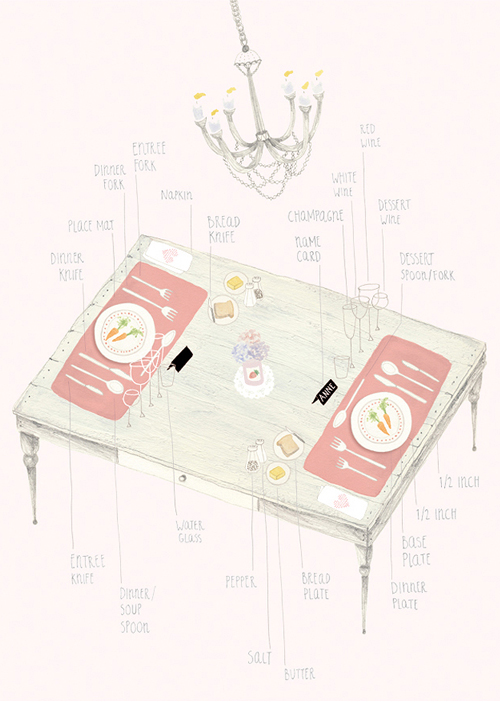
Darling Detail No. 8: How To Set A Table
Just in case you needed a lovely reminder...
~ Ciao
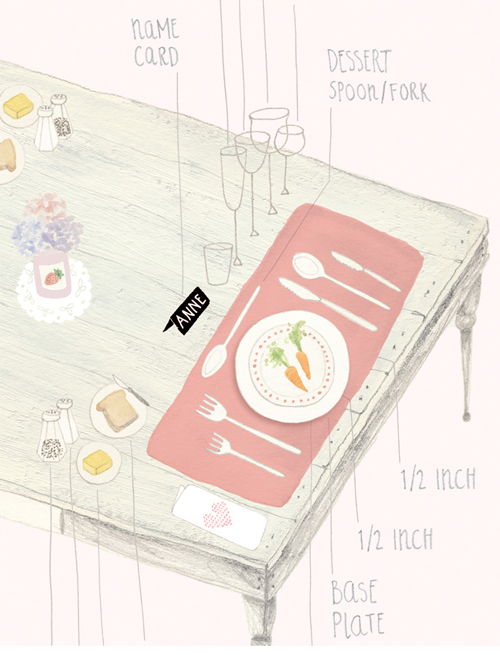
What a darling way to show how to set a table. It would be perfect to hand out a copy to friends and family that are helping with the setup of the event (if you're doing it yourselves), as a gentle reminder on the correct way to set a table, no?
I am adoring this illustration by Amy Borrell...as well as a handful of her other drawings...like The Moon, and Bird Eggs of Australia. But how cute is it that she added a chandelier to the illustration above? Oh, I love the detail. If you are not familiar with her work...you can have a look-see of all of it right here.
So will you be setting the table this weekend? I will be...I do almost every night! Cheers to a lovely weekend darlings! I'll see you back here on Sunday, as always, for some sweetness.
~ Ciao
Labels:
Darling Detail,
Details,
DIY,
How To,
Table Setting
3.30.2011
Goodness Grapeness
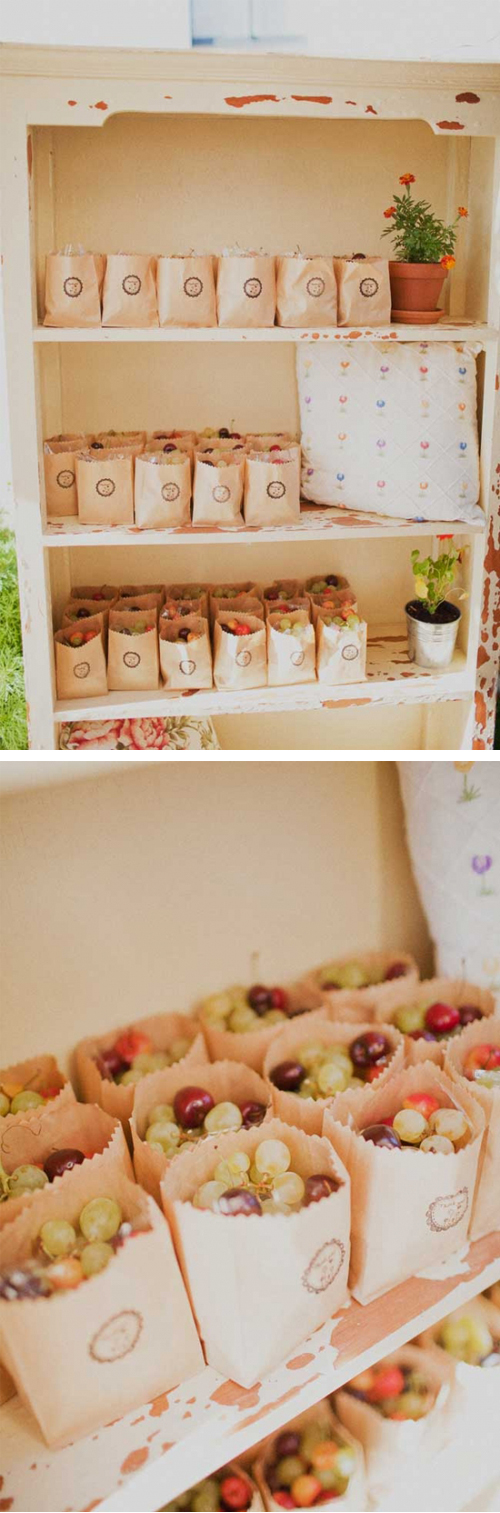
How fabulous are these simple favors...
I love the natural, easy, good for me feeling of them. I actually said outloud: "I want one." Yum, fresh fruit in a cute little bag...all for me. However, if you wanted some I would most certainly share with you.
A pefectly simple DIY favor that I am adoring right now. And while you mainly see grapes; the bags are filled with other fruits as well. What I really love about this idea is that it really would work with any wedding style! Just change the bag and how it's presented and viloa!
P.S. - And you know I love that they are lined up on a vintage bookcase. Hmmm, I think I need to get me one of those soon...simply over the moon!
~ Ciao
...image via ruffled
I love the natural, easy, good for me feeling of them. I actually said outloud: "I want one." Yum, fresh fruit in a cute little bag...all for me. However, if you wanted some I would most certainly share with you.
A pefectly simple DIY favor that I am adoring right now. And while you mainly see grapes; the bags are filled with other fruits as well. What I really love about this idea is that it really would work with any wedding style! Just change the bag and how it's presented and viloa!
P.S. - And you know I love that they are lined up on a vintage bookcase. Hmmm, I think I need to get me one of those soon...simply over the moon!
~ Ciao
...image via ruffled
3.10.2011
Homemade: Pennant Stamp
Hello my dears! Happy Homemade Thursday to you. Do I have a fabulous treat for you today. I ran across a blog yesterday that had a lot of homemade projects, and spent my time going through page after page (please tell me I am not the only one that does this), before I realized that it was way to late for me to finish putting together what I was working on for today and still manage to actually function ;-)
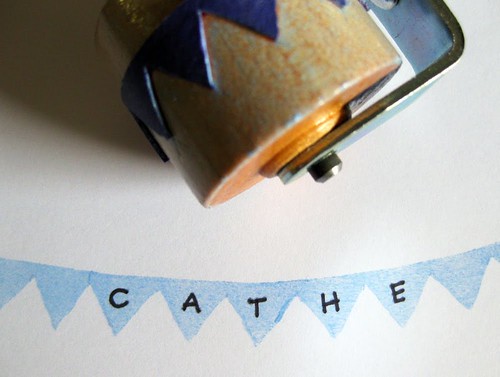
So I thought that I would share with you one of the homemade projects that I found, and that I was just over the moon about. This wonderful homemade pennant stamp by Cathe of Just Something I Made...which you might have seen before, but I still thought I would share with you...
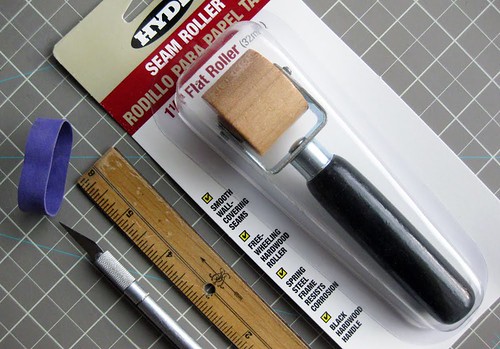
How darling is that? And you only need a couple of items to make...
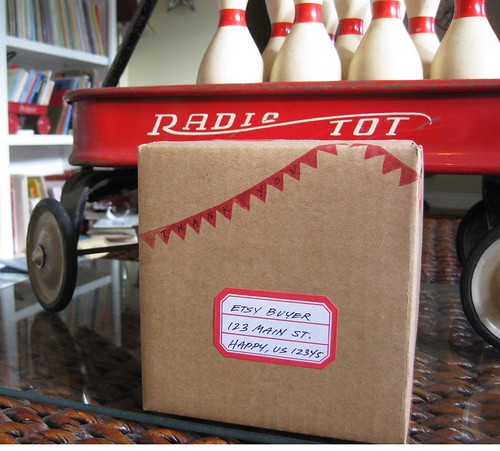
And you know my head is spinning with all kinds of ideas here! Looks so cute on packaging...
But for all the DIYers out there, I think this would be fabulous to use on save the dates, invitations, thank yous, menu cards, escort cards, dessert table, napkins, ...oh and the list goes on and on! But it would also be fabulous just to have to decorate with too.
For the complete step-by-step, please click here to be linked to Cathe's tutorial. However, you just might spend the morning/afternoon/evening looking around! I also liked the advent spool calender, and the happy pancakes.
So I am curious...what would you use this stamp on?
~ Ciao
...images via just something i made
So I thought that I would share with you one of the homemade projects that I found, and that I was just over the moon about. This wonderful homemade pennant stamp by Cathe of Just Something I Made...which you might have seen before, but I still thought I would share with you...
How darling is that? And you only need a couple of items to make...
And you know my head is spinning with all kinds of ideas here! Looks so cute on packaging...
But for all the DIYers out there, I think this would be fabulous to use on save the dates, invitations, thank yous, menu cards, escort cards, dessert table, napkins, ...oh and the list goes on and on! But it would also be fabulous just to have to decorate with too.
For the complete step-by-step, please click here to be linked to Cathe's tutorial. However, you just might spend the morning/afternoon/evening looking around! I also liked the advent spool calender, and the happy pancakes.
So I am curious...what would you use this stamp on?
~ Ciao
...images via just something i made
3.08.2011
Tuesday Thought: Flower Frogs #2 - Pen/Pencil Holder
Another Tuesday, another Tuesday Thought! A couple of weeks ago I did a Tuesday Thought post that showed you how you can use a flower frog as a straw holder. If you didn't see the post, you can click here to have a look-see. I also told you in that post that I would show you one way a month, over the next couple of months, on other ways to use flower frogs...well today is another way!
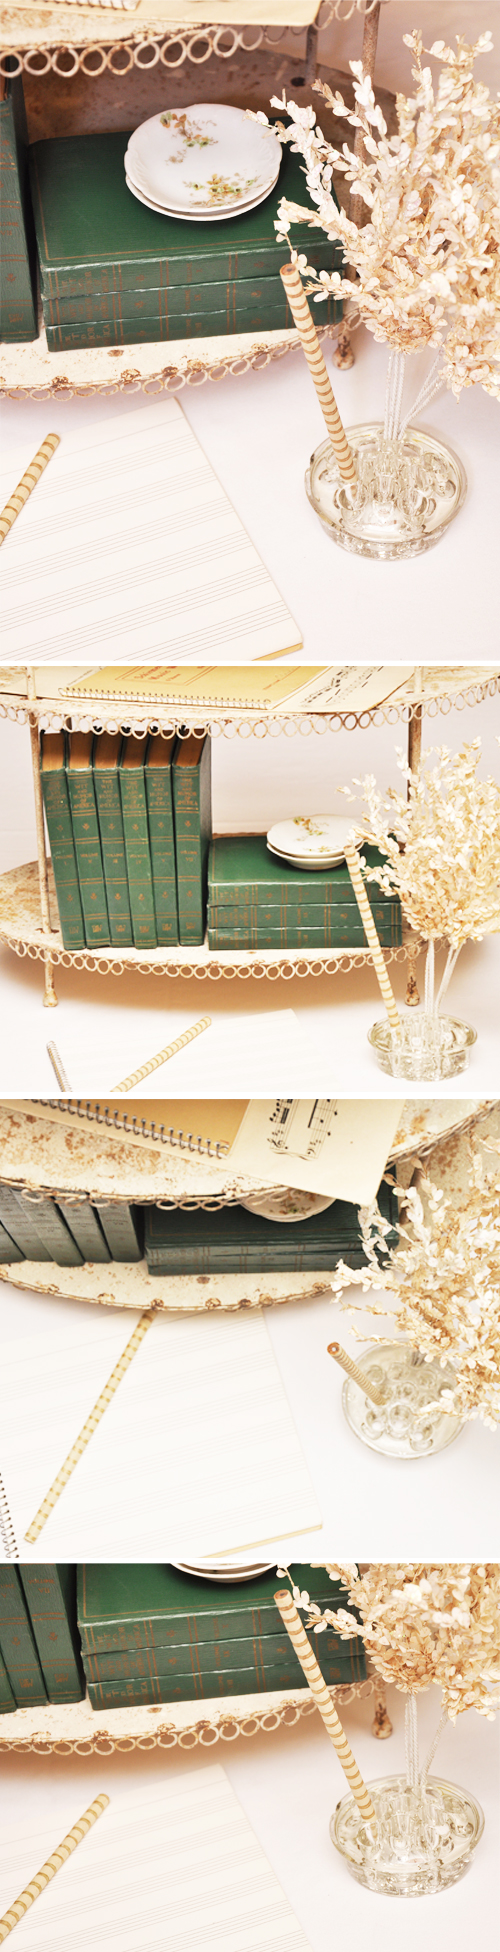
Even though I have a collection of flower frogs, I used the same one that I used for a straw holder for this next use too. And the next use being a pen/pencil holder...
The reason I used the same flower frog in this example, is that this is the exact flower frog that resides on my desk (of course with some other pens, a sharpie, paintbrushes and scissors...yep it holds them all)!
However, I would love to see these used at more weddings to hold pens/pencils/markers, etc... for your guests to sign in with. Such a pretty way to display the pens versus just laying them down or in one of "those" (you know what I am talking about here) pen holders! And for a couple of dollars you have a unique and pretty pen holder! There are so many varieties of flower frogs out there with a variety of hole sizes, so if you decide to use this idea at your wedding, just make sure that the pens/pencils/markers fit in the holes.
P.S. - Or you could just by one for yourself to use on your desk like me ;-)
~ Ciao
...concept, design, styling and photography all by luna and chloe weddings
Even though I have a collection of flower frogs, I used the same one that I used for a straw holder for this next use too. And the next use being a pen/pencil holder...
The reason I used the same flower frog in this example, is that this is the exact flower frog that resides on my desk (of course with some other pens, a sharpie, paintbrushes and scissors...yep it holds them all)!
However, I would love to see these used at more weddings to hold pens/pencils/markers, etc... for your guests to sign in with. Such a pretty way to display the pens versus just laying them down or in one of "those" (you know what I am talking about here) pen holders! And for a couple of dollars you have a unique and pretty pen holder! There are so many varieties of flower frogs out there with a variety of hole sizes, so if you decide to use this idea at your wedding, just make sure that the pens/pencils/markers fit in the holes.
P.S. - Or you could just by one for yourself to use on your desk like me ;-)
~ Ciao
...concept, design, styling and photography all by luna and chloe weddings
Labels:
Details,
DIY,
Flower Frogs,
Guest Sign In,
Pen Holder,
Tuesday Thought
3.03.2011
Homemade: French Enameled Numbers
Hi lovelies! Happy homemade Thursday. I wasn't able to get a post together for you today...so sorry, I have just been so busy and behind lately and am really in need of a vacay!
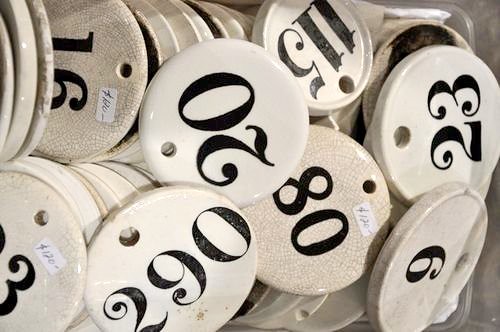
However, one homemade project that I found some time ago, and that I have been DYING to make are these homemade french style enameled numbers. Here is a picture of some original ones...
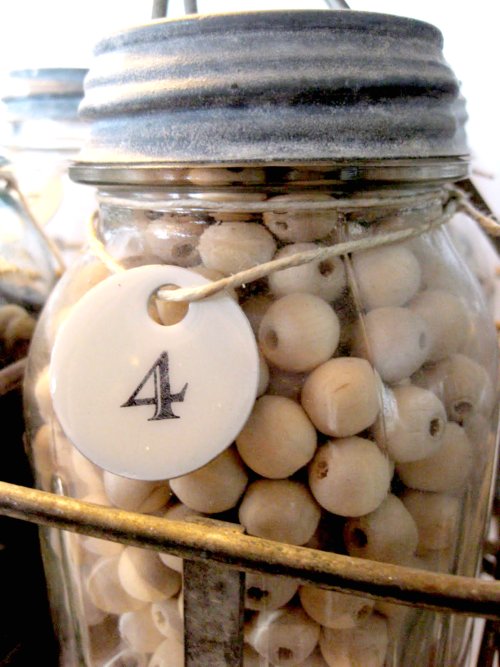
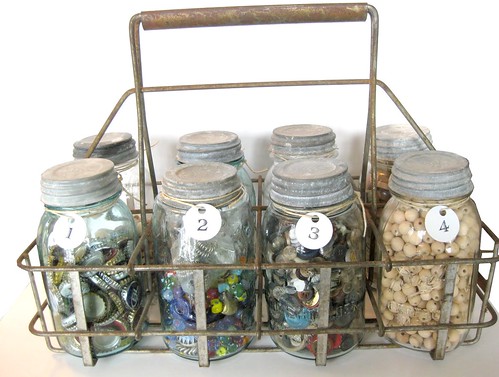
And since they have been on my "to make" list for months, and I would not have done a homemade post about them if I did make them - I would have used them in a photo shoot and given you the link...I decided that I should just give you the link anyway! So click here for the step-by-step how to by Gail at Can't Stop Making Things. Here are a couple of pictures of the ones Gail made...
They look so much like the real thing don't they? How darling would they be attached to escort cards to tell the guest what table they are seated at? So cute. Yet, they would also be darling a handful of other ways too...not to mention that I would love a handful of them to use around the house! I have another idea for them too...however, I hope to make these soon and when I do I will make sure to share how I use them! Hope you have a lovely day.
~ Ciao
...images (edited) via can't stop making things
However, one homemade project that I found some time ago, and that I have been DYING to make are these homemade french style enameled numbers. Here is a picture of some original ones...
And since they have been on my "to make" list for months, and I would not have done a homemade post about them if I did make them - I would have used them in a photo shoot and given you the link...I decided that I should just give you the link anyway! So click here for the step-by-step how to by Gail at Can't Stop Making Things. Here are a couple of pictures of the ones Gail made...
They look so much like the real thing don't they? How darling would they be attached to escort cards to tell the guest what table they are seated at? So cute. Yet, they would also be darling a handful of other ways too...not to mention that I would love a handful of them to use around the house! I have another idea for them too...however, I hope to make these soon and when I do I will make sure to share how I use them! Hope you have a lovely day.
~ Ciao
...images (edited) via can't stop making things
3.02.2011
Darling Detail No. 3: Book Hearts
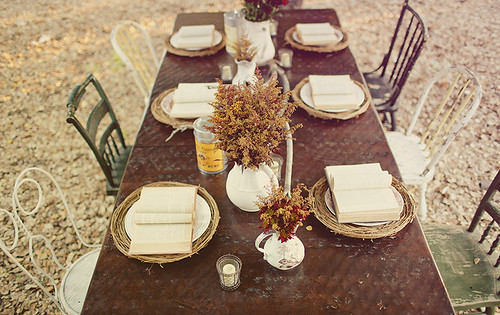
Ooooh, this is a cute little detail that I am sure you'll love! I am loving this rustic, vintage table decor...
~ Ciao
...photography by brandon kidd
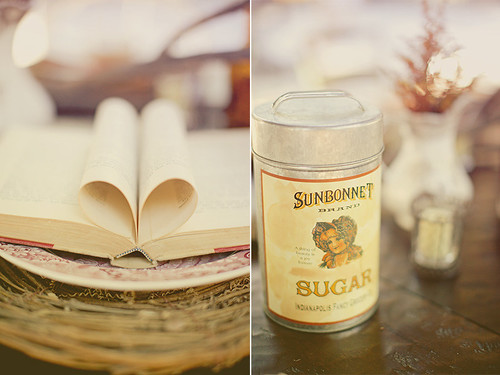
And the books at each place setting are just perfect, I think. However, it gets even better! Just take a look at the pages that have been folded and tucked in to the center to form a heart...
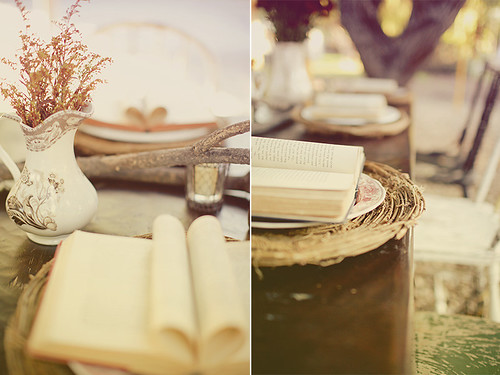
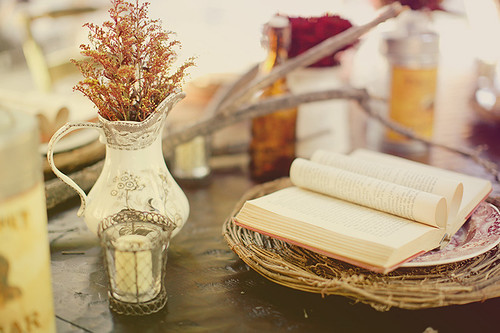
Fabulous, no? Oh, I am over the moon about this little detail! Here's a couple of more pictures for you...
Such a sweet and simple DIY. All you need is a book. Now I know that a book at each place setting might be too much, however a couple of books here and there with a heart would still be cute!~ Ciao
...photography by brandon kidd
Labels:
Books,
Darling Detail,
DIY,
Hearts,
Ideas,
Inspiration,
Rustic,
Vintage
Subscribe to:
Posts (Atom)