Showing posts with label Table Numbers. Show all posts

1.18.2012

On the Table: Red, White + Wood

Hi there lovelies!  How is your Wednesday going?  Mine is just peachy really ;-)  I know I still have a lot of explaining to do, but I just don't have the time right now to do so...and you just might not want to hear all that I have to say.  So while I still contemplate explaining my disappearance for almost two months, I thought I would still pop in and leave you with some lovely inspiration!

I know we are in the midst of Winter...hello highs of 52...and everyone is looking forward to Spring, but when I saw these pictures, I just couldn't help but think how fabulous Fall really is...
pretty-blog-2
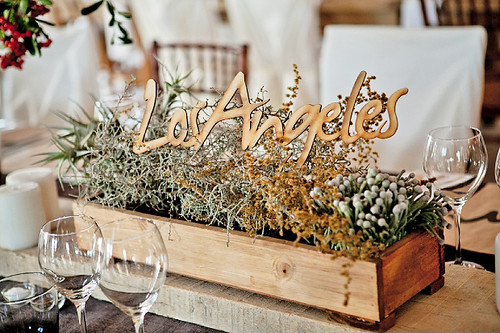
Here's a closer look at those table names...
On the Table
Eeks - fabulously rustic and Fall.  Here are a couple more details for you to devour...
pretty-blog-4
I gotta tell you that I am loving all of this, aren't you?  And the leaves on the floor are one of those details that sends me over the moon ;-)

~ Ciao

...photography by nikki meyer via the pretty blog

9.29.2011

Handcrafted: Twine Table Numbers

Yay!  It's time for another 'Handcrafted' post.  I don't know about you loves, but I always love handcrafted elements at ANY event...especially a wedding ;-)  It just adds that extra touch, don't you think?

I mentioned in my earlier post that I had a DARLING handcrafted idea for you today!  Here is one of the thoughts that swirled and twirled around in my head after seeing all the lovely shades of beige and soft white yesterday.  And while I did NOT actually make this, I am sure it would work and be fabulous!  (I just might have to mock one up this weekend, and show you how it turned out.) 

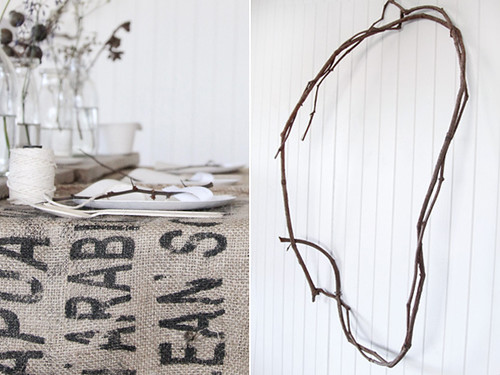
Anyhoo, my idea came from this picture....
Color Crave
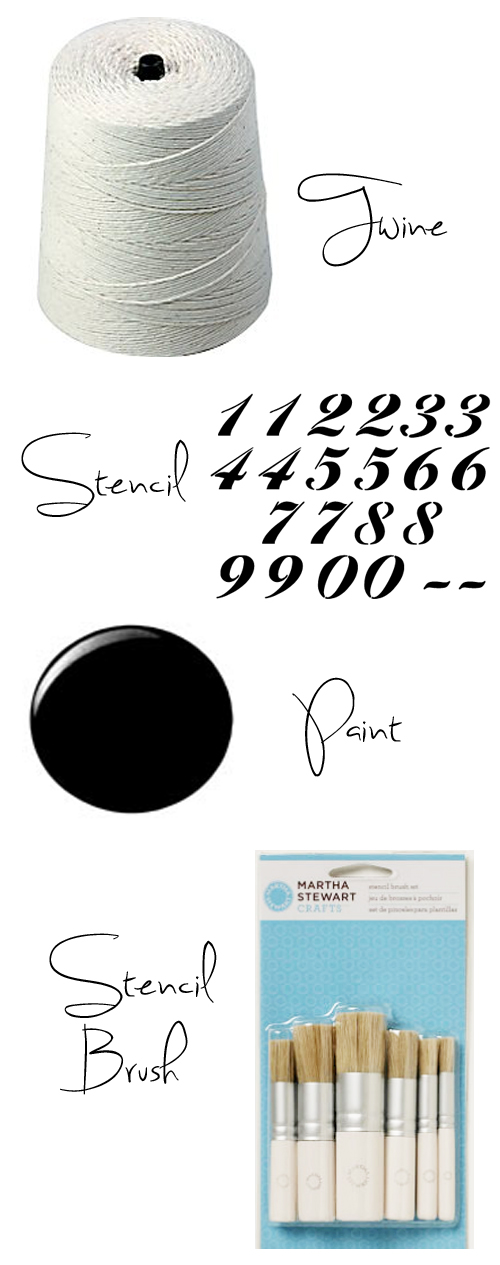
In the picture on the left, do you see the twine on the end of the table there?  Yes, that's the main element needed for this project;-)  You see, as soon as I saw it I thought it would make a great table number!  All you would have to do is paint a table number on.  So loves, here are the things you would need:
Handcrafted
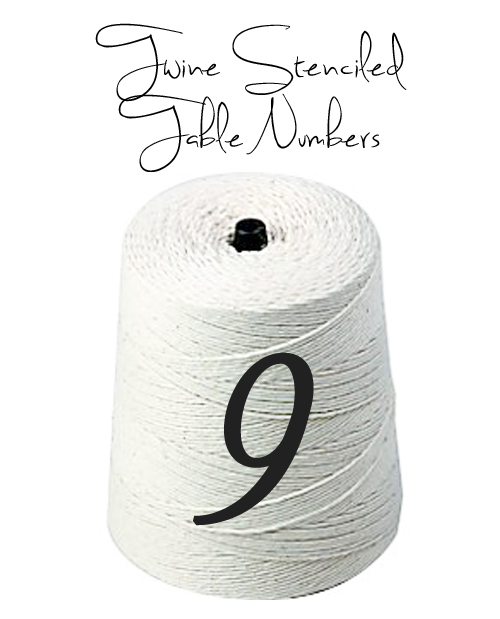
All you need to do is hold the stencil on, dip your stencil brush in paint (or paint brush would work too...just be careful to stay within the stencil), and stencil the number onto the twine!  It might take more than one coat.  However, I think you could probably stamp a number on, or use a sharpie and write on as well.  And here is an idea of what it would look like...
Handcrafted
Twine table numbers!  How fabulous, and easy is that?  And just think you could use any color paint you want - it doesn't have to be black.  Just look at all the oh so pretty paint options Martha Stewart now has at Michaels...
Martha Stewart Paint Colors
So I am sure there is a color that would work for you! 

Also, you know I always have lots of ideas - so I just have to tell you that a table number on a stick placed inside the hole at the top of the twine would be cute too ;-)))

Here's is where you can find everything you need for this handcrafted project:

The Shopping List:
~ Ciao

7.06.2011

Who Says

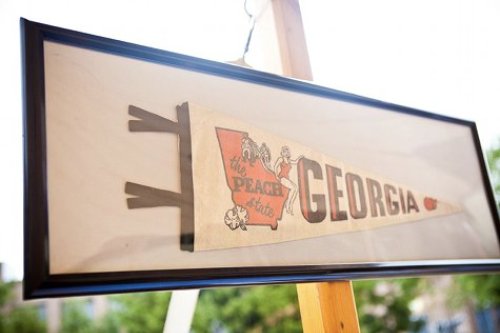
...you can't use pennants as your table markers?
Details
Details
I just adore this idea!  How cute would it be to use mini ones as escort cards and the large ones as your table marker?  So cute.  And you could easily make your own...hmm, I see a homemade post coming sometime soon?  Hehe ;-)

~ Ciao
...image via style me pretty

2.09.2011

Who Says...

...you can't use clocks (vintage or new) as table markers?
Who Says
Just set the time on each clock to the table number that you want it to be, and viola! I L-O-V-E it, don't you?

***Had to add a little update in after Jessica's comment ;-)))  I intially thought the same thing...would only work if you have 12 tables.  But remember you can set it at the 15, 30 and 45 minute increments too!  Or get really into it and set the clock at specific times that have meaning to you!

~ Ciao
...image via pretties and posies

10.14.2010

~ homemade: cork and thread inspired details part II ~

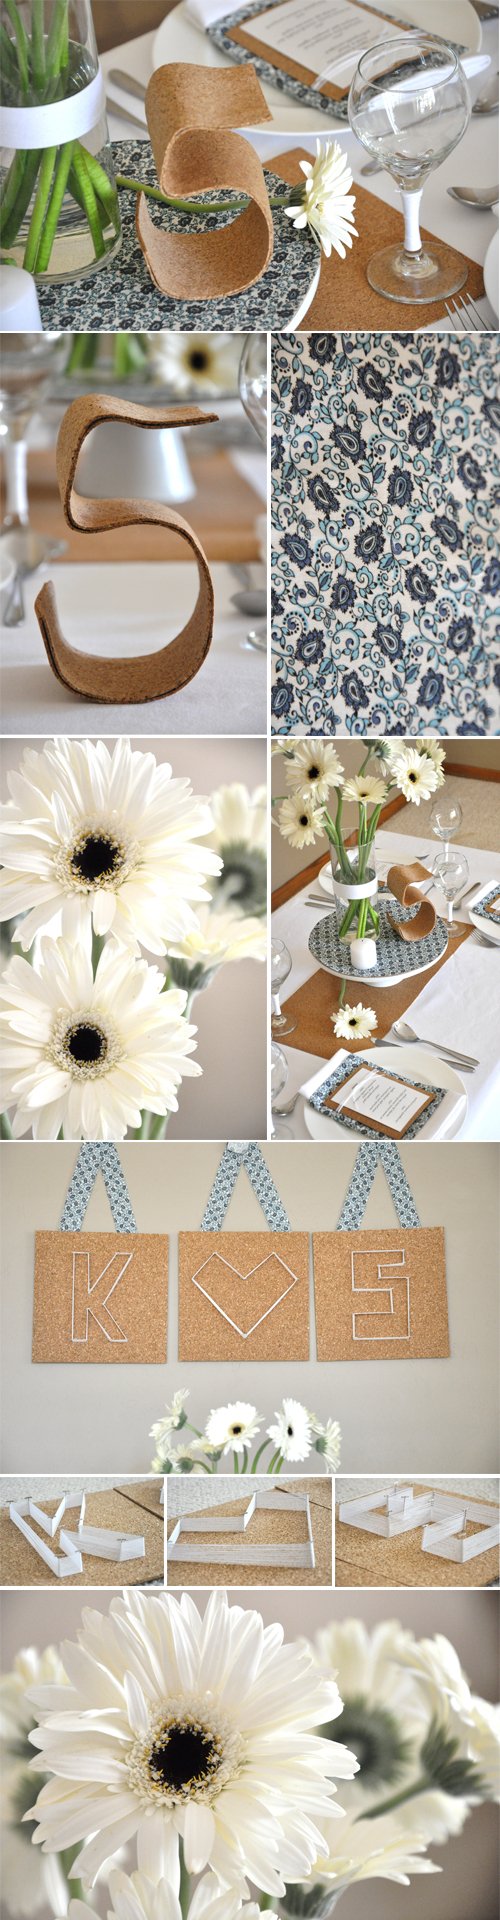
Alrighty, here we are with Part II of today's homemade post!  I just have to start out with a couple more pictures for you...
Cork-and-Thread
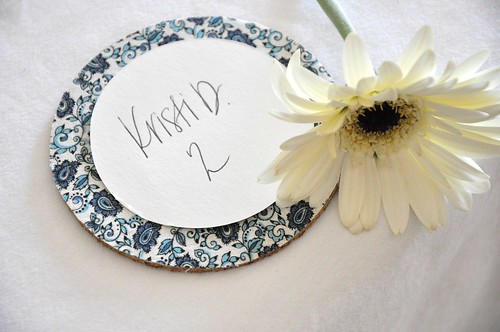
Okay...now that I got that out of my system, I can show you a couple other quick and easy ideas.  First up is an escort card...
Cork and Thread
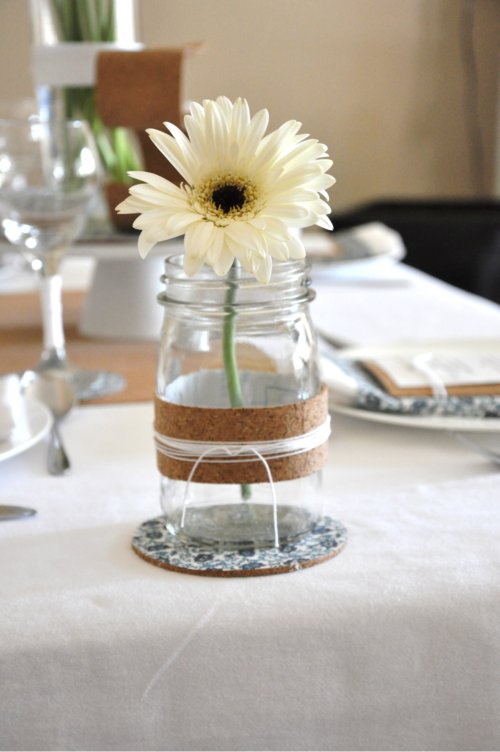
Place a circle shaped piece of paper with a guests name and table number on top of a coaster...just pin or hang to display.  Another quick idea is to wrap a piece of cork (with an adhesive back) around a mason jar...
Cork and Thread
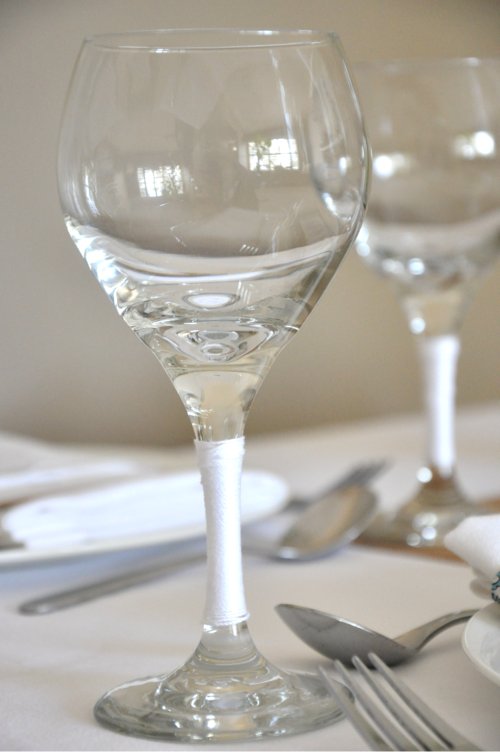
Just add some thread (or a piece of fabric) to finish off.  Either fill with flowers or a cocktail. I really liked this idea for a cocktail as the cork makes it easy to grab your glass!  And I do love the simplicity of a wine glass stem wrapped in thread...
Cork and Thread
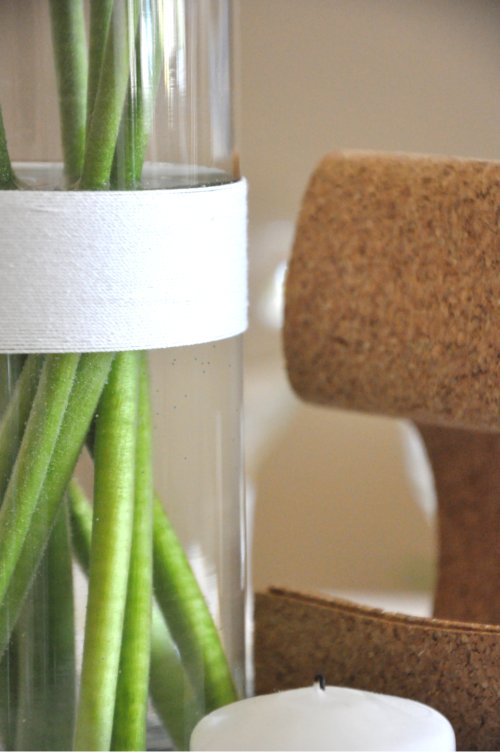
And a vase wrapped with thread...
Cork and Thread
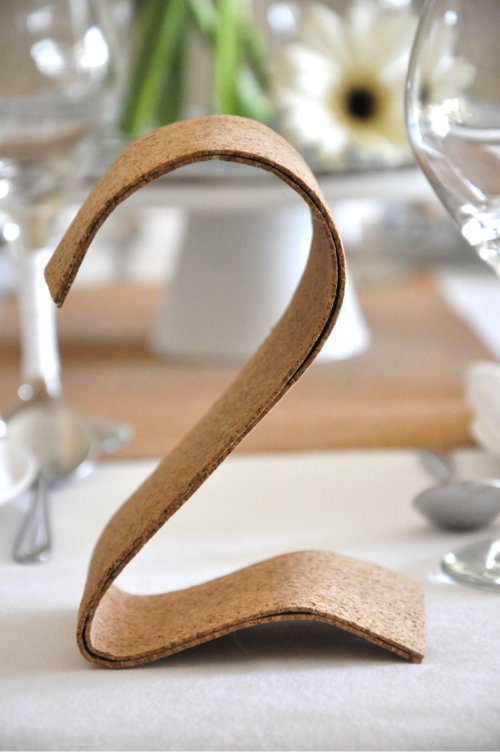
It is the extra added detail that I love...plus, it hids the water line in the vase!  And just imagine it in a pretty color!  Finally, I told you that I did a number two, but don't think I showed you a picture of it....well here it is...
DSC_0428
Too cute, no?  Love!  Just a quick reminder - cork cracks when bent too far!  And I forgot to mention that for the numbers 1, 4 and 7 that don't have a bottom to stand on you can either lean them up against something or stick them in a flower frog (painted a color to match). 

I had a BLAST working on this homemade project!  Seriously, there are soo many ways to use... like just cutting numbers and letters out of cork, spray painting the cork a color (fun), making your own cork backed picture frames and pinning pictures or escort cards to it...oh yes, I could go on and on...And I just might have to create a couple more cork inspired details for you!  Hope you enjoyed this Thursday's homemade project!  Now I'm off to see what I can come up for next Thursday. 

~ Ciao
...photography by me

9.30.2010

~ homemade: table numbers part II ~

Okay so here we go with part II...I love, love, love this! 

Project #3
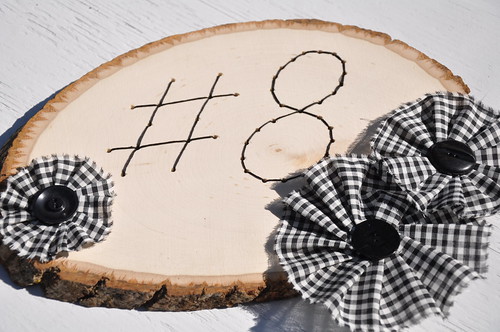
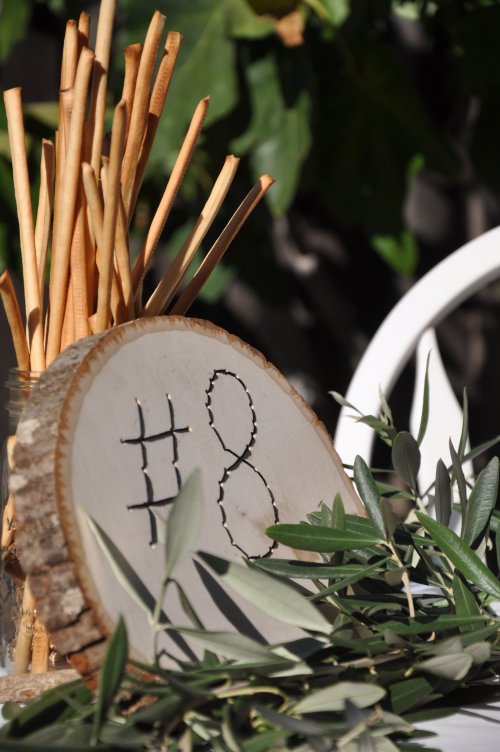
For this project I used a wood round, a drill press, a number that I printed out and cut out, and an embroidery needle and some thread.  First I printed out #and an 8 onto paper, and then cut them out.  I then placed them on the wood and used a push pin to mark spots into the wood every so often.  Next I used a pencil to make the pin marks darker and more visible to see.  (I forgot to take pics of these steps...blonde moment I think...but if you'd like leave a comment and I can send you step by step instructions.) And then Mr. Big went across the street to Bob's to use his drill press - be safe here! 
DSC_0800
We don't have a drill press (yet), but I am sure that someone you know does...dad, brother, uncle, guy across the street or friend and would be willing to help out or let you use it. Anyway, this is what it looks like with the holes drilled in... 
DSC_0807
I placed the # and 8 higher on the wood to leave room at the bottom to style.  Finally, I used a large needle and some thread and stiched the holes so it looked like this...
DSC_0148
How cute are the gingham rosettes I made?  Love them...
DSC_0152
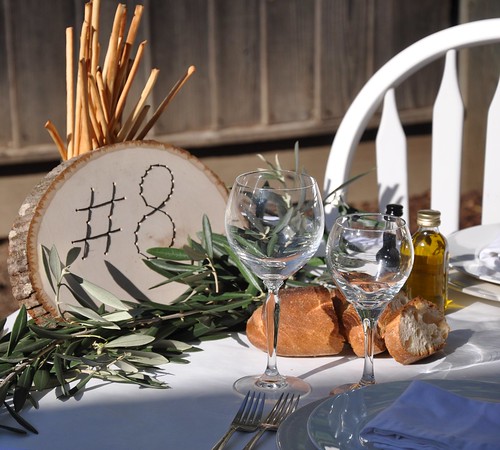
But then I started thinking...I have to style them differently, becuase there are so many ways to do so...and this is what I came up with...
DSC_0168
DSC_0199 
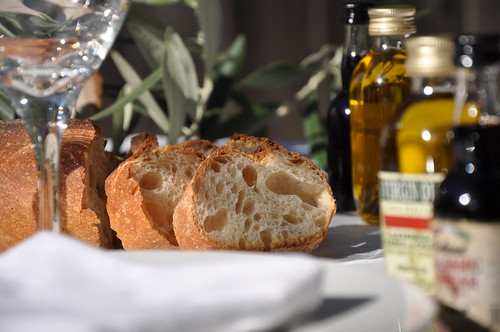
How cute are those mini olive oils and balsamic vinegar bottles?  Found them at Cost Plus, and love them...
DSC_0179
DSC_0160
The dirt patch in the back of this last picture is where the fountain is going...oooohh can't wait!!!  And I HAD to include this last picture for Chris at Postcards and Pretties, just love her and her amazing blog...
DSC_0215
Told you I'd share!!  Now I'm hungry for some bread, aren't you?  Well, I have one more project and then you (and I) can go grab some!

Project #4
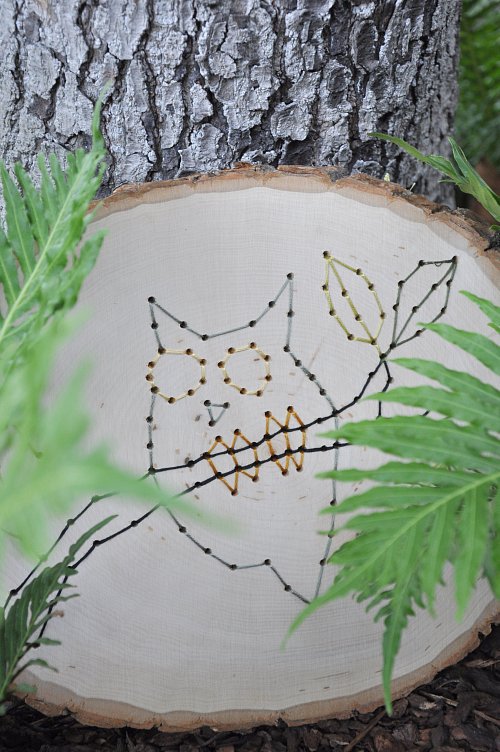
This final project is like the one above, but I wanted to show you that with a little imagination, a drill press and some colored thread you can create some wonderful things!  Here is one I that I saw that I loved...
DSC_0255
DSC_0227
To create the owl I just used an image I liked and then created my own outline on a piece of paper.  I placed the outline on top of the wood and used the pushpin to mark spots every so often.  And again went back over with a pencil to make the spots easy for Mr. Big to see while he was drilling. I kept the colors fallish...but would be sooo cute with brighter colors too!

I think these would be adorable instead of using table numbers...I would have an owl table, a squirrel, an acorn, a deer, some fall leaves...just use the same animal outline on the escort cards!

But how cute would they be with bride and groom printed on them and hung on the back of their chairs.  Or with initials, date, words, etc...  Go on, get creative!!!

Finally...that's all folks!

~ Ciao
...photography by me

~ homemade: table numbers part I ~

Hello darlings!  Are you ready for Thursday's homemade project?  I hope so!  This week I have a couple different ways that you could make table numbers all using wood rounds.  And I will be splitting them between two posts.  In this post I will show you two fairly simple ways, and in the next post I will show you two more ways that are a little more difficult.  So lets get started shall we?

Project #1
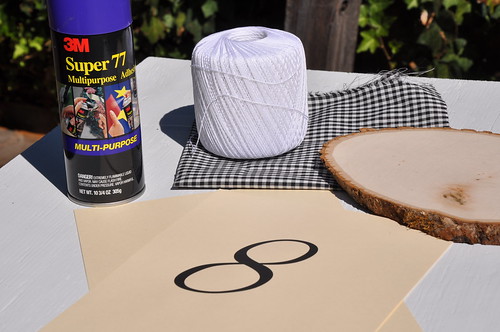
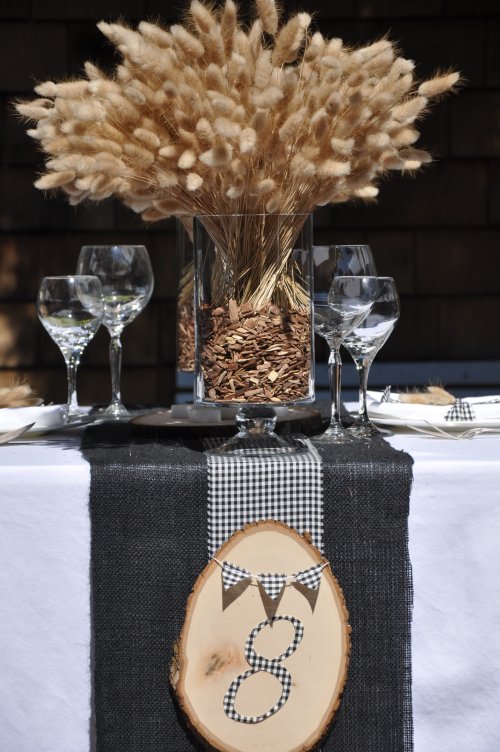
For the first project I used spray adhesive, a number printed on cardstock, gingham fabric, and some thread...
DSC_0810
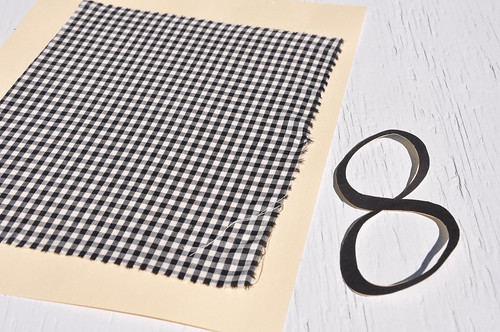
I applied spray adhesive to a blank piece of cardstock, and then placed the fabric on top.  Next I cut out the number...  
DSC_0812
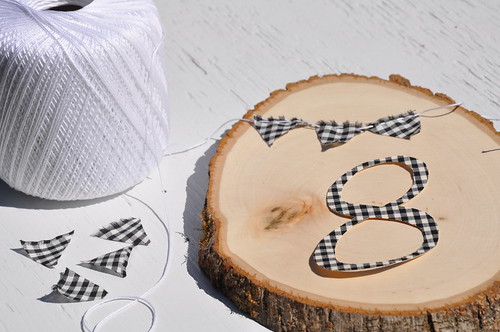
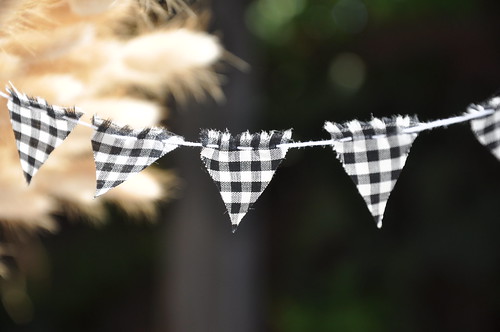
I flipped the cardstock with fabric over, and traced the number onto the back..making sure to flip the number over as well, otherwise it will be backwards!  Then I cutout it out.  The reason for the fabric on cardstock is that it makes the fabric easier to cut cleanly and adds some stiffness to the number.  Next I threaded the thread through a couple of triangle pieces I cut from the gingham...
DSC_0817
For the fabric number to stick to the wood, I just used some spray adhesive.  Yet, for the bunting I didn't want the little flags stuck in place so I used some tape on the backside to hold in place.  Here is the final product...
DSC_0045
And you know I had to do some tabletop decorating...
DSC_0098
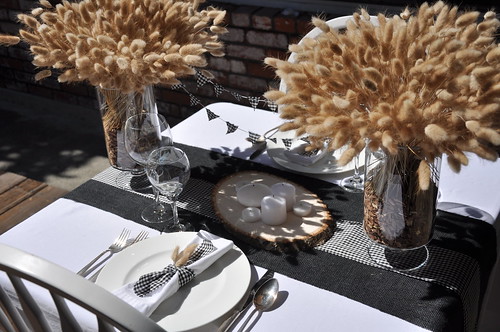
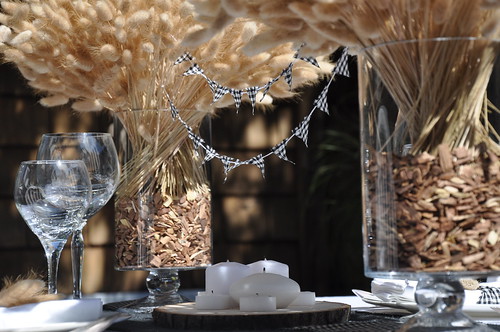
Do you think I could have cut the burlap straight?  Nope!  Anyway, the fluffies have made a comeback...they were better behaved this time around...
DSC_0073
I thought it would be cute to use the bunting on the table too!  I just attached the ends to sticks inside the fluffies.  And of course, those are wood chips for a grill in the bottom of the jars...you've seen me use those before.
DSC_0049
Oh you know I love things that hang...
DSC_0055
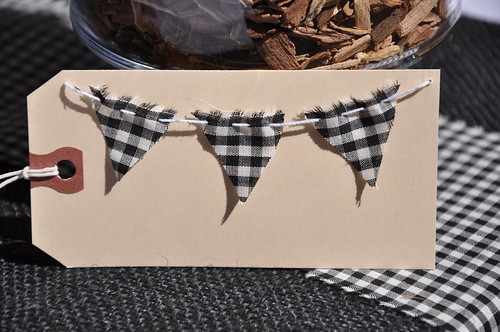
Believe it or not, I sat in the chairs to make sure the bunting wasn't in the way of seeing the guest across the table!  Just something to keep in mind.  Plus as an added little bonus, I thought it would be cute to carry the bunting onto seating cards as well...just write the names on the cards and you're done...
DSC_0080
Alrighty...on to the next project!

Project #2
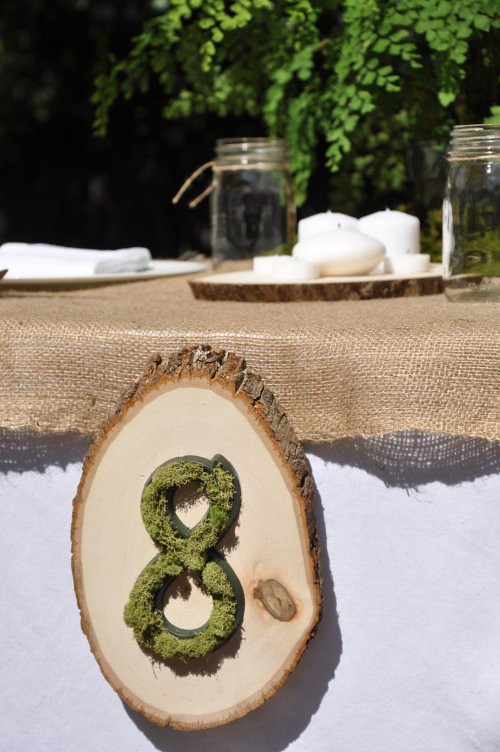
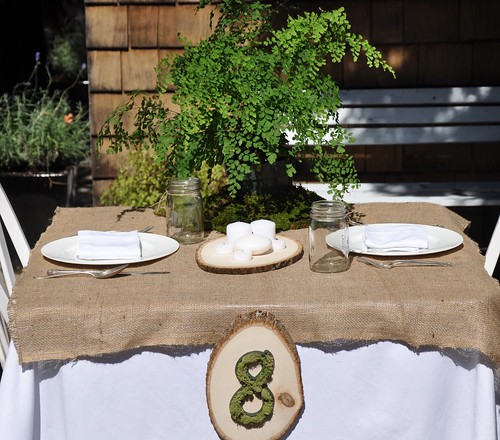
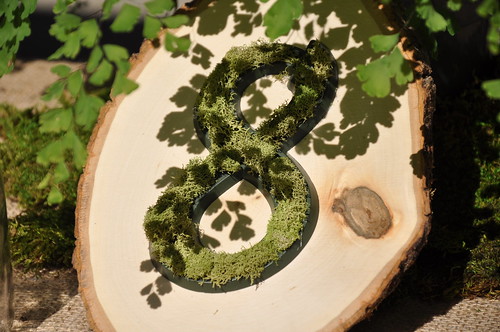
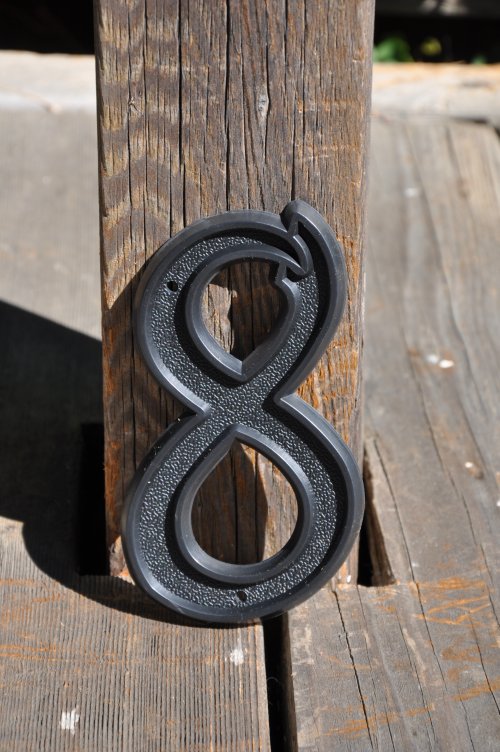
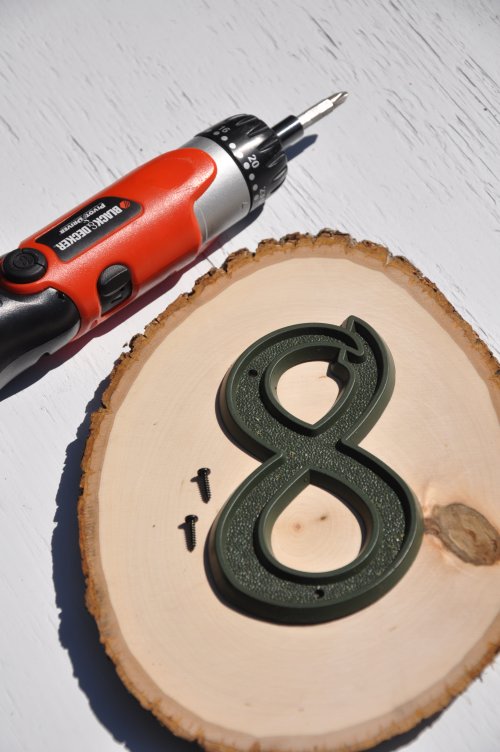
For this project I used a plastic house number from Home Depot for $1.89, spray paint and some moss.  I chose this plastic number because it has the perfect spot to place the moss in...
DSC_0783
I spray painted the number a moss green color and then screwed the number into the wood round...
DSC_0102
I then hot glued the moss into the grooves.  Pretty easy, no?  Here is the final product...
DSC_0115
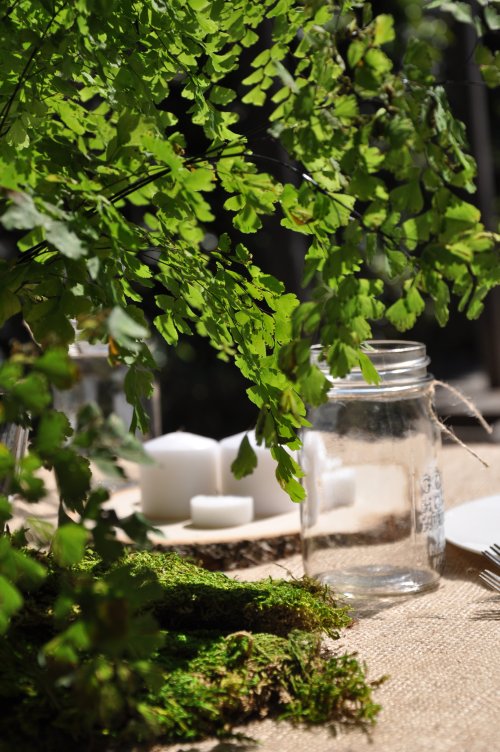
***Note:  I made the MISTAKE of leaving the moss number out in the sun for a couple days...and with 100 degree temps, it dried out and faded somewhat.  So it doesn't look as great as it did the day I made it.  So if you do something like this...keep in the shade until the big day!  Also, I know I am showing you this second, but it was the last photo shoot I did and I was running out of time, so the styling is simple...
DSC_0103
But the colors on the table sure do look pretty...
DSC_0121
DSC_0123
And as another option, you could always place the numbers on the table...
DSC_0137
Whew...you still with me?  Stay tuned for part II - promise it isn't as big as this post!

~ Ciao
...photography by me

5.11.2010

~ on the table: bottles + blooms ~

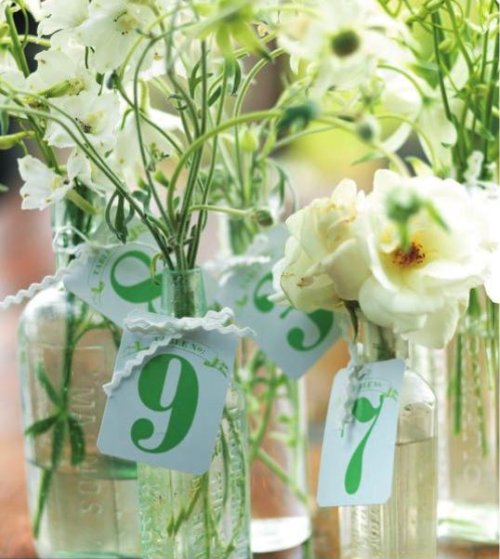
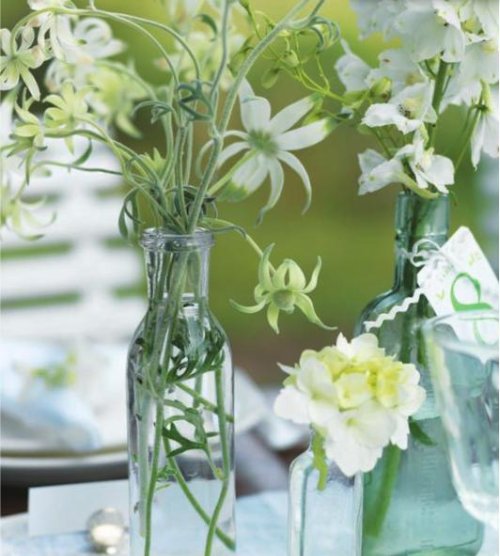
I am adoring these casual arrangements with table numbers attached!  I love the fresh, clean and crisp feel of the clear bottles, the white flowers with the bright green stems and the cards attached with rickrack (which I love and something that you don't see very often).
Wedding
This is something that you could do with a variety of clear bottles and white blooms.  And if the white flowers aren't your thing...think how pretty pink, purple, yellow or blue flowers would look!
Wedding
However, I must say that I am loving the white...it seems to get me every time!

~ Ciao

...images via wedding style guide

11.10.2009

Horseshoes Anyone?

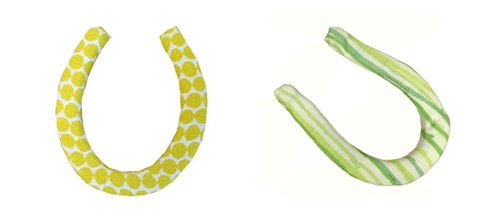
Ever since Carrie (a la Sex and the City) wore the horseshoe necklace - horseshoes have definitely made a comeback!  Whether you are a Sex and the City girl, a cowgirl, a horseshoe player or just plain love horseshoes - this is a fun way to incorporate them into your wedding!  Fabric-covered horseshoes...
Wedeing
The horseshoes can be found here.  But they only have 3 choices.  That however would not stop me from making them myself...or better yet, having someone in the family make them for me (oh, you know who you are!).  Anyway too cute!  I would use them instead of table numbers, and on the seating cards I would make horseshoe shaped with a piece of the pattern that matches that the table the person is sitting at!  I would them place the seating cards into wooden trays filled with grass or possible dirt (that just sounds so bad for some reason) and hang the horseshoe shaped cards from small metal stakes!  Now, that is one perfect detail, if I do say so myself!  Plus, horseshoes are the sign of good luck...and they ring around the stake...so many ways to play this one.  Hope I provided you with some inspiration!

~ Ciao