10.31.2010

~ spooky sunday sweetness ~

Halloween
Halloween
Happy Halloween my darlings! Hope everyone gets lots of yummy treats.  You can get the recipe for these spooky sweets right here.  Enjoy, and see you tomorrow.


~ Ciao

...image via matt bites via postcards & pretties

10.29.2010

~ in love with ~

Details
Details
Details
These absolutely adorable wool felted acorns by Green Baboon Designs on Etsy! Such a perfect detail for a Fall or Winter wedding (the colored ones would be great for Spring and Summer).  They would make the cutest escort cards, no?  How about using them as favors, or as place cards, or decor hanging from branches or even as cake toppers...LOVE!

Also, they would look lovely on a christmas gift, or on the tree, or in a bowl...soo many ways to use.

And if that wasn't reason enough to love them - then how about this...20% of all sales now through October 31, 2010 will be donated to the National Rescue Center for Domestic Violence - we all have the power to help! I just did by ordering the white ones! 

***This is NOT a sponsered post.  I just love the cause!

~ Ciao

...images via green baboon design 

10.28.2010

~ homemade: a spell and potion soiree part II ~

Thank you all for your super sweet comments on part I!!! (If you missed part I, see below.)  They made me blush, and knowing that you enjoyed part I...I was over the moon.  I hope you enjoy part II just as much.  There's lots more goodness here...
Table
Tubes
Dessert
And because that moss colored stump is AMAZING (that is the real color of it...no editing, just brightened because of the grey rainy day), I have a couple more. Promise it will end soon!
Cola
Stump
I just love the pop of green, don't you?  Okay my dears that is all I have...not really, but that's all I am gonna post!  Hope I didn't overwhelm you. 

I had so much fun with this shoot...even if I had to wait for three hours in the car on top of a hill in the middle of the woods with no cell phone reception in order to do it! 

~ Ciao

...concept, design, styling & photography all be me

~ guest posting over at magnolia rouge ~

Header
I am guest posting over at Magnolia Rouge today!  Was so thrilled when the lovely Kate asked me if I would.  I created a special little photoshoot for her.  Here's a sneak peek...
Homemade
Gorgeous, no? Come see all the other goodness right here!

~ Ciao

...image via magnolia rouge

~ homemade: a spell and potion soiree part I ~

I know, I know this is a wedding blog...but I just couldn't resist doing a little Halloween photoshoot!  I promise I won't do this very often...so please indulge me a little today...as Mr. Big and I had to sit in the car while it was raining outside for three hours before it stopped so we could actually do the shoot! 

Now this is nothing like the AMAZING Halloween shoot that Sofia at BrancoPrata did (see it here if you missed it, and trust me - you don't want to miss it!).  I absolutely adore Sofia, her work and her fabulously inspiring blog! And am thrilled that I can call her my friend.  If you are not following her...YOU NEED TO!

My concept all started with my homemade post last week when I showed you how to make the "cast a spell" bunting.  From there, I decided to do a "concoct a potion" bunting too...and the inspiration was born.  But I still needed something to cast a spell on, and concoct a potion for.  Hence the white diamond spider, and the protection potion (this sounds funny now that I think about it..not THAT kind of protection...protection against spells).

However, I do want to point out that a handful of the elements used here were under $5.00!  I know this is Halloween based but the little books and birdcages were $1.00 each at Michaels.  How cute would it be to use those books as escort cards with your guests names on the front, a story page, a menu page, and a cocktail recipe page...so CUTE!  And you could easily use these birdcages to hold place cards, as decoration, to hold votives, to hold sweets or for favors.  The two black goblets were $2.99 each at Target, and the black charges were on sale for $1.49 at Michaels.  Add to that two bags of spanish moss at $2.99 from Michaels and viola - the basis for a fabulous soiree!  The test tube holder and magnifying glass are from Ethan Ollie (love her Etsy store), and were a little spurlge that I purchased a couple months ago...before this photoshoot was a thought in my head.  Okay, I'll stop chattering....here you go...
Halloween
Homemade
Halloween-1
Hat
DSC_0393
Homemade
DSC_0405
Homemade
Homemade
Homemade
Homemade
Homemade
Homemade
Homemade
Homemade
Homemade
Have lots more pictures to come in part II...but I probably won't get them up until tonight or tomorrow morning.  I'm a tired girl and need some beauty sleep.  Really, I do!  But PLEASE check back!  Happy Thursday my dears!

~ Ciao

...concept, styling, design & photography all by me

10.27.2010

~ pump day #10: sparkly silver ~

I fell in love with this picture when I saw it...
Pump Day
Ohhh those sparkly shoes!  Of course I had to see if I could find them, and I did indeed...
Pump Day
You can find them right here.  So grab yourself a pair, and get your sparkle on!

P.S. - After some thought, and a little encouragement (thanks Chris!)...I am going to switch my Wednesday Pump Day posts to Tuesday Shoesday posts.

 ~ Ciao

...photography jill thomas & image via nordstrom

~ who says ~

...you can't use vintage windows and doors as decor at your outdoor ceremony?
Details
Details
Details
Don't you just love the clever way they used rebar to make the windows stand up in the grass?  So brillant.  And that monogrammed door ~ sigh ~.  All topped with flowers and I am over the moon!

~ Ciao

...photography by sean flanigan via style me pretty

10.26.2010

~ tuesday thought: egg sandwiches ~

I am a huge supporter for having late night snacks at weddings!  I think we have all been there - a couple of cocktails to loosen us up, so we can spend the night on the dance floor showing off our moves - leaves us down right famished.  Well why not serve your guests a late night snack?  So here is your Tuesday Thought:  Serve up an egg sandwich like this one... 
Food
Yum!  Now this is the kind of late night snack I'd want, wouldn't you?  You can get the recipe right here.  And how cute would it look wrapped in parchment and served up in one of my diy snack packs?  I know, it is too big to fit in one...but just trim the divider on one side and it would work beautifully...while still leaving two slots on the other side.  Love it!


~ Ciao

...image via design sponge

~ two: pretty plum details ~

Fashion
Two
An amazing dress with layers of tulle, and a perfect rose with layers of petals!

~ Ciao


...images via vintage rose garden

10.25.2010

~ details: edged in lace ~

I over the moon with this little detail...
Details
The simplicity of the decor really makes this detail standout...not to mention the softness it adds.  The perfect touch don't you think?

~ Ciao

...image via style me pretty

~ flowers of the week: 10.25.10 ~

Good Monday morning my dears!  Did everyone have a lovely weekend? 

Mine was pretty good.  Things definitely didn't go as planned this weekend that's for sure...sitting in the car for three hours waiting for the rain to stop so I could do my photoshoot was by no means the way I like to spend my time, and to top it off we were in the woods with little to no cell reception so I couldn't even work or tweet!  But Mr. Big and I hung out, listened to music and the rain and chatted.  It actually was a blessing in disguise as it gave me a chance to sit and relax as I have been running on empty all week!  Finally, the rain gave us a break and we got the shoot done just as it started again.  And the rain continued all weekend.  I do have to admit that I love a rainy day on occasion...especially when the wind is blowing the leaves all around.  So when I ran across this bouquet, I knew I had to post it for this week's flowers...
  Flowers of the Week
All those pretty leaves gathered up into a bouquet - so perfect for Fall, no?  Well it's definitely something different...and I think by now most of you know I like different.  Hope you have a great week!

~ Ciao

...photography jill thomas

10.24.2010

~ sunday sweetness ~

Heart shaped appetizers...
Sunday Sweetness
Adorably sweet!

~ Ciao

...photography elizabeth messina via her blog kiss the groom

10.22.2010

~ a special toast ~

Let's all raise a glass to the ever so sweet and lovely Erin of Sparkle and Hay who is getting married this weekend!  Cheers my dear to a life filled with love, laughter, special moments and a little bit of heaven!
Cocktails
I wish you and Dan all the best in your celebration this weekend, and the rest of your lives together!  Mwah, mwah!!

~ Ciao

...photography by jose villa via style me pretty

~ guest posting at enchanted dream weddings ~

I am guest posting for Naomi (aka sissy) over at Enchanted Dream Weddings today.  Come have a look-see at my DIY, homemade project I created!  
Guest Post
~ Ciao

10.21.2010

~ homemade: halloween bunting ~

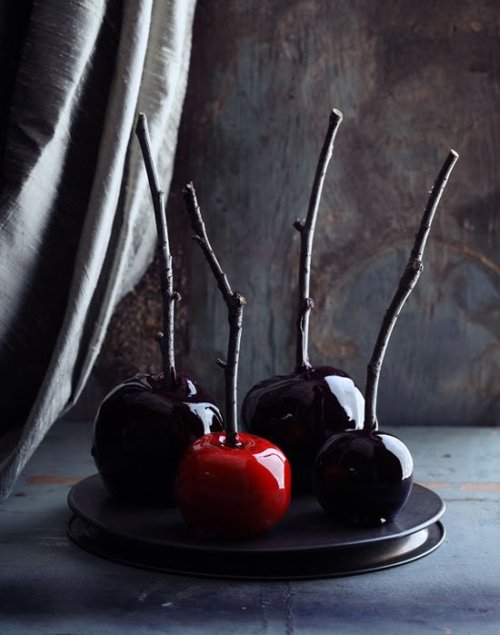
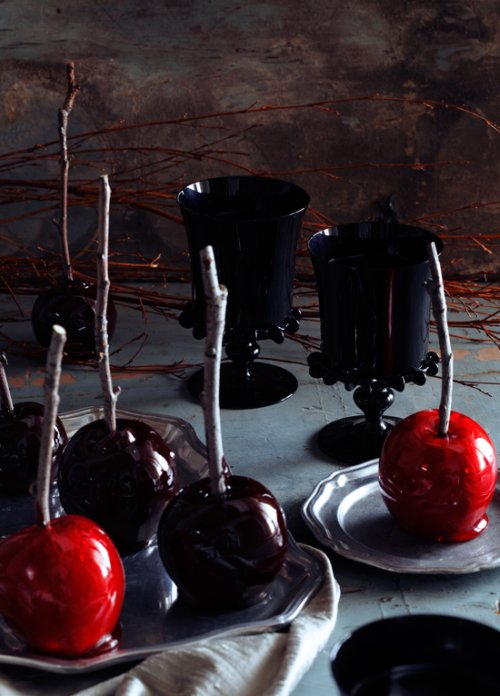
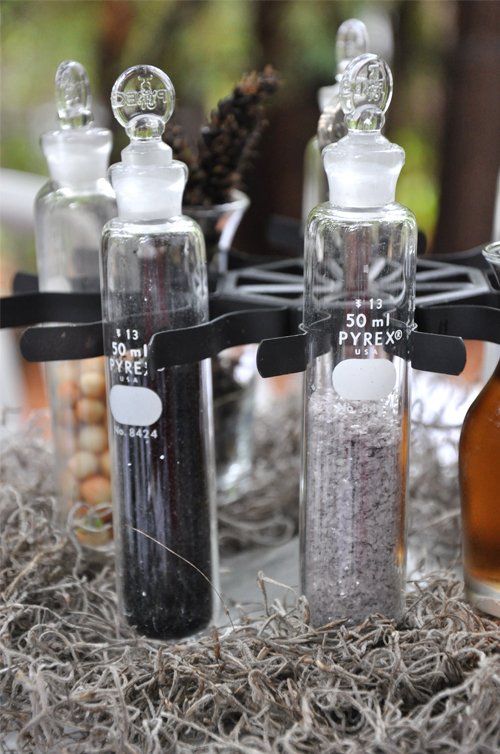
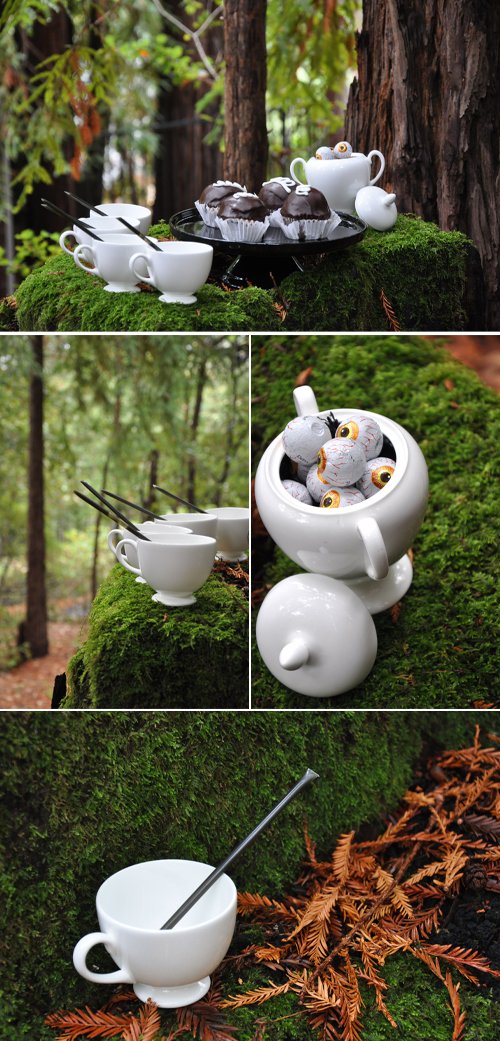
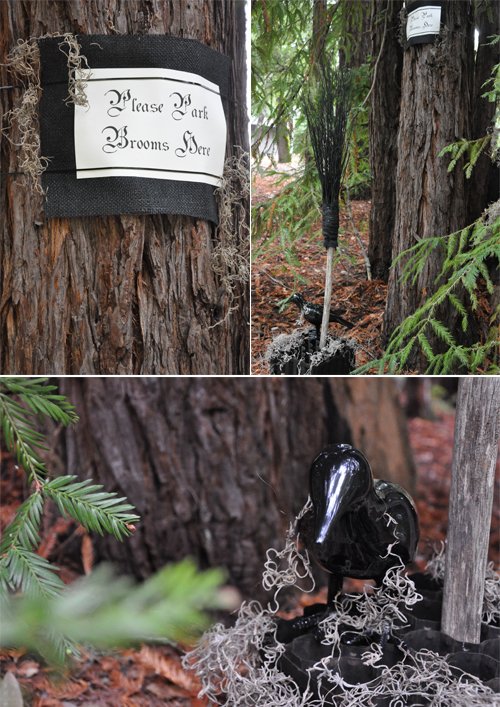
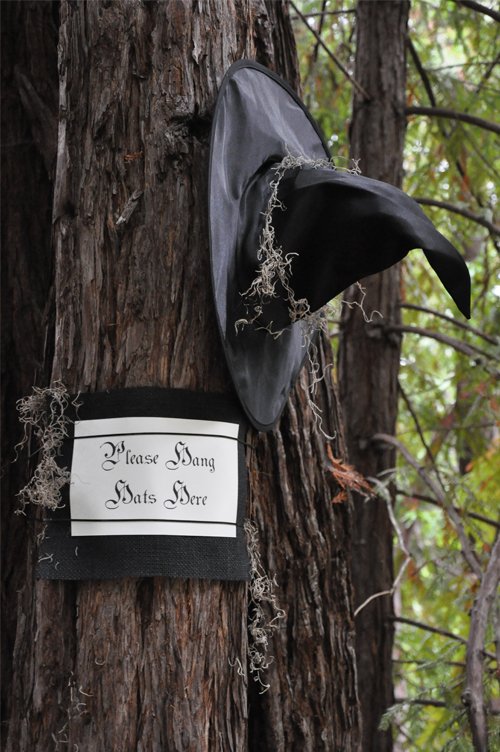
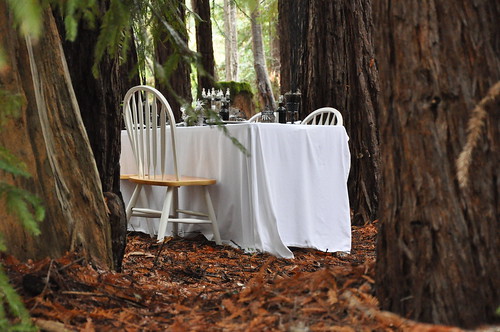
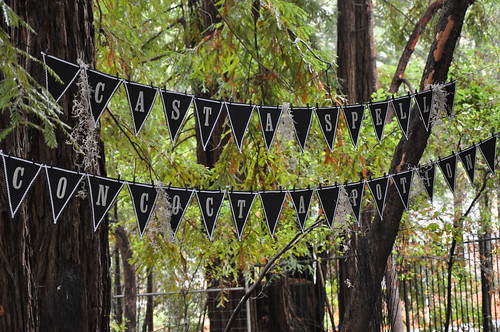
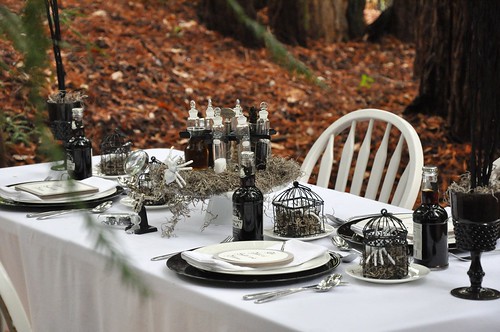
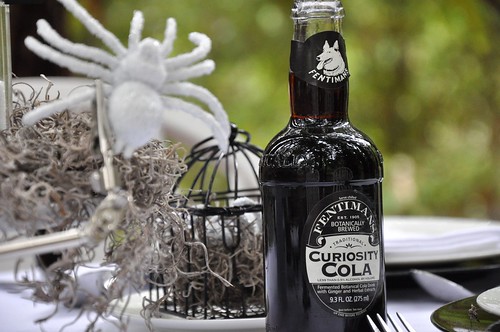
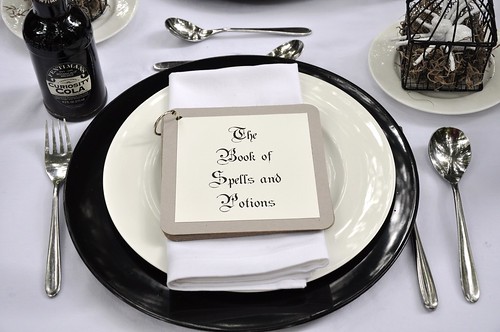
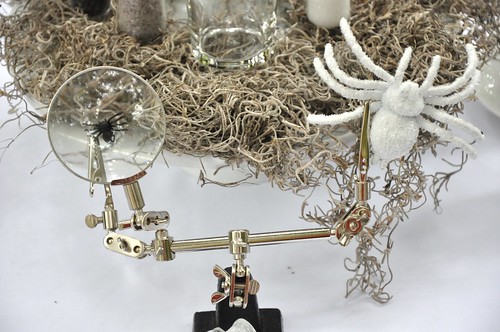
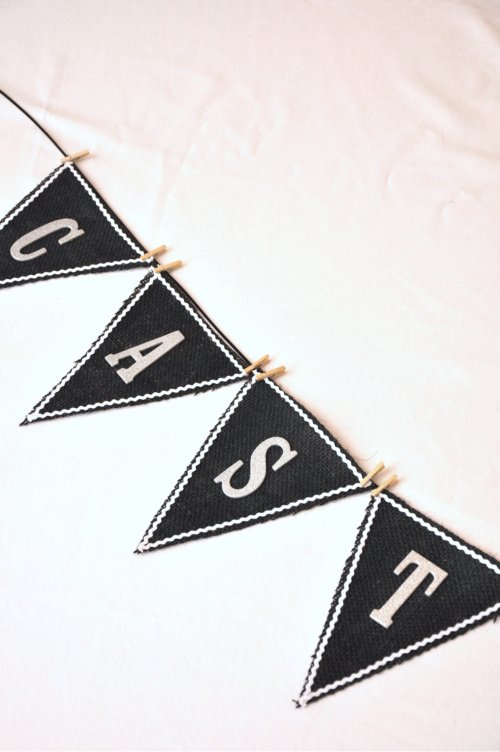
Yay it's Thursday!  That means it is homemade time around here at LCW.  Yes, I know...Halloween bunting on a wedding blog...what's up with that?  Well my intention is that while this is for Halloween (and my Halloween photoshoot that I will post next Thursday) you can make these bunting flags with any color material or paper and any words!  And while I was going to do another homemade project (that will come in a couple of weeks), I am soooo thrilled with my Halloween photoshoot that I thought I would give you a little sneak peek!  And this is just a part of it...hey, I did say sneak peek ;-)
Homemade
So here is a list of supplies you will need for this homemade project:

Black burlap
Elmer's Glue
White Baby Rick Rack
Wax Paper
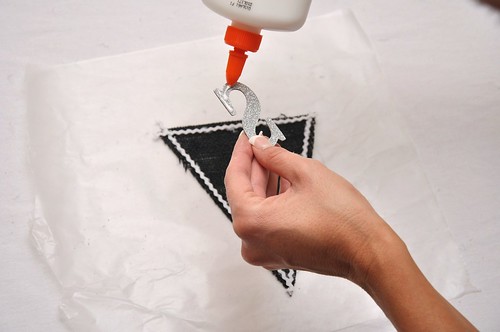
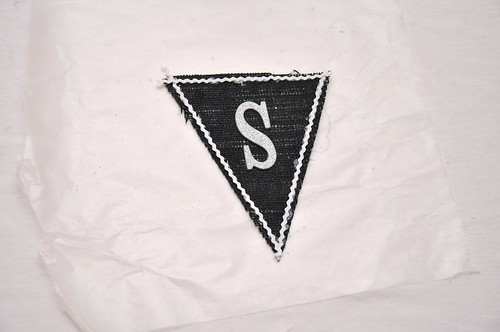
Silver chipboard letters
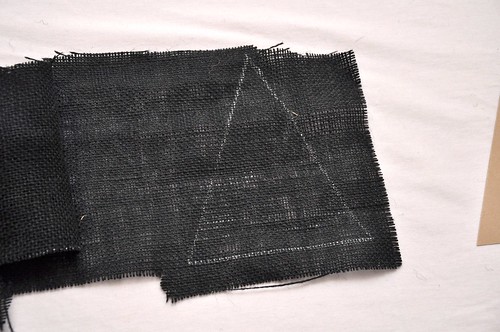
A triangle in the size you want
White crayon
Scissors
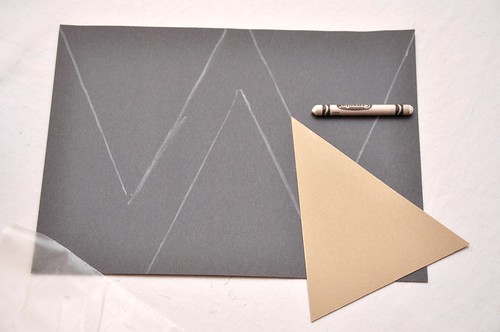
Black construction paper
Spray adhesive (which is not in the picture...oops, sorry)
Homemade
Step 1:  Take the burlap, place triangle on top, outline the shape with the white crayon, and then cut out.
Homemade
Homemade
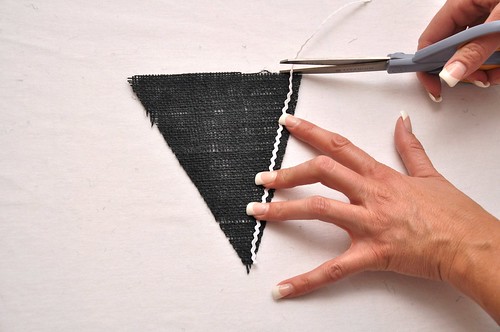
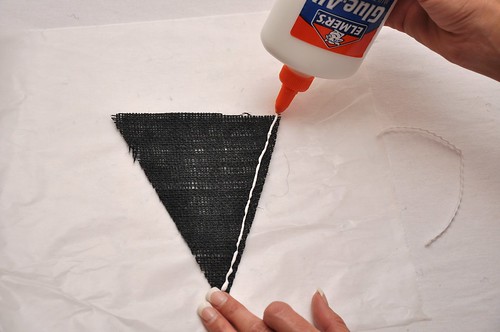
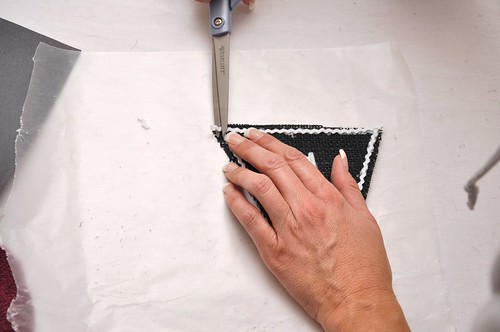
Step 2:  Next cut the rick rack the length of the sides. Place a piece of wax paper down to avoid the glue going through the burlap and sticking.  Run a line of glue down one side and place the rick rack on top.  Do the same for the other two sides.
Homemade
Homemade
Homemade
Homemade 
***As you can see in the picture above - there is glue around the rick rack that looks sloppy.  Don't worry about getting glue on the outside of the rick rack...the glue will dry clear and you will not see it.

Step 3:  Now we are ready to add glue to the back of the silver chipboard letter and place in the center of the triangle.
Homemade
Homemade
Step 4:  If there is any rick rack hanging over the edges be sure to trim so it looks neat and clean.
Homemade
Step 5:  If you are hanging the bunting against something like a wall, fence, etc...then you do NOT have to do Step 5.  However, if you are hanging the bunting from a tree, over a table, between posts, etc...then you will need to add some construction paper to the back of the burlap, otherwise the light shines through and you cannot read the letters.  NOTE:  this only has to be used if you are using burlap.  So for this step you will need to trace the triangle onto the construction paper, cut out the triangle and then use spray adhesive to attach to the back.  NOTE:  when placing the construction paper try to line up on the backside with the rick rack...so it's not up against the edges (see pic below)...you will also need to trim off the top of the construction paper a little since you are raising it up on the burlap.
Homemade
Homemade
Step 6:  Repeat until all letters are done.  And finally...attach you flags (I used mini clothespins for the photo) and your done! 
Homemade
Ta da!  The whole process does not take that long...I know it seems like it with the step-by-step, but it does go pretty quickly.  I hope you enjoyed this homemade project.  I can't wait to share my photoshoot with you next Thursday!

~ Ciao

...photography by me and Mr. Big