1.31.2011

We Have a Winner

Thank you to the handful of you that entered LCW's first giveaway!  I realized that many of you already have the book, but for those of you that don't it is such a fabulous book that I wanted to give you the opportunity to win one too.

So without further ado - the winner of the Handmade Weddings book is...
Megan-Winner

Congrats Megan!  So happy that you can use it for your wedding ;-)  Please send me an e-mail at lunaandchloe@yahoo.com with your mailing address, and I will get it out to you as soon as possible. 

~ Ciao

Flowers of the Week: 1.31.11

Happy last Monday in January my dears!  Can you believe it?  One month of the new year already gone.  I am in serious need for time to slow down.  Golly, I haven't even thought too much about Valentine's Day...and now it is only two weeks away.  Eeek, need to get going on some things! 

It's funny how I love Valentine's Day, but I am not a red person at all.  I think I own one pair of red shorts, and a HOT pair of red summer sandals.  So I never do red for Valentine's Day...it's just not me.  But if I was to get a bouquet of flowers for Valentine's Day, I wish it looked like this one...
Flowers of the Week
Now this is so my style!  Soft, light, and a mixture of textures.  I am loving the combination of succulents, billy buttons, and irises (amongst other flowers) aren't you? 

How was your weekend?  Ever so lovely, I hope.  Mine was quite nice, and pretty mellow.  We ended up with rain on Saturday and Sunday...so it kept me inside more than I had hoped.  However, last night it was make your own pizza night and playing Pictionary on the Wii, which was boat loads of fun!

And speaking of drawing...I will be drawing the winner of the Handmade Weddings book this morning, and announcing the winner later today.  So stay tuned!

~  Ciao

...photography by jac photography via style me pretty

1.30.2011

Sunday Sweetness

To write your own love story...
Ivy-and-Aster-Final
And if it just so happens to include a crown and sequins shoes...all the better!

~ Ciao

...photography by elizabeth messina via ivy & aster

1.28.2011

Sweet Friday

Eeek...so sorry this is so late in getting up.  However, it has been such a sweet week here on LCW - that I thought I should share some sweetness with you!  I am OVER THE MOON - not only with this cake...
Cake-1
...but the with details and styling as well!
Cake-2
The vintage metal stand, the cake plates, the lace, the candlesticks, and even the candles lit on the stairs are all just sweet perfection!  And a great way to end a great week.

Thank you my dears for making it a good one.  Wishing you all a perfectly sweet weekend!  See you Monday.

~ Ciao

...photography by the always amazing jose villa via style me pretty

1.27.2011

Homemade: Heart Adorned Burlap Bags

Today's homemade project is one I created for my contributing post on Celebrations at Home.  I did an inspiration photo shoot titled:  Your Ticket to Love.  If you didn't see the post, you can right 
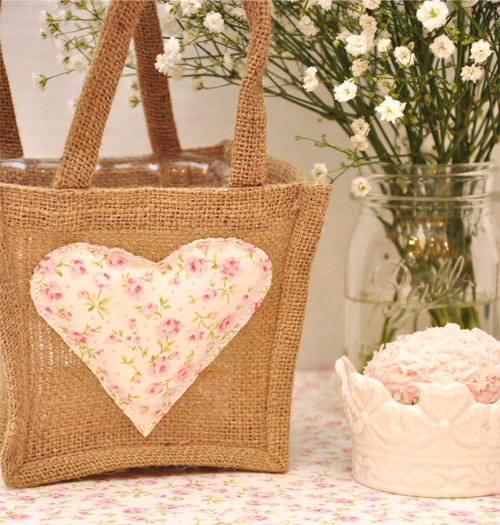
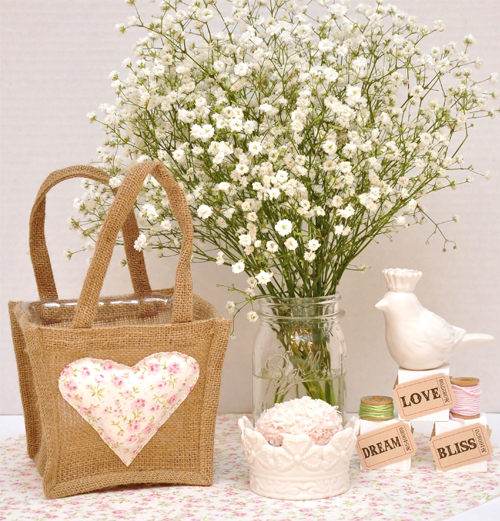
here.  With Valentine's Day just around the corner...I thought a great project for today would be the heart adorned burlap bags I made... 
Heart-Bags-First
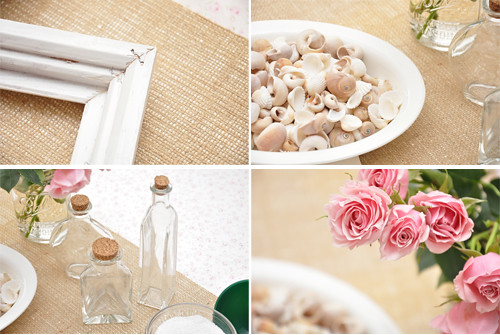
For this project you will need:
Heart Adorned Bags
~ A burlap bag...found the at Beverly's for $2.99
~ A piece of fabric
~ A heart template
~ Pencil
~ Scissors
~ Needle
~ Embroidery thread
~Batting
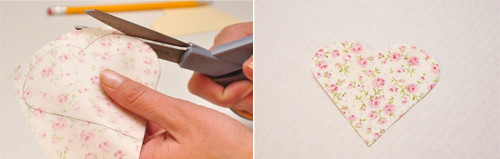
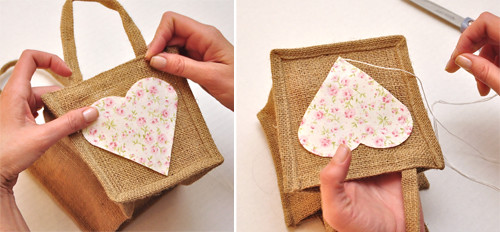
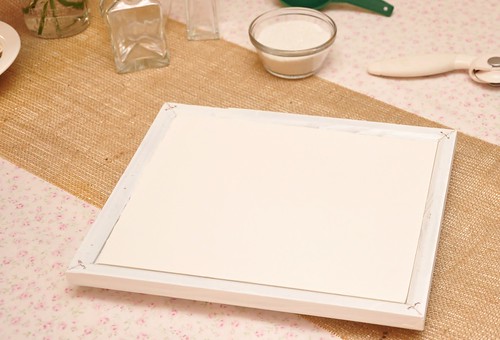
The first step is to trace the heart template onto the backside of your fabric with a pencil.
Heart-Bags-1
Cut out the heart.
Heart-Bags-2
Find where you want to position the heart on the bag (starting lower is better), and starting at the point of the heart sew using a backstitch. You will want to make sure that you have a large enough knot at the end so that it doesn't pull through the burlap, and be careful not to stitch too close to the edge of the fabric.
Heart-Bags-3
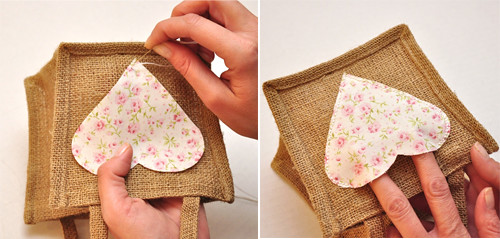
Continue stitching up one side until you start rounding the top corner of the heart then stop.  Stitch up the other side of the heart to the same point.  You should have an opening at the top so that you can stuff the heart with batting.  ***Note:  I did it this way so that you can put a tag with a name on it coming out of the heart, or a small sprig of flowers, or a love note...then I forgot and finished it without a picture of it.  Oopsies.
Heart-Bags-4
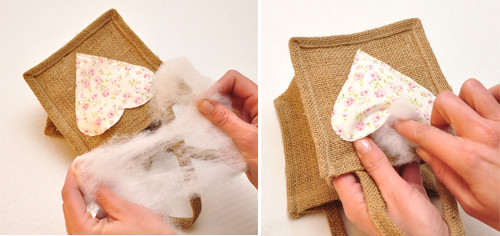
Next you will need to pull the batting apart so it is easier to work with.  Working with smaller sized pieces, stuff the heart to the desired thickness.
Heart-Bags-5
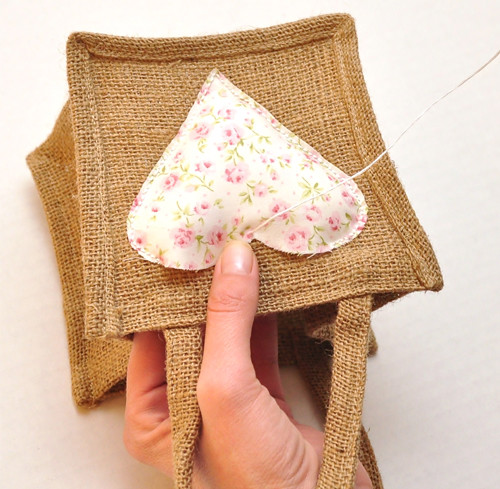
Lastly, finish stitching the heart starting from the point where the heart meets at the top.  I found that starting in the middle avoids having folds or bunching on one side of the heart and not the other.
Heart-Bags-6
And viola! 
Heart-Bags-7
Honestly, I really do not know how to sew that well (that is a talent that both my mom and sissy have, but not me).  So if I can do this...so can you!  Actually I liked the heart more when the lines weren't perfectly straight, and the stitch size were a bit different...it adds to the homemade feel, especially since it's on burlap.

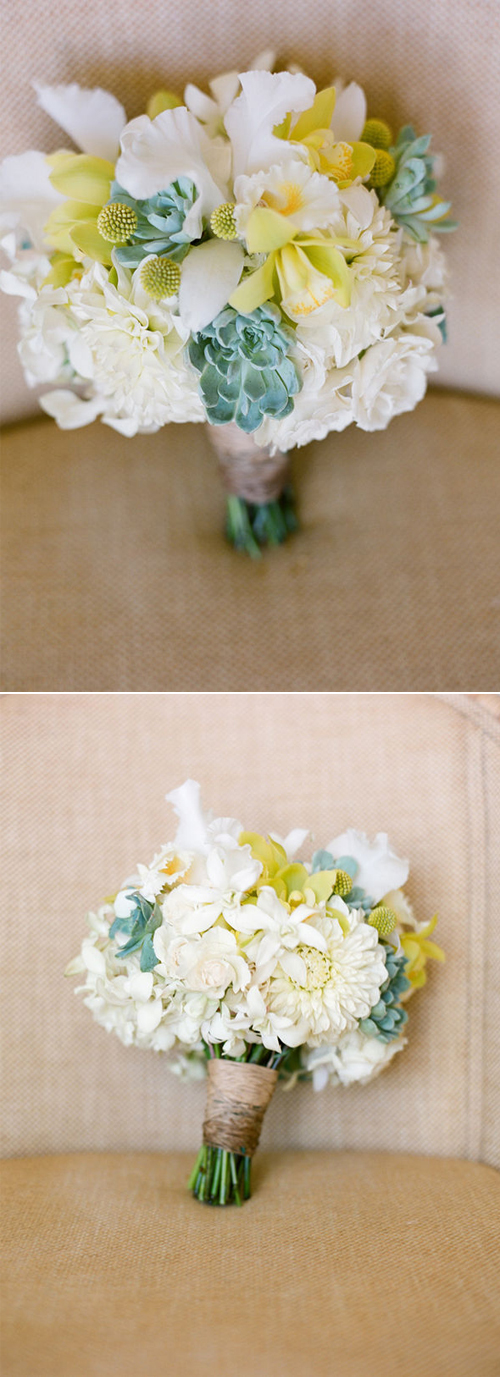
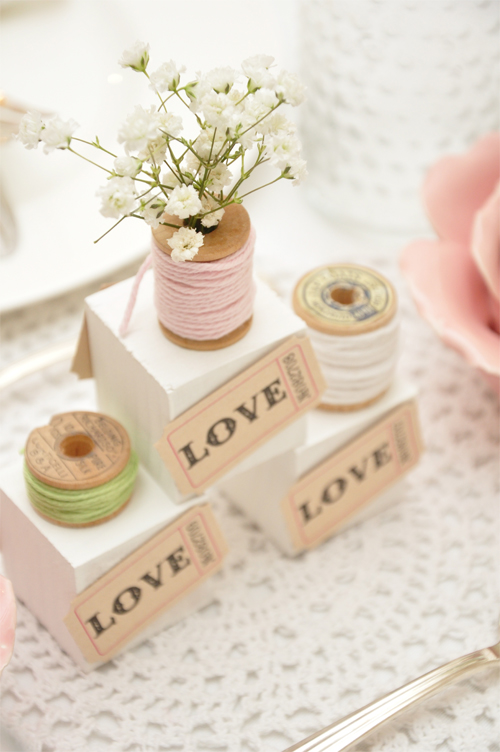
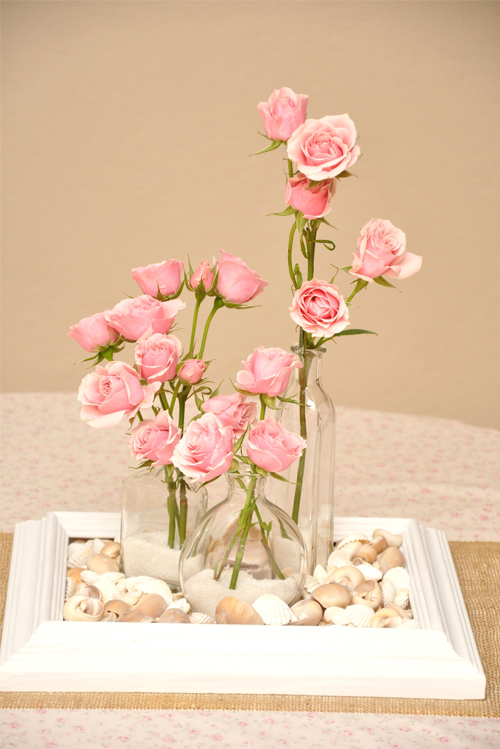
What I really love about this project is that these bags can be used in so many ways!  While they are the perfect size to hold cupcakes in crowns as favors, there are lots of other way to use too.  Since the bags come with a plastic liner you can fill them with a variety of things...including flowers or a plant for centerpieces, to hold treats in as gift bags for guests, favor bags for a wedding or party, to give a Valentine's Day present in, to hold utensils, or (like me) to have on my desk filled with items such as pencils, scissors, etc...  And just think if you changed out the fabric, or the shape of the heart...it can be used at any time of year.  I am sure you will be seeing these bags in a photo shoot again!

~ Ciao

...concept, design, styling & photography all by luna and chloe weddings

1.26.2011

Who Says...

...you can't use a galvanized tin pedestal for your cake!
Cake
So fabulous, no?  The style of the cake, and the stand are just perfection together, don't you think? 

And I have to tell you that the lovely Rosie, of Sweetapolita, not only made this amazing confection, but styled it too.  If you haven't been to her blog yet ~ go now as it is a LCW MUST see!  You can find Rosie's recipe for the Sky-High Hummingbird Cake right here, and she was so fabulous to give me the link to the galvanized tin pedestal too...you can get one right here.  Oh, I love!

Thank you Rosie of Sweetapolita for sharing the link with me and LCW readers!!!  It was so sweet of you! Mwah.

~ Ciao

...image via sweetapolita

1.25.2011

Your Ticket to Love Photo Shoot on Celebrations at Home

Did you see my contributing post on...
Celebrations At Home Logo
No?  Well, head here right now and check it out!  And because I just love you bunches, here is a sneak peek for you...
Ticket-to-Love
~ Ciao

...image via celebrations at home & luna and chloe weddings

Tuesday Shoesday #8: Meshing Around

Shoes, I am talking shoes here!  I wouldn't mind meshing around in these...
Tuesday Shoesday
Tuesday Shoesday
How about you - would you mesh around in these too?   A dare if you wear pair of Christian Louboutin's - that would be perfect for a Summer wedding, and peeking out from under your dress!

Be sure to check out these lovely blogs for more Tuesday Shoesday goodness:


~ Ciao

...image via net-a-porter

Tuesday Thought: Vintage Springs

Oh are you in for one of my 'out of the box' thoughts today!  You know how I love to use things in new ways.  Well what do you get when you use a vintage spring and a test tube...
Spring-1
See where I am going with this?  I am sure you do ;-).  But I'll give you a little hint...
Spring
A fabulous idea for a unique vase or centerpiece!  Yesterday was super busy for me...so I didn't have time to style these pictures at all.  But here are a couple of pictures to show you how it can look...
Spring-3
Spring-5
Or you can welcome Spring in with a pop of color from some lovely daffodils...
Spring-6
How's that for an unique, easy centerpiece idea?  Oh it would be darling just used as decoration on a welcome table, escort table...anywhere really. 

~ Ciao

...concept, design, styling and photography all by luna and chloe weddings 

1.24.2011

Flowers of the Week: 1.24.11

Did you think I forgot?  No, I just had some news that I needed to get out before this.  Besides, how could anyone forget a bouquet as gorgeous as this...
Flowers of the Week
No matter what angle you look at it - it is fabulous! And just to let you know - this bouquet has been added to my favorites list.  I have a feeling that this list is going to be really, really big this year!!  Hope you're having a lovely Monday.  And if not - hopefully this bouquet will brighten your day ;-)

~ Ciao

...photography jose villa via style me pretty

Link Love on Style Me Pretty

I cannot tell you how OVER THE MOON  I was on Friday night when I found out that my wood block save the date puzzles were included on Style Me Pretty's:  A few fabulous links from around the web...
SMP-Loge_edited-1
smp-2_edited-1
This news made my month!!   I am absolutely honored that Style Me Pretty not only saw my save the dates, but that they included my link on their page.  THANK YOU to the moon and back SMP!!!

~ Ciao

...images via style me pretty

Happy Monday & A Giveaway

Happy Monday loves!  Do you notice anything different around here???? Do you like?  Well as I mentioned in a post at the start of the new year - there would be some changes around here...this being one of them!  This redesign has been in the works since last July...colors chosen, header created, all of it...it just took some time to get the code written.  There are still a couple tweaks (date tab, extra spacing, etc...)that need to be made, and I thought that I would have had time to do them this weekend...but no such luck.  Anyhow, you can only imagine how happy I am to finally see the design live on the blog.

Since LCW has a new look, I think a celebration is in order!  And how I would like to celebrate LCW's new look, is by having a giveaway.  Yep, LCW's first.  What am I giving away you ask?  Well this my dears...
Giveaway
An absolutely amazing book that I am totally over the moon about!  Everything about this book is perfection - the ideas, styling, photography - all of it!!  There is no doubt in my mind that you will love it too. 


It's just my way to say THANK YOU to all my readers, fellow bloggers and friends for your continuous support and encouragement.  My goal for this blog is, and always has been, to share my ideas with you!  I hope I am holding up my end of the baragin.  My promise to you is that I will continue to strive to create something new and different, and share those creations with you.  There will be some new things coming soon - like video DIY's, a new series, and a project that I hope will be out by the end of the year. 


So I bet you are wondering how to enter this giveaway, right? So here is how to do just that...


To enter:
  1. Leave a comment on this post telling me one of your favorite homemade items you have either made or received.
Additional Entries:
  1. Follow this blog (please let me know if you already do)
  2. Follow me on twitter @lunaandchloe, and leave me a comment here that you did (please let me know if you already do)
  3. Like Luna and Chloe on Facebook, and leave me a comment here that you did (please let me know if you already do)
  4. Tweet about this giveaway.  For example:  "I just entered the Handmade Weddings book giveaway on @lunaandchloe...http://bit.ly/eNStvn."
You have until midnight (Pacific Standard Time) on Friday, January 28, 2010 to enter.  The winner will be chosen at random and announced on Monday, January 31, 2010.  Good luck to all of you!  I sincerely wish I had a copy for everyone.


~ Ciao


...image via barnes and noble

1.23.2011

Sunday Sweetness

Ruffles, braids and holding hands...
via smp sunday sweetness JAC photography
...is ALWAYS sweet!


~ Ciao


...jac photography via style me pretty

1.22.2011

~ working behind the scenes ~

Sorry for no post Friday.  I have been working behind the scenes on my redesign.  Still lots of little tweaks that need to be made.  I hope to have the majority of them fixed by Monday.  I will  resume my normal posting on Sunday. 


Sorry for any inconvenience. Hope you are having a lovely weekend!


xoxo
kristi

1.20.2011

Tutorial: Homemade Save the Date Blocks

Happy Homemade Thursday my dears!  Oh are you in for a little (not big) treat today.  Do you remember the Save the Dates wood block puzzles that I made for The Loveliest Day?  Here is one picture in case you missed...
Homemade
Well not only will I give you the step-by-step tutorial on how I made the Save the Dates, I am going to show two other ways that you could use these wood blocks!  My first is for table numbers...
WB-Table-Numbers
We'll get to the other idea in just a minute.  How did I make the table numbers and the Save the Date wood block puzzle you ask?  Well I designed, printed, cut and stuck!  Makes it sound super easy, no?  Well this project is more time consuming then difficult I think...but the outcome is so worth the effort!  Here is what you need for this project:
Tutorial-1
  1. 6 designs printed out.  You will want to make the design 4 1/2 x 4 1/2 be careful not to go all the way to the edges as you don't want to trim off any words.  Hint if you use a patterned background like I did for the table numbers it makes it easier than no background, as you can follow the lines of the pattern to cut out, otherwise it is measuring to get it right.
  2. 9 plain square wooden blocks 2 inches in size
  3. A Xyron machine - this fabulous little machine makes plain paper into a sticker.  You could also use double-sided sticker sheets (8 1/2 x 11 in size) as well.
  4. Either a pair of scissors, a paper cutter or a ruler and Xacto knife to trim with.
  5. A pencil and ruler to mark and measure squares on the back of the design.
And here is the step-by-step tutorial on how to make the wood block puzzle table numbers (the same way I made the Save the Dates):


Tutorial-2

  1. I trimmed the paper before I sent it through the Xyron machine, as to save materials.  Make sure to turn the handle slowly to pull the paper through.  When the paper has come all the way through, use the trimmer on the machine to cut off. Images 1-4.  
  2. Trim the edges off of the paper.  And remove the top layer of film (this is just a protective coat).  Images 5-6.
  3. Measure 1 1/2 and 3 inches from one side and mark a line at each.  Rotate the paper 90 degrees and do the same - so you have a grid on the back.  Image 7.
  4. You can check at this point that your design will fit on top of the blocks.  Image 8.
  5. I then cut the lines and each line into a square. Image 9.
  6. Make sure to place the cut squares on the blocks as you go so you do not mess up the pattern.  Image 10.
  7. Peel off the sticker. Image 11.
  8. Place one sticker onto one square. Image 12.  If there is any overlap, trim it with scissors or an Xacto knife after each sticker is stuck.  Repeat until all squares are done.  Flip the blocks over and start again.
Also, at $1.29 for one wood block at Michaels, it makes this project pretty expense. So I sent my boyfriend, Mr. Big, to Home Depot to find me an alternative...and that he did. One 8 foot post, the same size as the blocks (2 inches) for about $10.00. If you do some math - that would make about 5 puzzles (with some room for an error or two) at a cost of about $2.00 a puzzle for the wood.  Which is really the only thing you need to purchase...unless you want to purchase a Xyron machine.


I know some were concerned about the cost of mailing; and while the cost isn't a $.44 stamp it is outrageously expensive either.  Packaged in just a cellophane bag and place in a padded envelope the cost to mail it from California to New York was $2.92.


Okay, now onto the second idea I have for you - escort blocks.  These are fairly quick and easy if you set up a table in Word.  You follow the instructions as above, but you only have 6 squares to cut out versus 9.  (If you would like I can e-mail you the template I created, just leave me a comment or send me an e-mail and I will be more than happy to send it to you.)
WB-4
WB-7
WB-8
WB-5
WB-1
I just loved the way the escort cards turned out, don't you?  I printed a guest name on one side and different numbers on the other.  The table that the guest is seated at is marked by a circle.  So there you have it - wood block escort blocks.


Also, I told you that I would include the fonts that I used for the Save the Dates posted on The Loveliest Day.   I used a variety of cross stitch fonts, and all the fonts I used can be downloaded for free.  If interested here is name and link for each font:
  1. Save the Date - Cross Stitch Delicate
  2. Date - Embroidery
  3. Names - Stitch Cross
  4. Location - Home Sweet Home Outline
  5. Heart - Home Sweet Home
  6. Made with Love - Costura Lt
For the escort cards above, I used a free down loadable font as well called 1942 Report.


So that about does it my dears.  Please let me know if you have any questions, as I would be more than happy to answer them or assist in any way that I can. 

Psst - And to let you in on a little secret, I saved $65.00 on the Xyron machine I purchased.  How?  At Michaels they are $129.99...but I had a 50% off coupon!  Let me tell you, one of the best purchases I have made in quite some time.  So if you are interested in buying one, find a 40 or 50% off coupon for Michaels so that you too can save some money!


Oooh and a couple more things - these blocks would be cute to use at a bridal shower, birthday party, a game night party, etc...  They would also be cute as gifts, favors, etc...using pictures.  Also, I would include one page with smaller images of all the designs to help solve!


~ Ciao

...concept, design, styling & photography all by luna and chloe weddings

1.19.2011

~ over the moon ~

...about this fabric backdrop for either decoration, your ceremony or your photo booth.
In love with
I love this idea of piece different fabrics together for a backdrop.  It is an fairly easy DIY, and such would be such a great detail to add to your big day.  I would also love to see it behing the head table...instead of a wall, if inside.  Just find some fabulous fabric and sew together!  Or bet yet, have someone sew it together for you ;-)))


~ Ciao

...photography by corbin gurkin via style me pretty

~ who says ~

...you can't say love with charges?
Sunday Sweetness
A little chalkboard painted on the inside, and some chalk and you have a fabulous homemade DIY!  Don't you just L-O-V-E it?  Oh how cute would it be to spell out Mr. & Mrs., or with your last name spelled out!  As always, so many options ;-)


P.S. - Julia from Kentucky Bride Magazine (found online:  http://www.kentuckybridemagazine.com/ and on twitter:  @kybridemag) was so sweet to alert me that this was from their winter shoot after seeing my tweet!  The whole shoot is fantabulous, and a must see!!!  You can get a copy of the magazine, and this gorgeous shoot right here.


~ Ciao

...photography by elizabeth messina via kiss the groom

1.18.2011

~ tuesday shoesday #7: i love choo's ~

And these Jimmy Choo's will definitely add a little sparkle to your step...
Tuesday Shoesday
Just what every bride needs on her wedding day - some sparkle!


Be sure to check out these lovely blogs for more Tuesday Shoesday goodness:


~ Ciao

...image via net-a-porter

~ tuesday thought: shell filled frame centerpiece ~

Hi loves!  It's that time again.  Yep, for your Tuesday Thought.  This weekend with the weather being so nice, the dynamic duo, Aleah and Nick, of Valley & Co. (you must check out their fabulous blog) who are just so supportive and sweet, tweeted a picture from the beach.  And oh how I wished I was there. 


But it got me thinking...how could I bring a little beach to me while I am stuck inside working on projects?  And taking a look around at the disaster I had created on the back patio (normally I am pretty organized), I found just the elements I needed for a cute DIY project for you today.  This is what I created to bring a little beach into my world...
Shell-Frame-DIY-1a
And I think this shell filled frame would make darling centerpieces for a beach wedding, don't you? Or a beach inspired bridal shower!


So are you ready to get crafty with me?  If so, here is what you need for this project:
Homemade
  1. A picture frame (that has some depth to it)
  2. Shells
  3. Foam core board
  4. Rotary cutter
  5. Heavy duty tape (I used packaging tape but I forgot to put it in the picture)
  6. 3 small bottles (these are from Beverly's for $1.29 each)
  7. White sand
  8. Funnel (to get the sand into the bottles easily)
  9. Small fresh blooms
Here are some of the details...
Homemade
Using the rotary cutter, cut a piece of foam core to fit the closet edge to the back of the frame.  This will allow you space to hold the shells and bottles.  Once the piece is cut, place into the frame...
Homemade
...and then use the tape to hold it in place.  (The picture above I had to mess with the colors in order for you to see the foam core board without a huge white spot and I hadn't added the tape yet.)  Next, flip the frame over.  You will notice the space between the foam core and the top inside edge of the frame...
Homemade
...this is to hold the shells and bottles in.  Place your bottles where you would like them (you could always use a couple of glue dots to adhere them to make sure they won't tip over if the table is bumped or an earthquake happens...yes, I try and think of everything!)...
Homemade
Once the bottles are where you want them, then add the shells...
Homemade
Remove the corks if they have them, and add the sand... 
Homemade
Lastly, add the flowers and some water...
Homemade
...and viola!  A pretty centerpiece that is perfect for a beach wedding, a beach inspired bridal shower, an event or just around the house.

And you know me...there are lots of other options that I thought about...painting the frame a color, using beach glass instead of shells...play around and see what you create!

Don't forget to be sure to see my Homemade post on Thursday.  This week is the tutorial for how to make the fabulous wood block puzzles I created for my guest post on The Loveliest Day...plus I will show you another way or two on how they can be used.

~ Ciao

...concept, design, styling & photography all by luna and chloe weddings