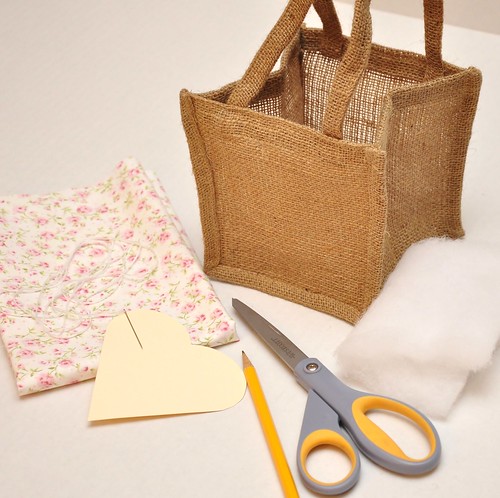
For this project you will need:
~ A burlap bag...found the at Beverly's for $2.99
~ A piece of fabric
~ A heart template
~ Pencil
~ Scissors
~ Needle
~ Embroidery thread
~Batting
The first step is to trace the heart template onto the backside of your fabric with a pencil.Cut out the heart.
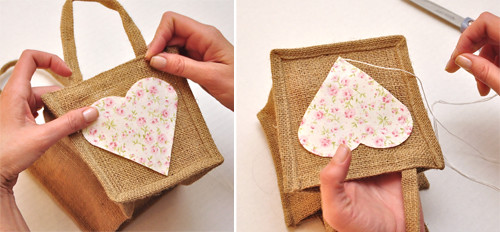
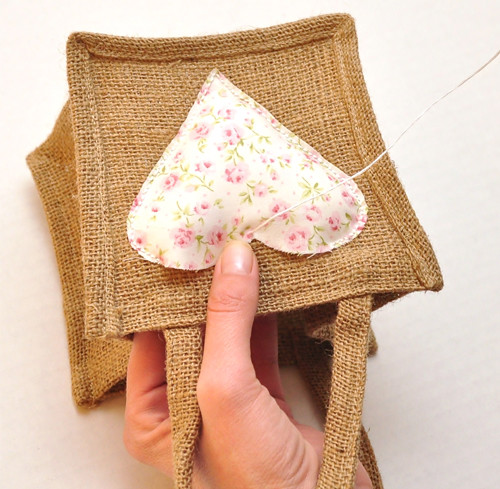
Find where you want to position the heart on the bag (starting lower is better), and starting at the point of the heart sew using a backstitch. You will want to make sure that you have a large enough knot at the end so that it doesn't pull through the burlap, and be careful not to stitch too close to the edge of the fabric.
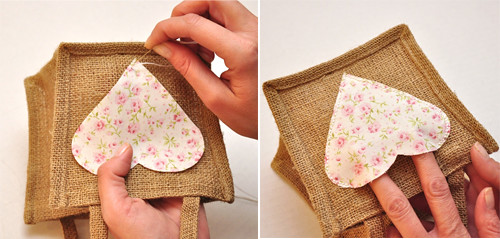
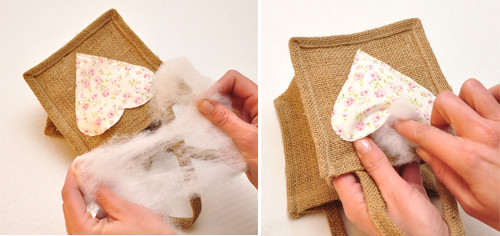
Continue stitching up one side until you start rounding the top corner of the heart then stop. Stitch up the other side of the heart to the same point. You should have an opening at the top so that you can stuff the heart with batting. ***Note: I did it this way so that you can put a tag with a name on it coming out of the heart, or a small sprig of flowers, or a love note...then I forgot and finished it without a picture of it. Oopsies.Next you will need to pull the batting apart so it is easier to work with. Working with smaller sized pieces, stuff the heart to the desired thickness.
Lastly, finish stitching the heart starting from the point where the heart meets at the top. I found that starting in the middle avoids having folds or bunching on one side of the heart and not the other.
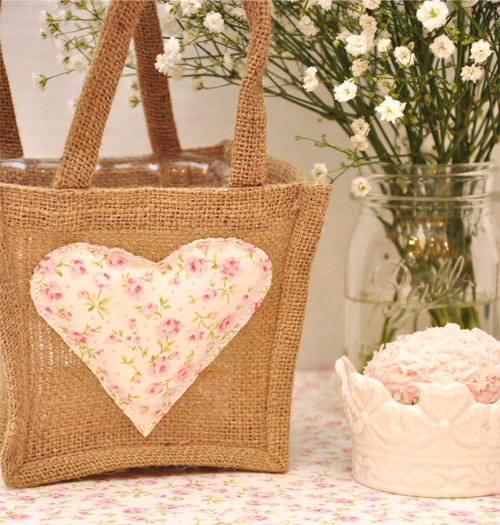
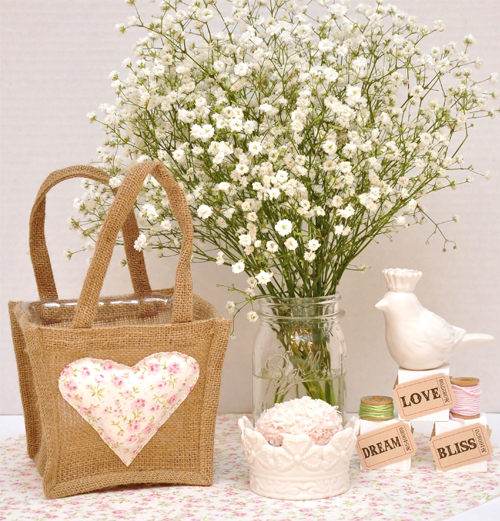
And viola!
Honestly, I really do not know how to sew that well (that is a talent that both my mom and sissy have, but not me). So if I can do this...so can you! Actually I liked the heart more when the lines weren't perfectly straight, and the stitch size were a bit different...it adds to the homemade feel, especially since it's on burlap.
What I really love about this project is that these bags can be used in so many ways! While they are the perfect size to hold cupcakes in crowns as favors, there are lots of other way to use too. Since the bags come with a plastic liner you can fill them with a variety of things...including flowers or a plant for centerpieces, to hold treats in as gift bags for guests, favor bags for a wedding or party, to give a Valentine's Day present in, to hold utensils, or (like me) to have on my desk filled with items such as pencils, scissors, etc... And just think if you changed out the fabric, or the shape of the heart...it can be used at any time of year. I am sure you will be seeing these bags in a photo shoot again!
~ Ciao
...concept, design, styling & photography all by luna and chloe weddings




These would be soooo cute as bmaid gift bags, too!
ReplyDeletethose burlap bags are precious!! filled with plants they can double up as centerpieces too!
ReplyDeleteLove those! So what do you do with all this stuff that you use for shoots? Do you just have a huge room in your home dedicated to shoots?
ReplyDeletelove it! i could just see this filled to the brim with some homemade cookies (and love the pen holder idea too!)
ReplyDeleteSuch a great DIY Kristi! Perfect for Valentine's Day. And I love the entire shoot you did with these over on Celebrations at Home...so amazing!
ReplyDeleteAbsolutely too sweet! You can fill these with so many treats !
ReplyDeletelove!
ReplyDeleteI love this!!! It's so cute and such a fun accessory!
ReplyDeletePS. Love your new website!
cute cute cute! agree with claire- the new website looks great!
ReplyDeletecreative ideas, we're loving this post.
ReplyDeleteWhat a cute idea. I can think of so many things to fill those with.
ReplyDeleteWow your guests with personalized wedding coasters.
This is so very cute, Lady!!
ReplyDeleteI love your new look.. it's perfect!! oxox