9.30.2010

~ details: floral fabric ~

I am ADORING this pretty fabric used to hang escort cards from...
Details
And for napkins at each seat...
Details
Pretty, simple and gorgeous I think! 

~ Ciao

~ homemade: table numbers part II ~

Okay so here we go with part II...I love, love, love this! 

Project #3
For this project I used a wood round, a drill press, a number that I printed out and cut out, and an embroidery needle and some thread.  First I printed out #and an 8 onto paper, and then cut them out.  I then placed them on the wood and used a push pin to mark spots into the wood every so often.  Next I used a pencil to make the pin marks darker and more visible to see.  (I forgot to take pics of these steps...blonde moment I think...but if you'd like leave a comment and I can send you step by step instructions.) And then Mr. Big went across the street to Bob's to use his drill press - be safe here! 
DSC_0800
We don't have a drill press (yet), but I am sure that someone you know does...dad, brother, uncle, guy across the street or friend and would be willing to help out or let you use it. Anyway, this is what it looks like with the holes drilled in... 
DSC_0807
I placed the # and 8 higher on the wood to leave room at the bottom to style.  Finally, I used a large needle and some thread and stiched the holes so it looked like this...
DSC_0148
How cute are the gingham rosettes I made?  Love them...
DSC_0152
But then I started thinking...I have to style them differently, becuase there are so many ways to do so...and this is what I came up with...
DSC_0168
DSC_0199 
How cute are those mini olive oils and balsamic vinegar bottles?  Found them at Cost Plus, and love them...
DSC_0179
DSC_0160
The dirt patch in the back of this last picture is where the fountain is going...oooohh can't wait!!!  And I HAD to include this last picture for Chris at Postcards and Pretties, just love her and her amazing blog...
DSC_0215
Told you I'd share!!  Now I'm hungry for some bread, aren't you?  Well, I have one more project and then you (and I) can go grab some!

Project #4
This final project is like the one above, but I wanted to show you that with a little imagination, a drill press and some colored thread you can create some wonderful things!  Here is one I that I saw that I loved...
DSC_0255
DSC_0227
To create the owl I just used an image I liked and then created my own outline on a piece of paper.  I placed the outline on top of the wood and used the pushpin to mark spots every so often.  And again went back over with a pencil to make the spots easy for Mr. Big to see while he was drilling. I kept the colors fallish...but would be sooo cute with brighter colors too!

I think these would be adorable instead of using table numbers...I would have an owl table, a squirrel, an acorn, a deer, some fall leaves...just use the same animal outline on the escort cards!

But how cute would they be with bride and groom printed on them and hung on the back of their chairs.  Or with initials, date, words, etc...  Go on, get creative!!!

Finally...that's all folks!

~ Ciao

...photography by me

~ homemade: table numbers part I ~

Hello darlings!  Are you ready for Thursday's homemade project?  I hope so!  This week I have a couple different ways that you could make table numbers all using wood rounds.  And I will be splitting them between two posts.  In this post I will show you two fairly simple ways, and in the next post I will show you two more ways that are a little more difficult.  So lets get started shall we?

Project #1
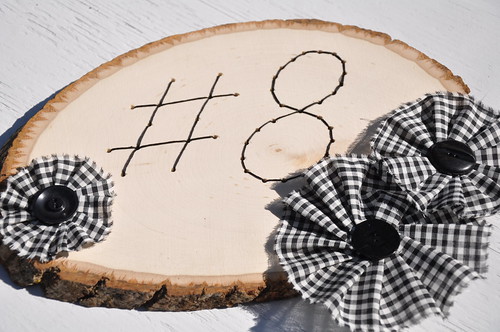
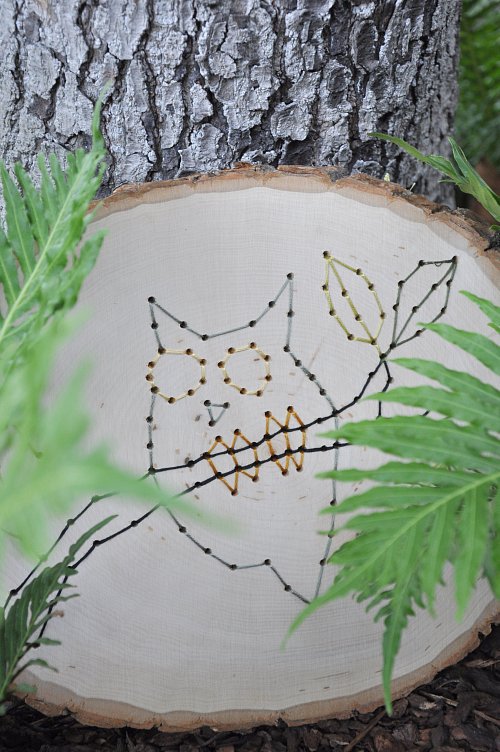
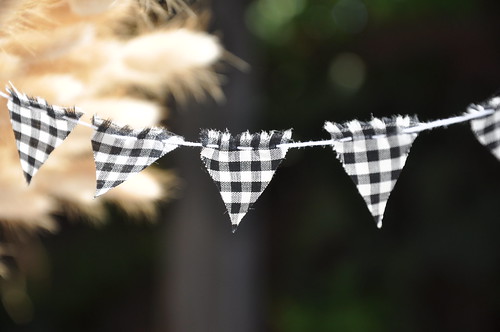
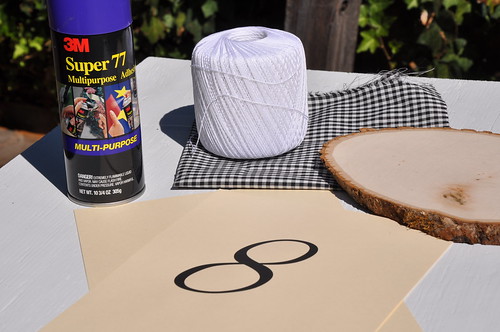
For the first project I used spray adhesive, a number printed on cardstock, gingham fabric, and some thread...
DSC_0810
I applied spray adhesive to a blank piece of cardstock, and then placed the fabric on top.  Next I cut out the number...  
DSC_0812
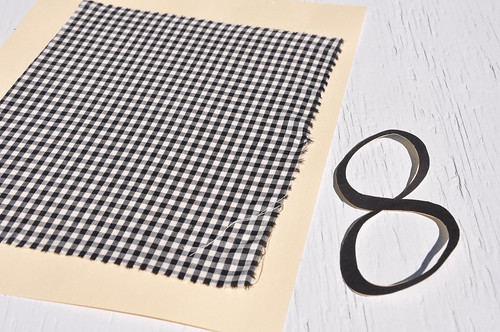
I flipped the cardstock with fabric over, and traced the number onto the back..making sure to flip the number over as well, otherwise it will be backwards!  Then I cutout it out.  The reason for the fabric on cardstock is that it makes the fabric easier to cut cleanly and adds some stiffness to the number.  Next I threaded the thread through a couple of triangle pieces I cut from the gingham...
DSC_0817
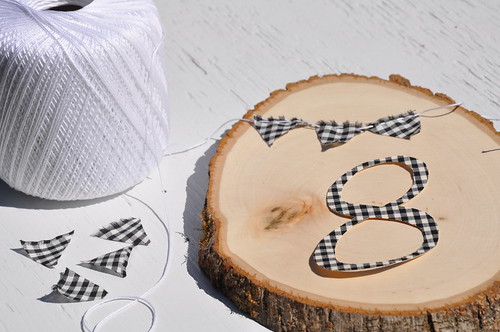
For the fabric number to stick to the wood, I just used some spray adhesive.  Yet, for the bunting I didn't want the little flags stuck in place so I used some tape on the backside to hold in place.  Here is the final product...
DSC_0045
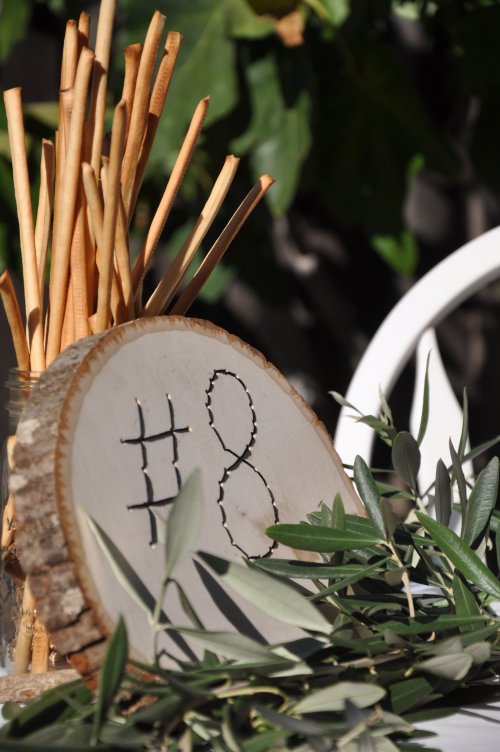
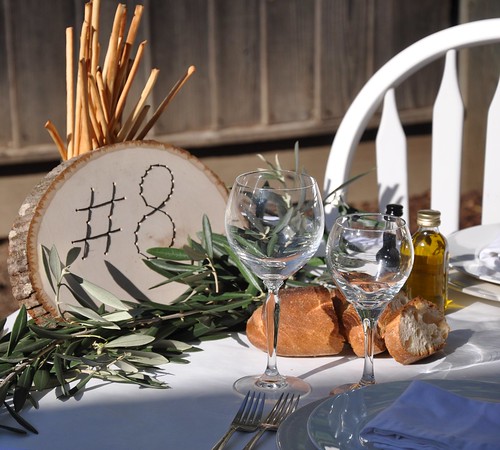
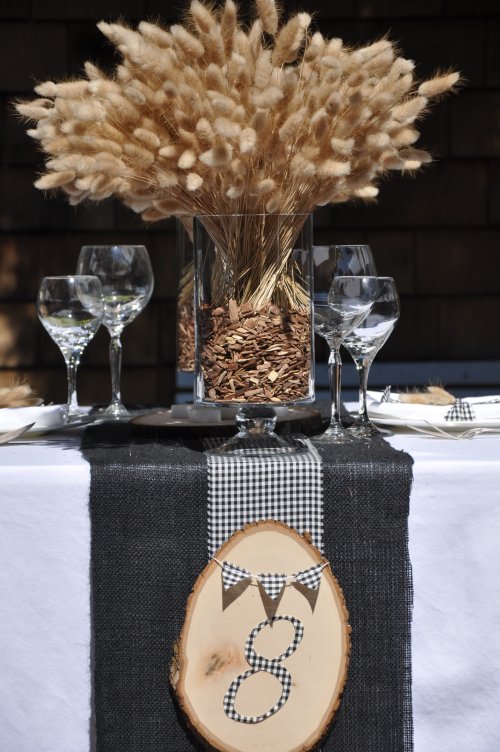
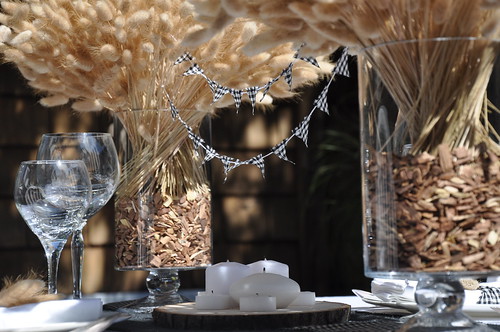
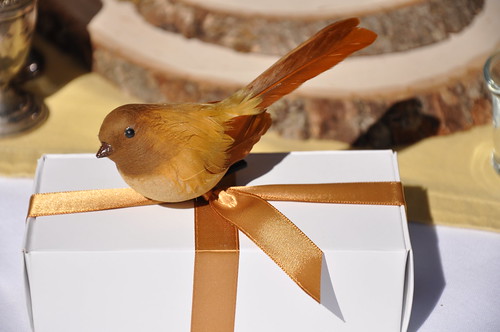
And you know I had to do some tabletop decorating...
DSC_0098
Do you think I could have cut the burlap straight?  Nope!  Anyway, the fluffies have made a comeback...they were better behaved this time around...
DSC_0073
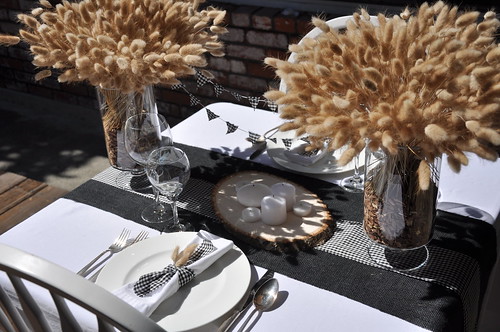
I thought it would be cute to use the bunting on the table too!  I just attached the ends to sticks inside the fluffies.  And of course, those are wood chips for a grill in the bottom of the jars...you've seen me use those before.
DSC_0049
Oh you know I love things that hang...
DSC_0055
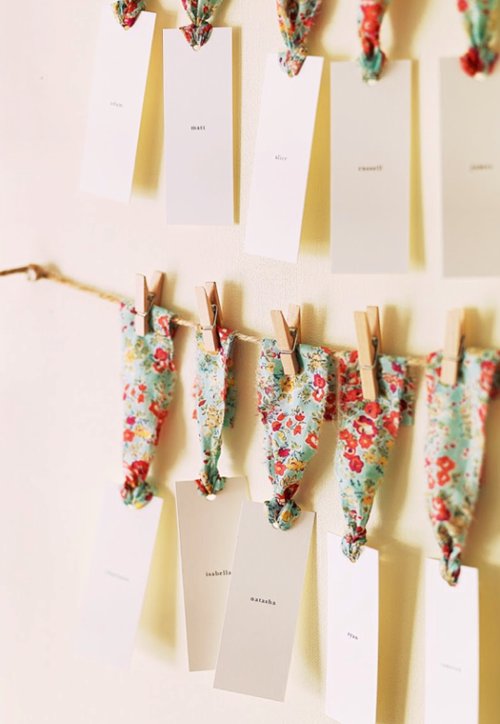
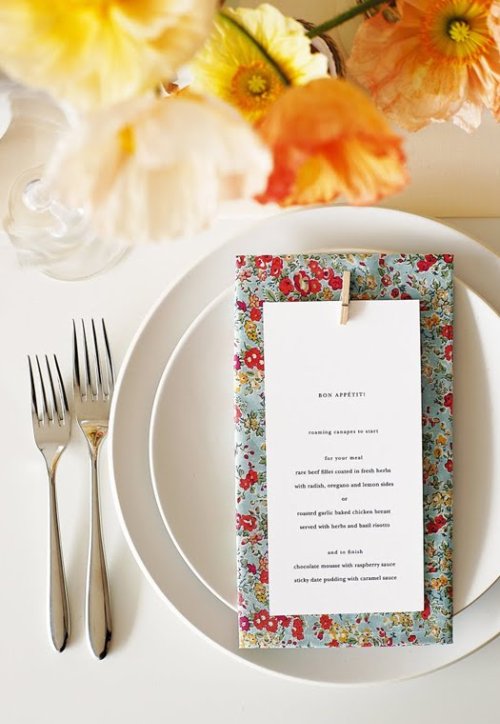
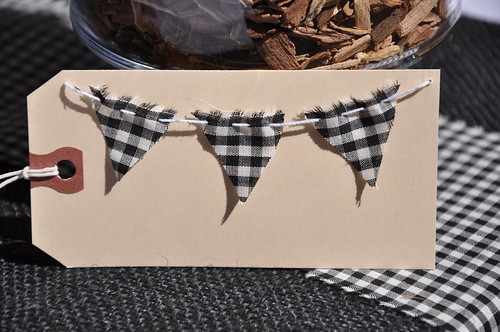
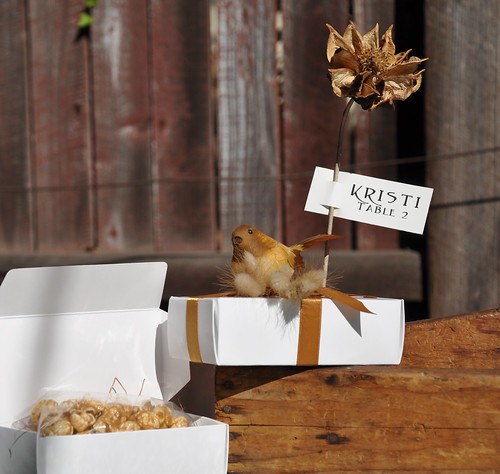
Believe it or not, I sat in the chairs to make sure the bunting wasn't in the way of seeing the guest across the table!  Just something to keep in mind.  Plus as an added little bonus, I thought it would be cute to carry the bunting onto seating cards as well...just write the names on the cards and you're done...
DSC_0080
Alrighty...on to the next project!

Project #2
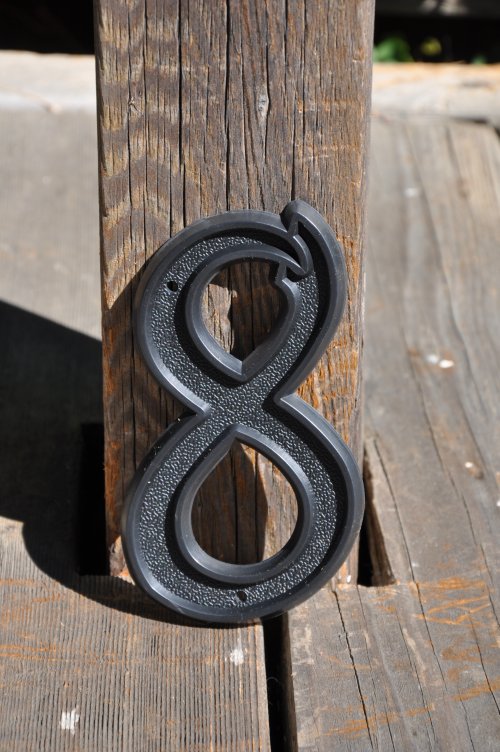
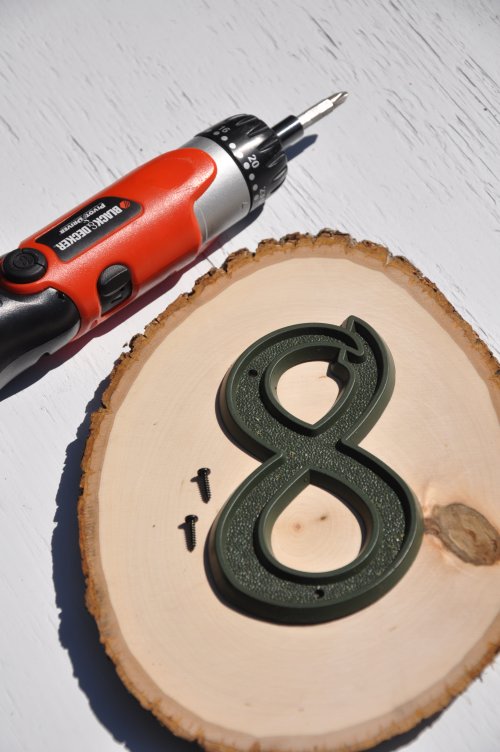
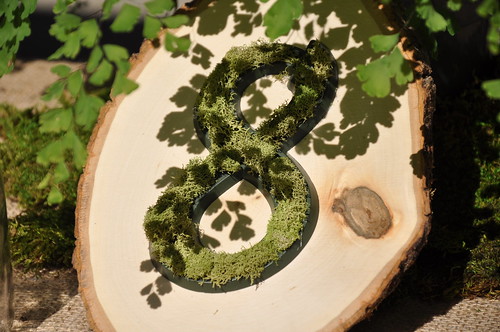
For this project I used a plastic house number from Home Depot for $1.89, spray paint and some moss.  I chose this plastic number because it has the perfect spot to place the moss in...
DSC_0783
I spray painted the number a moss green color and then screwed the number into the wood round...
DSC_0102
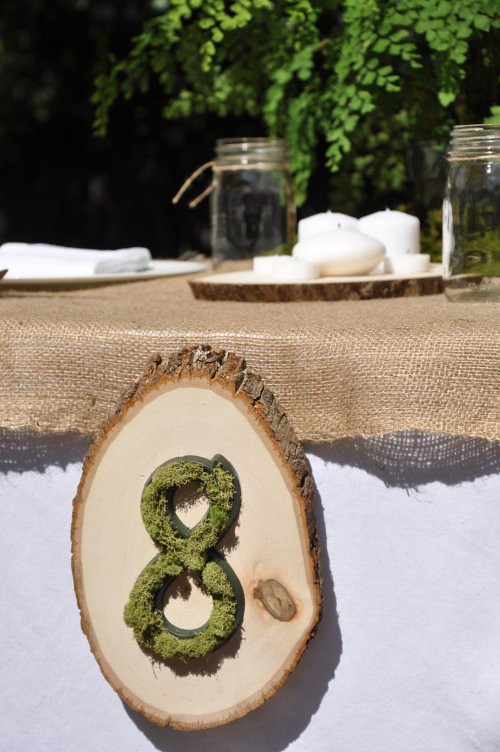
I then hot glued the moss into the grooves.  Pretty easy, no?  Here is the final product...
DSC_0115
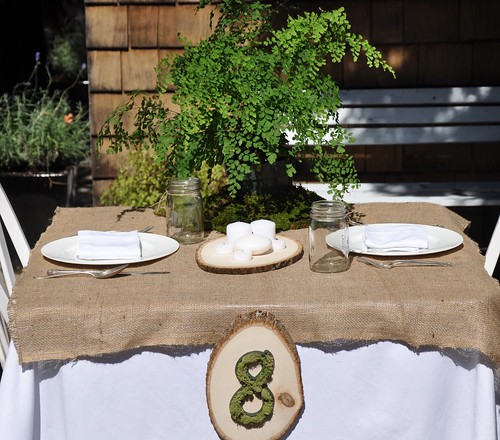
***Note:  I made the MISTAKE of leaving the moss number out in the sun for a couple days...and with 100 degree temps, it dried out and faded somewhat.  So it doesn't look as great as it did the day I made it.  So if you do something like this...keep in the shade until the big day!  Also, I know I am showing you this second, but it was the last photo shoot I did and I was running out of time, so the styling is simple...
DSC_0103
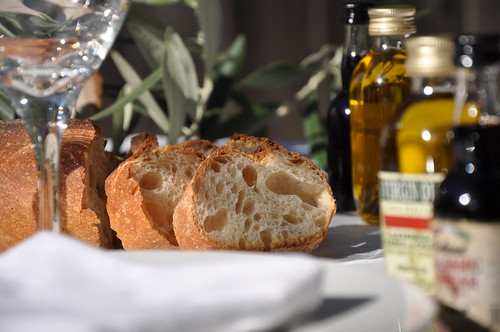
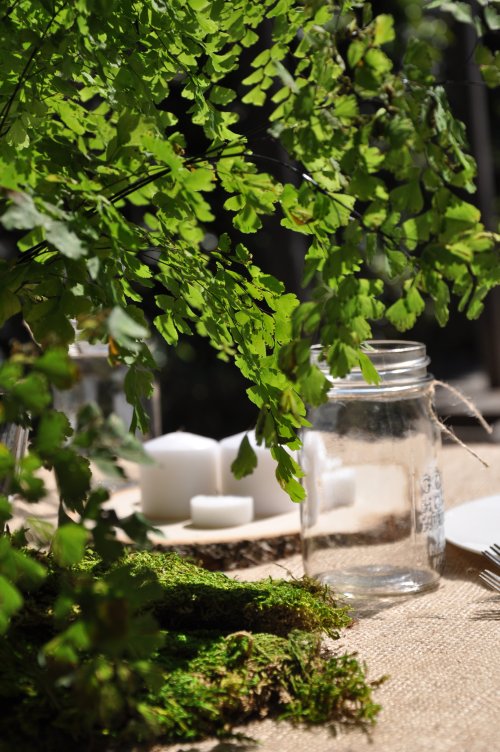
But the colors on the table sure do look pretty...
DSC_0121
DSC_0123
And as another option, you could always place the numbers on the table...
DSC_0137
Whew...you still with me?  Stay tuned for part II - promise it isn't as big as this post!

~ Ciao

...photography by me

9.29.2010

~ who says ~

...you can't hang teacups from a tree as decor!
alifield_2791
Wedding
I think they look spectacular (even though I would probably use ribbon)!  Love it, don't you?

~ Ciao

...photography by angela kohler

9.28.2010

~ tuesday thought: twinkle toes ~

I can't really believe that I am posting this!  I will post...as long as no one makes fun of my feet.  I have LARGE feet - they measure a size 11, but because they are narrow I wear a 10 most of the time.  Also having the second toe longer than the first is supposedly a sign of intelligence...not saying that I am super smart or anything! 

Okay, now on to what I am trying to tell you.  I have, yes I admit it, been getting the same pedicure for 8 years!  Yes, I said same and 8 years.  The thing is that I get compliments on my toes ALL the time!  So here is your Tuesday Thought:  Get a french pedicure with some bling for your big day (or just cause you deserve it!)...
Twinkle Toes
The addition of little crystals just below the white tip makes your tootsies sparkle (without being overdone or gaudy...classic, sophisticated with a little fun is how I think of them) when the light hits just right!  I obviously love the way it looks, and since I just got a pedicure yesterday (on my play day) I figured now would probably be the best time to show you!  I know, pretty brave of me to put a picture of my long toes up on the web!  At least that is what I am telling myself in order to get through this post!  I am hoping that my AMAZING black patent Burberry's (a Christmas present from Mr. Big last year) make up for my funny looking feet!  Here these babies are...
DSC_0025
DSC_0018
Pretty fabulous (the shoes that is), no?  Well maybe if I wasn't leaning forward so much making my feet look all wrinkled and trying not to sink in the grass!  But these little jewels have a platform and 5 inch heels...making me about 6'2" in them...yes, the taller the better in my book.  Anyhoo, give the french pedi with bling a try (if you haven't already)...guaranteed you will LOVE it!

~ Ciao

...photography by my Mr. Big  

~ two: perfect purple details ~

Two
Details
Stunning hydrangea that would look fabulous grouped together for a simple bouquet/centerpiece, or purple bottles lining the tables with simple white blooms - perfection!

P.S. - Sorry for a late post today...such a crazy, busy day!  I will be back later tonight with another post...see you then!

~ Ciao

...images via vintage rose garden

9.27.2010

~ guest post: postcards & pretties ~

Hi there!! I’m Chris from Postcards & Pretties and I am so delighted to be guest posting on Luna & Chloe Weddings. Today I want to share with you an autumn inspired wedding board with a warm color palette of plums and honey. Velvet used throughout the wedding adds richness and texture to the centerpieces and décor and don’t forget a lightweight cardigan to keep the chilly autumn air away. 
{season} autumn
{colors} plum, blush and honeycomb
{photos} bridesmaid dresses {martha stewart weddings} honey mascarpone creme cake {martha stewart weddings} velvet ribbon {country living} shoes {jessica clair} chair garland {project wedding} plums {country living} velvet table numbers {martha stewart weddings} honey {sweet paul} cardigan bride {frenchie & flea}
postcards and pretties logo
~ blog ~       ~ twitter ~       ~ facebook ~

9.24.2010

~ happy weekend & a special treat ~

Hello my dears!  I hope that everyone has a fabulous weekend.  Me, I plan on getting a couple things accomplished this weekend...but I am taking Monday off just for me!  I plan on sleeping in...
Misc.
Getting a mani and a pedi, doing some shopping, enjoying a nice lunch outside, and then taking a little nap...
Misc.
Sounds heavenly doesn't it?  Ooooh, I can't wait.

However, I do have a super special treat for you...the lovely and sweet Chris from Postcards & Pretties is guest posting for me!!  I can't wait for you to see the fabulous fall inspiration she has created!  So I know you are in amazing hands on Monday!  I'll be back on Tuesday refreshed and ready to blog, blog, blog!!

~ Ciao

...images via stylist twig hutchinson

~ fall on a stick ~

I adore these candied lady apples...
Dessert
Don't they look delicious?  I adore lady apples for a couple of reasons.  First, they are truly an heirloom - of all the known apple varieties, the lady apple is apparently the oldest; and second, their small size!  It is their small size that makes them perfect for either a sweet treat at a fete, or as favors for your guests to take home and enjoy. 

If used as a favor, I would attach a little tag with a reference that they are an heirloom...the first of many that the two of you hope to pass down!  Cute, no? 

Here is the recipe (from cannelle et vanille):

~ Candied Lady Apples ~
adapted from Martha Stewart

2 cups sugar
1 cup water
3/4 cup corn syrup
10 lady apples

Remove the stems from the apples and insert a wooden skewer in each one.
Mix the sugar, water and corn syrup in a medium saucepan and bring to a boil. Cook to a very light caramel (barely any color) to about 315F. 

~ Ciao

...image and recipe via cannelle et vanille

9.23.2010

~ homemade: fall inspired part II ~

So here we go with part II (if you missed part I you can see it here), as I had a couple more ideas for you that I wanted to share.  First off...favors.  Check out how cute this is...
DSC_0387
A plain white favor box, tied with a ribbon and topped with a little bird! 
Homemade
DSC_0370
They look adorable on the table at each seat...
Homemade
But they also look cute on their own (with a couple sprigs added)...
Homemade
And filled with peanut brittle...
DSC_0422
Or caramel corn... 
DSC_0426
I think they make a sweet fall treat!  And you know me...I had to include a place card...
Homemade
And an escort card...
Homemade
Finally, one last picture for you...
Homemade
I sure hope you enjoyed my homemade fall inspired photo shoot today.  I am already planning next Thursday's homemade project...can't wait for this one!

~ Ciao

...photography by me