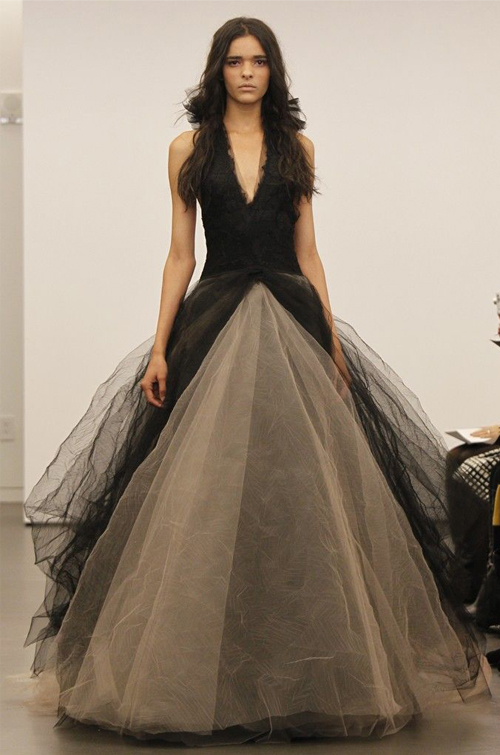
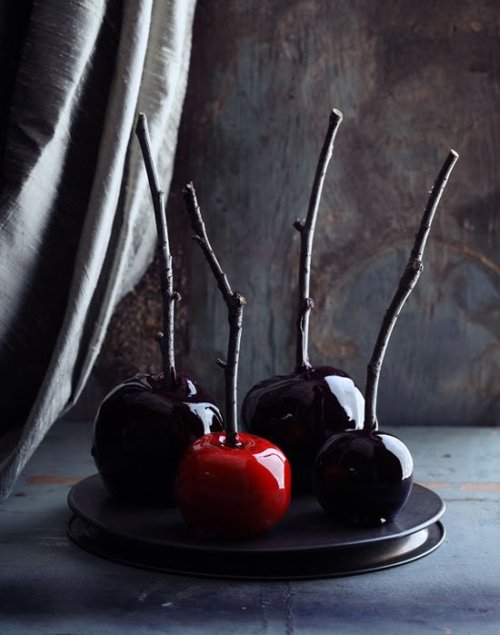
Hi there lovelies! Continuing on with all things Halloween...I couldn't help but think that this dress would be PERFECT for Halloween...
Oh yes, love the dark side...hehe. And you know what, black or not, I LOVE, LOVE, LOVE this dress especially the neckline! And I LOVE it that much that it just made itself onto my all time fave list ;-)
P.S. - How perfect is it with the flowers I posted earlier?
~ Ciao
...images via onewed
Showing posts with label Black. Show all posts
10.31.2011
Flowers of the Week: 10.31.11
HAPPY HALLOWEEN my little darlings!
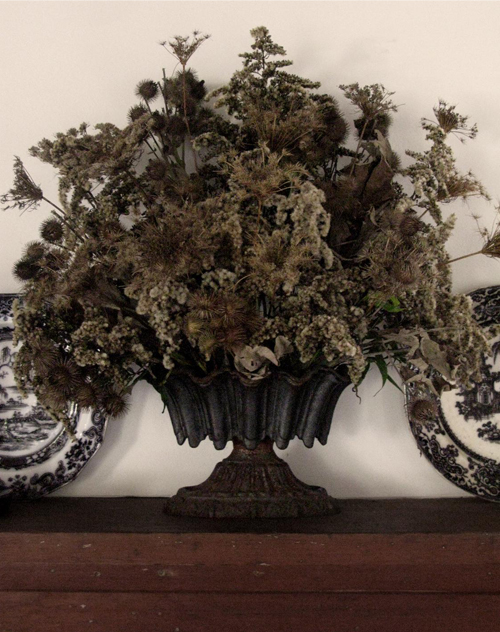
Of course, since today is Halloween, I just couldn't resist going to the dark side for this week's 'Flowers of the Week'...so have a look-see at this arrangement...
Perfect for today, no? Wishing you a wonderful Halloween darlings. I hope it's filled with lots of treats ;-)
~ Ciao
...image via eddie ross
10.20.2011
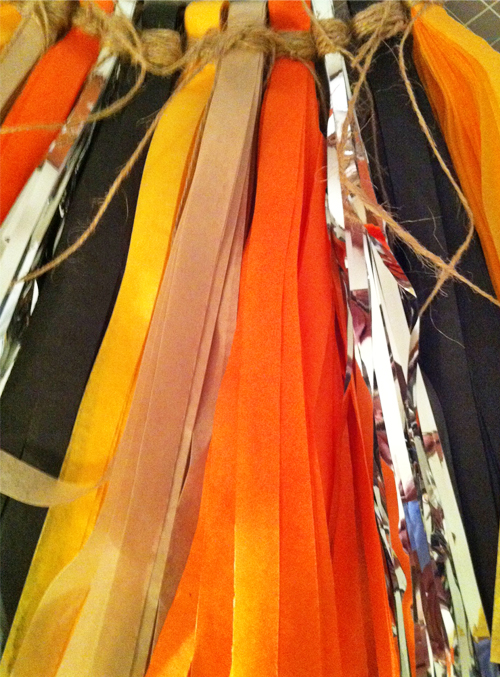
Handcrafted: Halloween Pom Pom Tassel Garland
Hi loves. I just wanted to share these with you really quick, as I made these darling pom poms for a photographer for Halloween pictures...
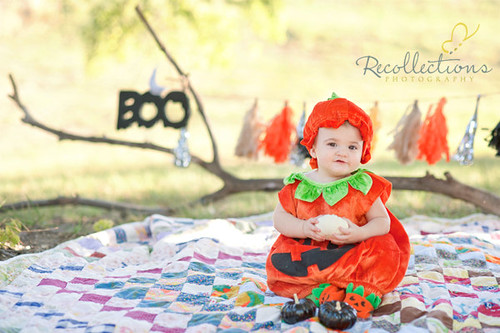
And just check out the picture the fabulous Tori of Recollections Photography sent me....
Soooooo D-A-R-L-I-N-G!!! And my tassels look pretty cute too, no?
THANK YOU TORI at Recollections Photography sooo much for sharing with me ;-) And be sure to check out all of Tori's goregous pictures on her blog!!!
~ Ciao
...photography by over the moon vintage rentals & recollections photography
And just check out the picture the fabulous Tori of Recollections Photography sent me....
Soooooo D-A-R-L-I-N-G!!! And my tassels look pretty cute too, no?
THANK YOU TORI at Recollections Photography sooo much for sharing with me ;-) And be sure to check out all of Tori's goregous pictures on her blog!!!
~ Ciao
...photography by over the moon vintage rentals & recollections photography
Labels:
Black,
Halloween,
Handcrafted,
Hotel Silver,
Orange,
Tan
10.17.2011
LCW Style: Fall Fashion
Well we can't do a Fall Week without some Fall fashion, now can we? So I figured why not start with the little ones!?! No not children, puppies...or dogs if you like. Tell me that this bow tie wouldn't be darling for your little fella...
Oh my goodness - just look at that face! He's like - Mom, not again...I'm tired of smiling! And that face and the bow tie...I am dying of cuteness over here ;-) So many other cute choices over at Happy Dog Clothes on Etsy. Hey, we can't forget man's best friend now can we...hehe.
~ Ciao
...image via happy dog clothes
Oh my goodness - just look at that face! He's like - Mom, not again...I'm tired of smiling! And that face and the bow tie...I am dying of cuteness over here ;-) So many other cute choices over at Happy Dog Clothes on Etsy. Hey, we can't forget man's best friend now can we...hehe.
~ Ciao
...image via happy dog clothes
8.30.2011
Tuesday Shoesday #38: On the Diagonal
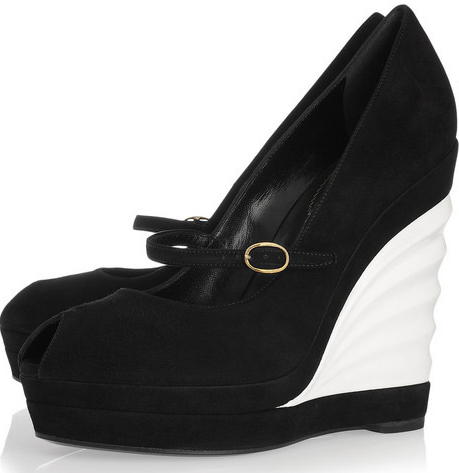
In Yves Saint Laurent's black and white suede and patent leather wedges...
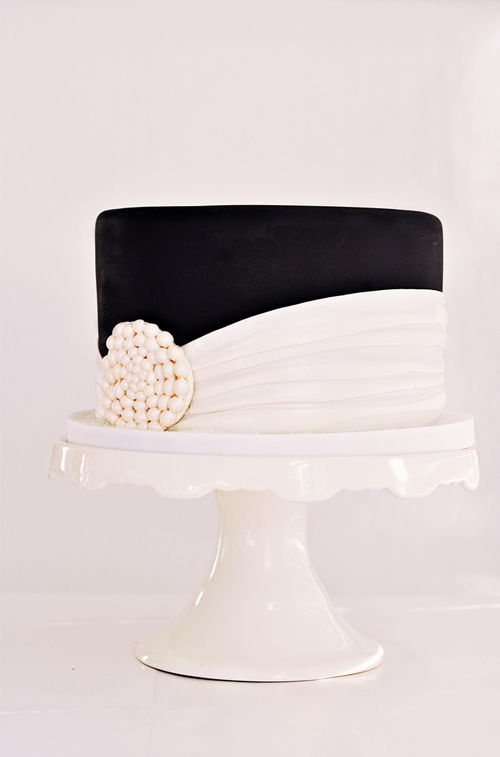
And with this black and white cake by Sweetapolita...
Eeks ~ how fabulous is this match up today my dears? I love how the wedges are a mary jane...which adds a vintage vibe, yet they are still kind of modern. As with the cake, it's the pearl detail that gives it a vintagey vibe. And did you notice how the white on the shoes, pairs up perfectly with the white on the cake? A match made in shoe/cake heaven, no?
~ Ciao
...images via net-a-porter & sweetapolita
And with this black and white cake by Sweetapolita...
Eeks ~ how fabulous is this match up today my dears? I love how the wedges are a mary jane...which adds a vintage vibe, yet they are still kind of modern. As with the cake, it's the pearl detail that gives it a vintagey vibe. And did you notice how the white on the shoes, pairs up perfectly with the white on the cake? A match made in shoe/cake heaven, no?
Be sure to check out these lovely blogs for more Tuesday Shoesday goodness:
~ Postcards & Pretties ~ Brancoprata ~ Life in the Superburbs ~ Magnolia Rouge ~ Landlocked Bride ~ The Demosielle ~ Swatchbook Weddings ~ A Realistic Wedding ~ Merci New York ~
~ Ciao
...images via net-a-porter & sweetapolita
Labels:
Black,
Cake,
Details,
Tuesday Shoesday,
Wedge,
White,
Yves Saint Laurent
7.11.2011
Flowers of the Week: 7.11.11
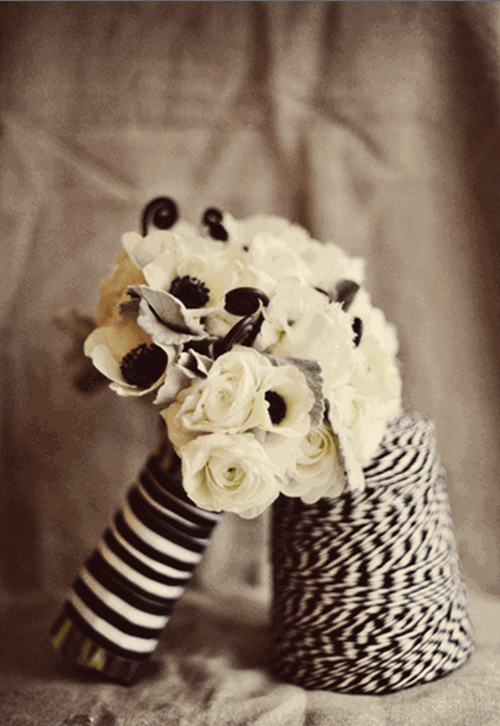
Black and white done oh so right...
Not too often do I see a black and white bouquet that I love...however, this one I DO!!! How about you?
Happy Monday loves. Looking forward to another great week her at LCW...hope yours is great as well.
~ Ciao
...image via w wedding flowers
Not too often do I see a black and white bouquet that I love...however, this one I DO!!! How about you?
Happy Monday loves. Looking forward to another great week her at LCW...hope yours is great as well.
~ Ciao
...image via w wedding flowers
5.24.2011
Tuesday Shoesday #25: Embellished
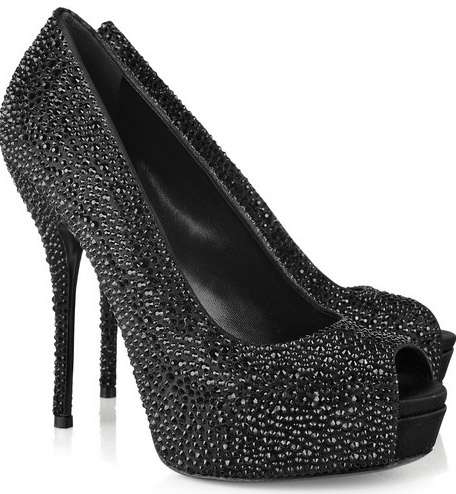
A handful of weeks ago I wanted to be enmeshed, so I figured why not be embellished this week...in these Gucci crystal-embellished silk-satin peep-toes...
Oh yes, embellish me!
Be sure to check out these lovely blogs for more Tuesday Shoesday goodness:
~ Postcards & Pretties ~ Brancoprata ~ Life in the Superburbs ~ Magnolia Rouge ~ Landlocked Bride ~ The Demosielle ~ Swatchbook Weddings ~ A Realistic Wedding ~ Merci New York ~
~ Ciao
...image via net-a-porter
Labels:
Black,
Crystal Embellished,
Gucci,
Peep Toes,
Platform,
Satin,
Silk,
Tuesday Shoesday
2.16.2011
The Blackest Forest
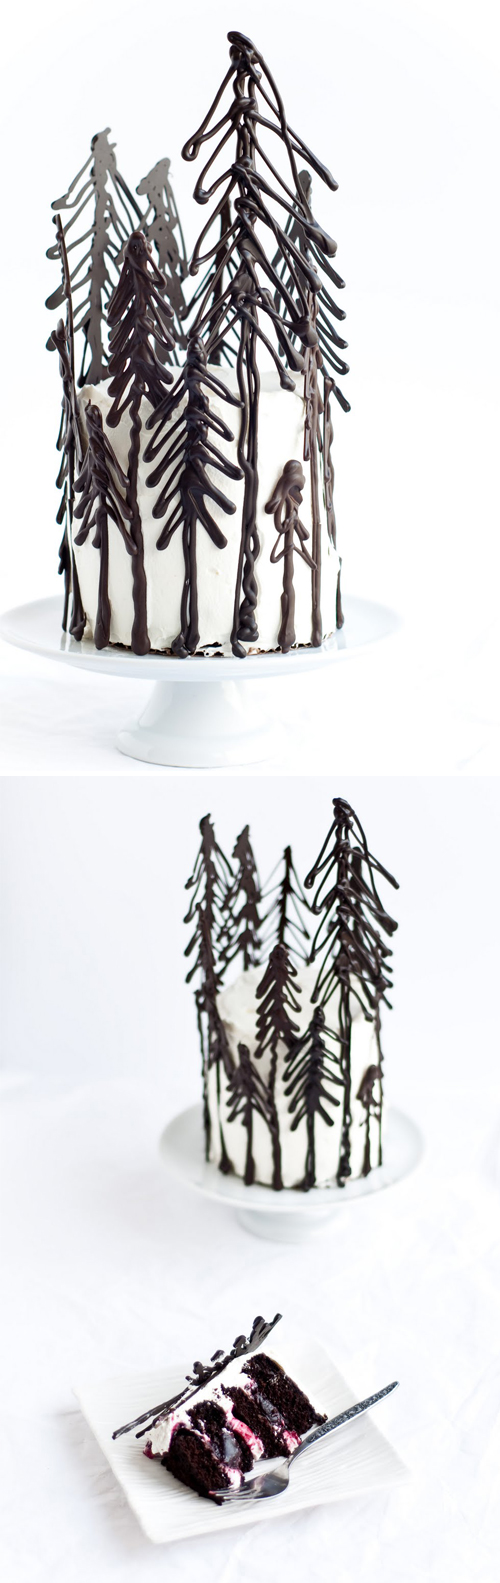
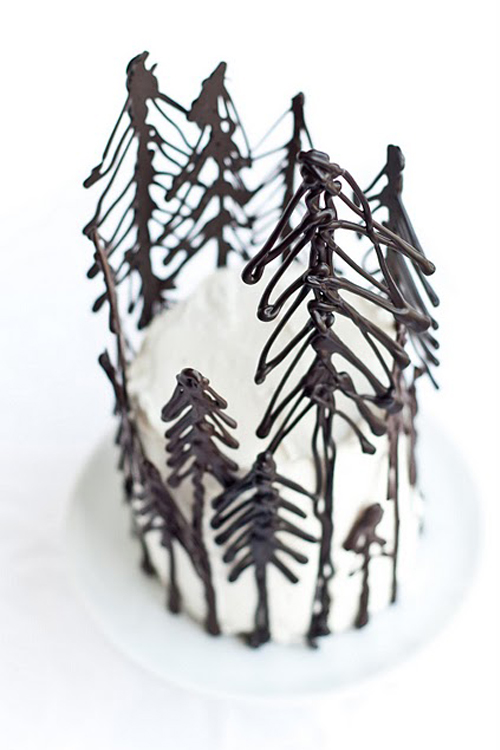
...Gateau that is, is what I am craving today! Just have a look-see, and I am sure you will be too...
Ummm, tell me this doesn't look delicious? And seriously, could it be anymore fabulous? The chocolate trees are just amazing and a detail that I love. And with ingredients of black cocoa and chocolate ganache how could it not taste yummy? I can see why it received 173 comments, as the presentation alone is perfection! Oh how I would LOVE to see this cake at a wedding!
And if you feel inclined to make this yourself, just click here for the recipe.
P.S. - I have a feeling you might be seeing those chocolate trees again sometime :-)
~ Ciao
...image via desserts for breakfast
Ummm, tell me this doesn't look delicious? And seriously, could it be anymore fabulous? The chocolate trees are just amazing and a detail that I love. And with ingredients of black cocoa and chocolate ganache how could it not taste yummy? I can see why it received 173 comments, as the presentation alone is perfection! Oh how I would LOVE to see this cake at a wedding!
And if you feel inclined to make this yourself, just click here for the recipe.
P.S. - I have a feeling you might be seeing those chocolate trees again sometime :-)
~ Ciao
...image via desserts for breakfast
1.04.2011
~ tuesday thought: black lace ~
Good Morning lovely readers! Hope you are well this morning. Me = exhausted...but a good exhausted! I am working on two guest post photo shoots, on top of this one for today, and my Homemade post for Thursday...so running on low fuel. Please bear with me and my sparse table decor! Even Mr. Big said: "Isn't it kind of sparse?" (in the sweetest possible way!) I said yes, but I have to much to do and need some sleep. And I know you will forgive me ;-)
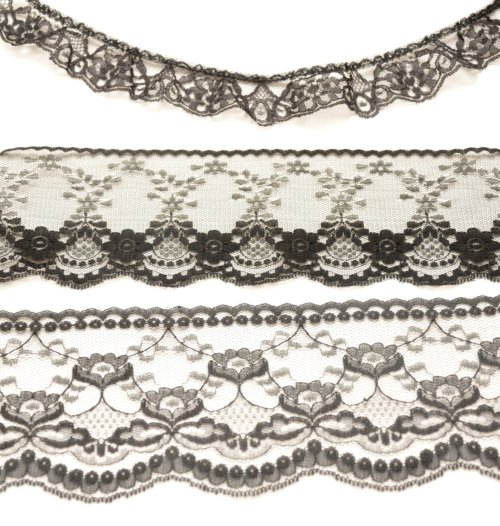
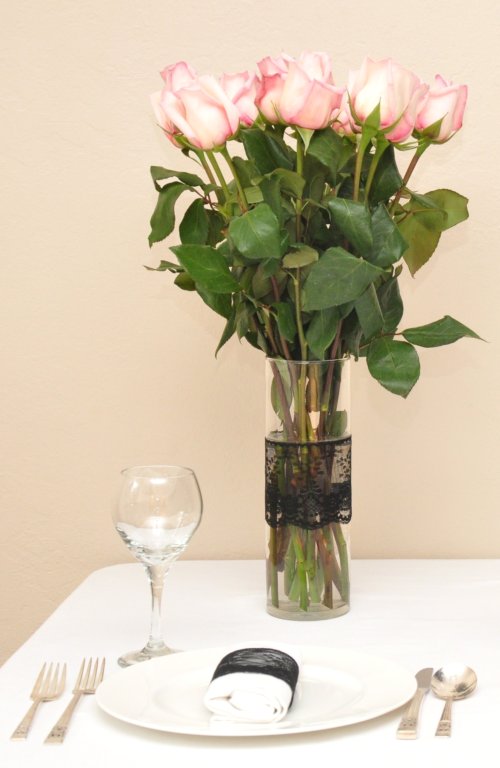
So for the first Tuesday Thought of the year, I thought I would play off of one of my previous posts. Do you remember the cake plate edged in black lace? Click here to see. Anyway, I've been playing with that lace a little bit and thought of some other ways in which to use. Here are the three types of black lace I used (sorry for the bad picture)...
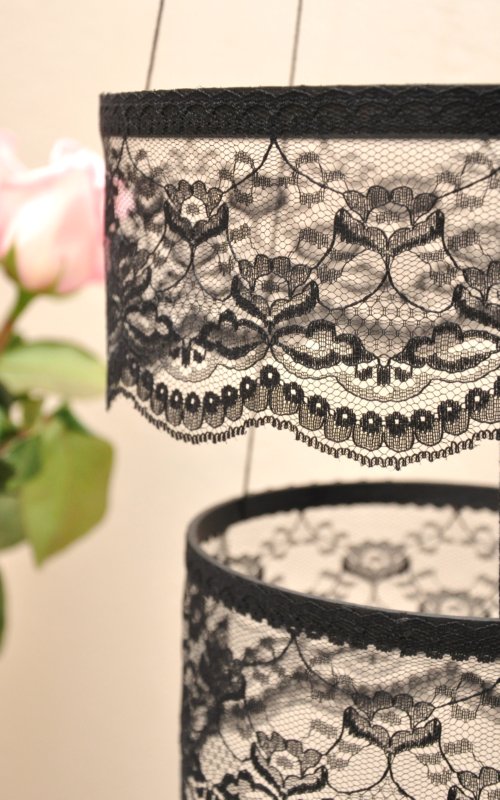
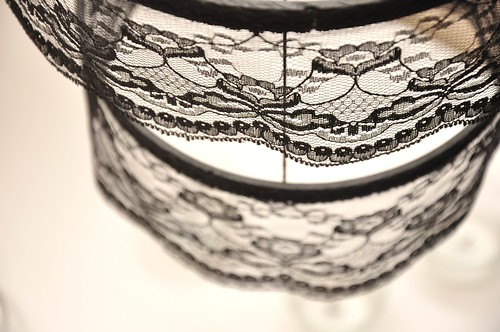
I used the wider lace for all projects, except the rosettes. So let's have a look-see and see what I came up with. First up, I made a very SIMPLE lace chandelier.
~ Ciao
So for the first Tuesday Thought of the year, I thought I would play off of one of my previous posts. Do you remember the cake plate edged in black lace? Click here to see. Anyway, I've been playing with that lace a little bit and thought of some other ways in which to use. Here are the three types of black lace I used (sorry for the bad picture)...
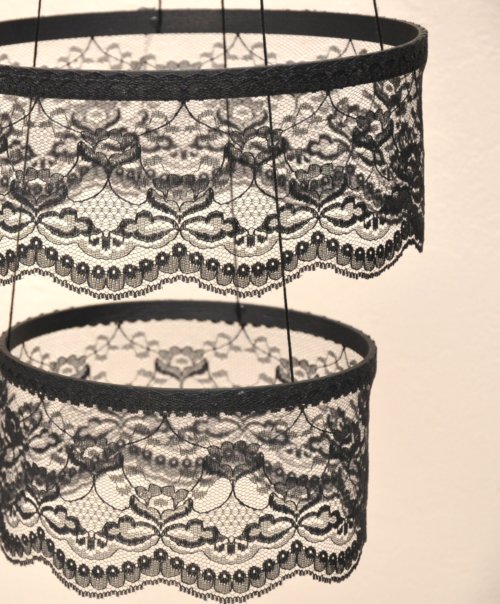
I used the wider lace for all projects, except the rosettes. So let's have a look-see and see what I came up with. First up, I made a very SIMPLE lace chandelier.
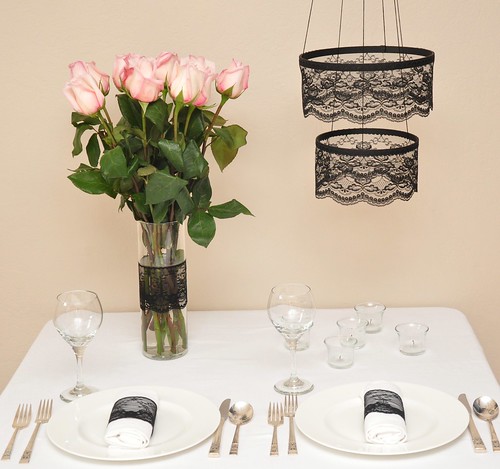
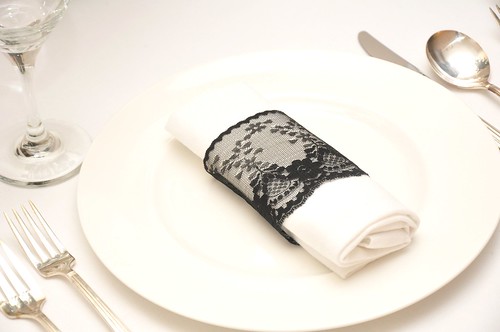
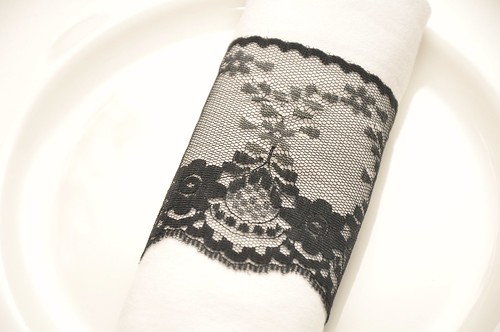
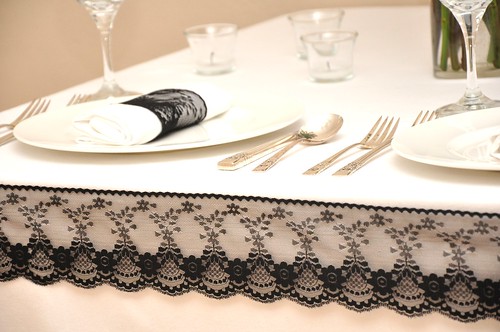
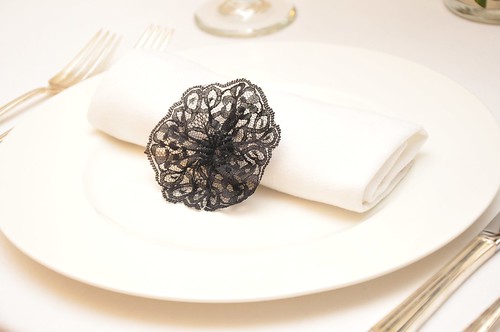
Yes, simple in the fact that all I used was two embroidery hoops(inside pieces only), spray painted them black, attached the lace using glue dots (the BEST thing ever...the key to use them is to roll your finger over them), and glue to attach the black string! It really looks darling in person, but it's one of those things I have a hard time getting a great picture of. A couple of other very simple was to use are wrapped around a napkin...
I love how the wider piece of lace looks, don't you? Also, you could use it wrapped around a vase...
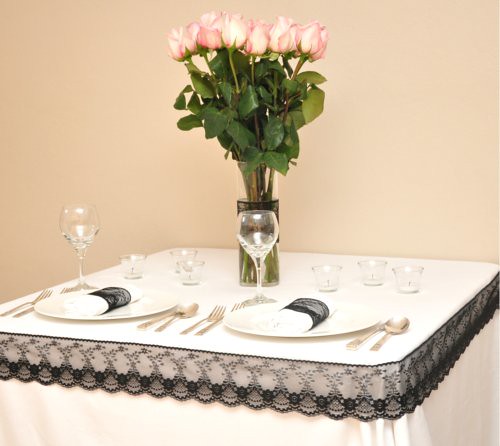
Or wrapped around the edge of the table...
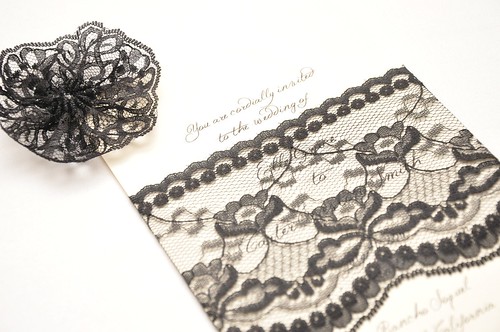
Or wrapped around an invitation...
I love it made into rosettes with a needle and thread...
And as an added little bonus, I wrapped it around a wine glass and adhered the lace on the back with a glue dot...but used cream so you can see that it looks different, but still pretty.
Oh and I can't forget the pink roses Mr. Big gave to me...
Not only are they gorgeous, they smell heavenly. (Thanks honey!) This is exactly how I found them when I came home. I didn't want to mess with his arrangement of them - so cute!
Well, there you have it my dears - a couple ways to incorporate black (or other colored) lace at your wedding or event. There are handfuls of other ways to use, but just wanted to give you a couple today! Hope you enjoyed this first Tuesday Thought of the year. Have a lovely day!
Not only are they gorgeous, they smell heavenly. (Thanks honey!) This is exactly how I found them when I came home. I didn't want to mess with his arrangement of them - so cute!
Well, there you have it my dears - a couple ways to incorporate black (or other colored) lace at your wedding or event. There are handfuls of other ways to use, but just wanted to give you a couple today! Hope you enjoyed this first Tuesday Thought of the year. Have a lovely day!
~ Ciao
...concept, design, styling & photography all by luna and chloe weddings
Labels:
Black,
Chandelier,
Details,
Lace,
Napkin Decorations,
Rosettes,
Tuesday Thought
12.03.2010
~ in love with ~
...the details and decor!
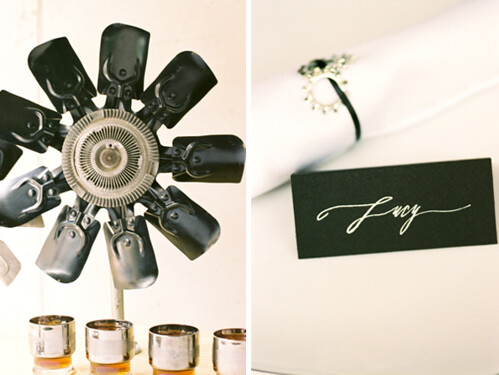
You know I am DYING over that fan! And I adore the white calligraphy.
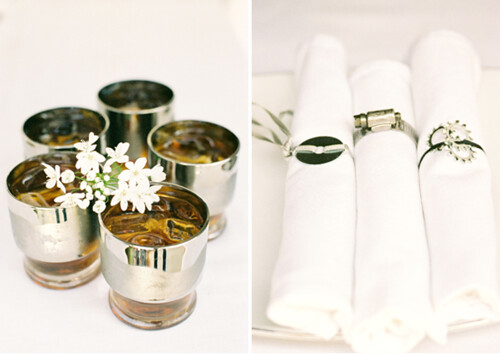
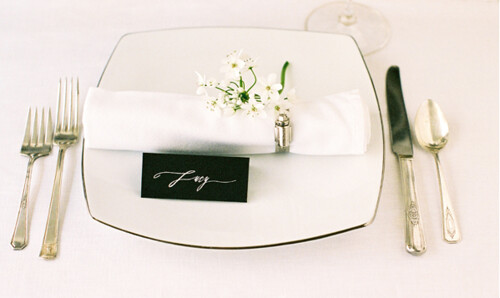
Simply stunning, no? Ooooh I just love, love, love it!
~ Ciao
...images via once wed
11.16.2010
~ tuesday shoesday #3: ladylike ~
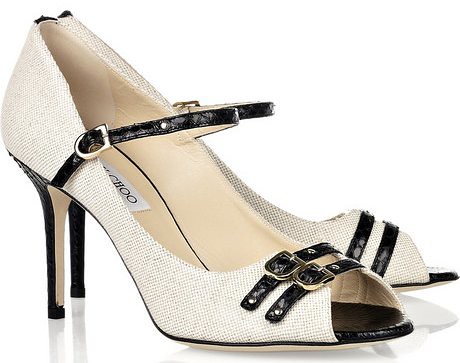
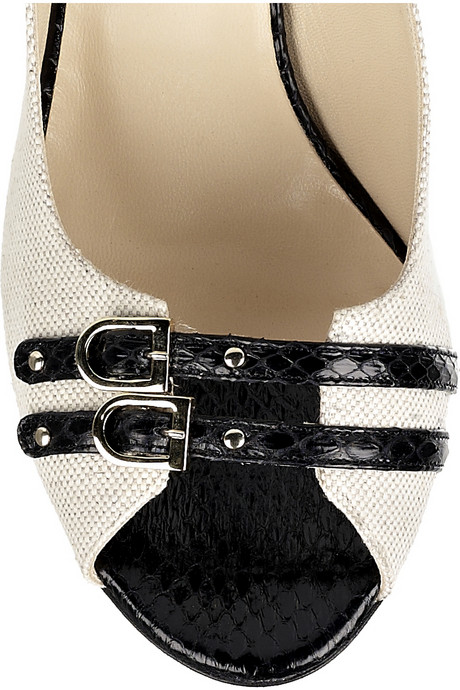
With a little edge! Loving these canvas and black snakeskin strapped Jimmy Choo's...
How cute are the peep toes with double straps and buckles...
The canvas makes them a perfect choice for Spring, while the black adds a little edge. My kind of shoes! I can see them paired with a tea length dress with a black sash or detail! So cute.
Be sure to check out these lovely blogs for more Tuesday Shoesday goodness:
~ Postcards & Pretties ~ Brancoprata ~ Enchanted Dream Weddings ~ Life in the Superburbs ~ Magnolia Rouge ~ Landlocked Bride ~ The Demosielle ~ Swatchbook Weddings ~ Meant to be Sent ~ Simply & Forever ~ Gwyneth Paige ~
Be sure to check out these lovely blogs for more Tuesday Shoesday goodness:
~ Postcards & Pretties ~ Brancoprata ~ Enchanted Dream Weddings ~ Life in the Superburbs ~ Magnolia Rouge ~ Landlocked Bride ~ The Demosielle ~ Swatchbook Weddings ~ Meant to be Sent ~ Simply & Forever ~ Gwyneth Paige ~
~ Ciao
...images via net-a-porter
Labels:
Black,
Jimmy Choo,
Spring,
Tuesday Shoesday,
White
10.31.2010
~ spooky sunday sweetness ~
Happy Halloween my darlings! Hope everyone gets lots of yummy treats. You can get the recipe for these spooky sweets right here. Enjoy, and see you tomorrow.
~ Ciao
...image via matt bites via postcards & pretties
10.21.2010
~ homemade: halloween bunting ~
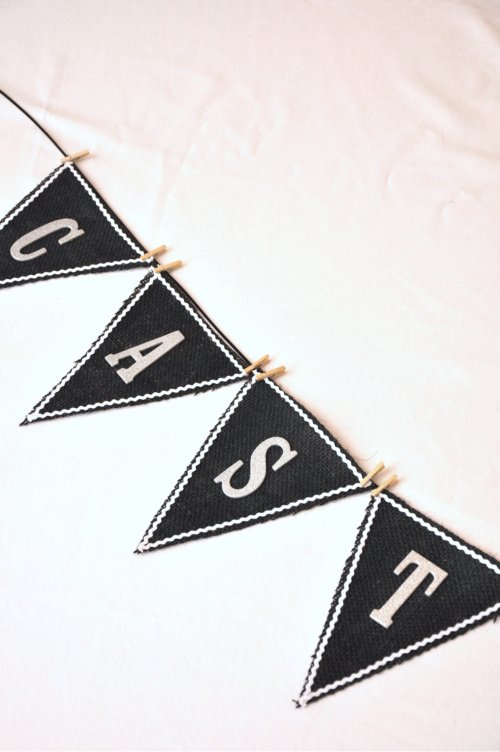
Yay it's Thursday! That means it is homemade time around here at LCW. Yes, I know...Halloween bunting on a wedding blog...what's up with that? Well my intention is that while this is for Halloween (and my Halloween photoshoot that I will post next Thursday) you can make these bunting flags with any color material or paper and any words! And while I was going to do another homemade project (that will come in a couple of weeks), I am soooo thrilled with my Halloween photoshoot that I thought I would give you a little sneak peek! And this is just a part of it...hey, I did say sneak peek ;-)
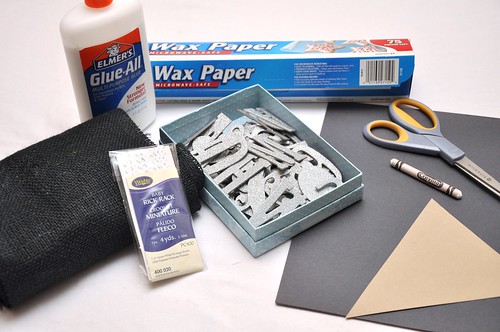
So here is a list of supplies you will need for this homemade project:
Black burlap
Elmer's Glue
White Baby Rick Rack
Wax Paper
Silver chipboard letters
A triangle in the size you want
White crayon
Scissors
Black construction paper
Spray adhesive (which is not in the picture...oops, sorry)
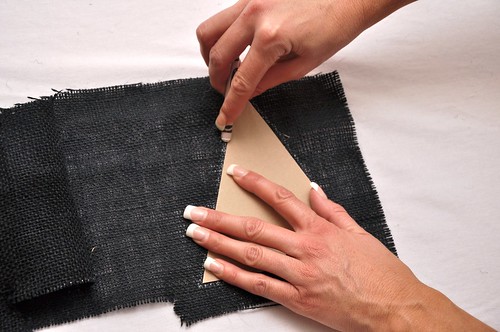
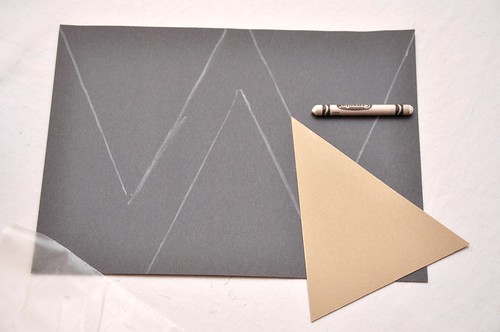
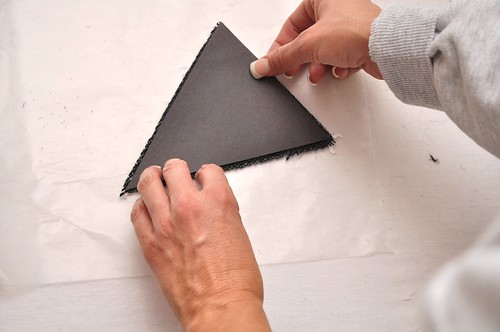
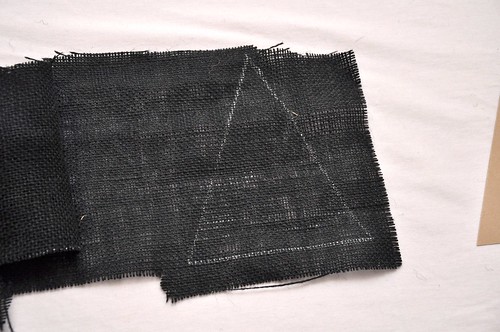
Step 1: Take the burlap, place triangle on top, outline the shape with the white crayon, and then cut out.
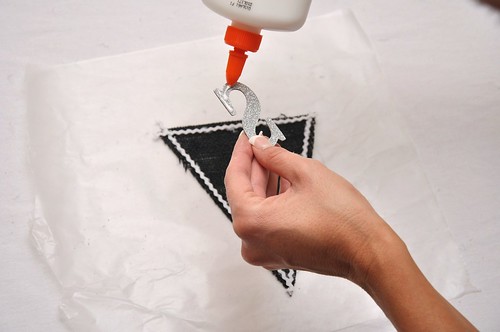
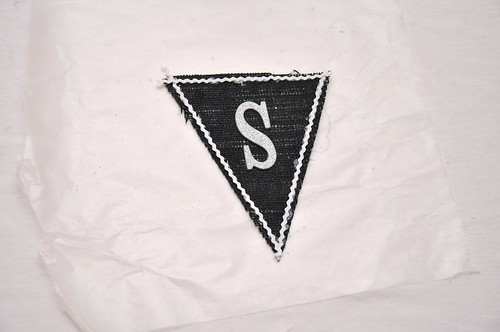
Step 3: Now we are ready to add glue to the back of the silver chipboard letter and place in the center of the triangle.
So here is a list of supplies you will need for this homemade project:
Black burlap
Elmer's Glue
White Baby Rick Rack
Wax Paper
Silver chipboard letters
A triangle in the size you want
White crayon
Scissors
Black construction paper
Spray adhesive (which is not in the picture...oops, sorry)
Step 1: Take the burlap, place triangle on top, outline the shape with the white crayon, and then cut out.
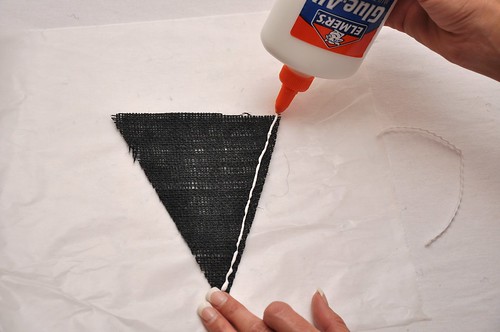
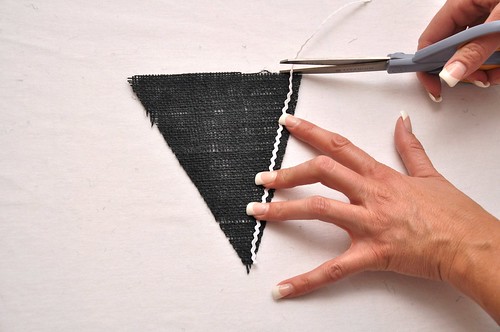
Step 2: Next cut the rick rack the length of the sides. Place a piece of wax paper down to avoid the glue going through the burlap and sticking. Run a line of glue down one side and place the rick rack on top. Do the same for the other two sides.
***As you can see in the picture above - there is glue around the rick rack that looks sloppy. Don't worry about getting glue on the outside of the rick rack...the glue will dry clear and you will not see it.
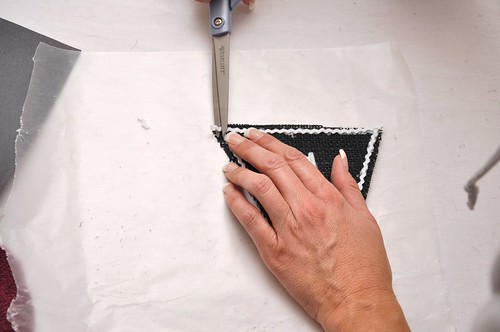
Step 4: If there is any rick rack hanging over the edges be sure to trim so it looks neat and clean.
Step 5: If you are hanging the bunting against something like a wall, fence, etc...then you do NOT have to do Step 5. However, if you are hanging the bunting from a tree, over a table, between posts, etc...then you will need to add some construction paper to the back of the burlap, otherwise the light shines through and you cannot read the letters. NOTE: this only has to be used if you are using burlap. So for this step you will need to trace the triangle onto the construction paper, cut out the triangle and then use spray adhesive to attach to the back. NOTE: when placing the construction paper try to line up on the backside with the rick rack...so it's not up against the edges (see pic below)...you will also need to trim off the top of the construction paper a little since you are raising it up on the burlap.
Step 6: Repeat until all letters are done. And finally...attach you flags (I used mini clothespins for the photo) and your done!
Ta da! The whole process does not take that long...I know it seems like it with the step-by-step, but it does go pretty quickly. I hope you enjoyed this homemade project. I can't wait to share my photoshoot with you next Thursday!
~ Ciao
...photography by me and Mr. Big
9.22.2010
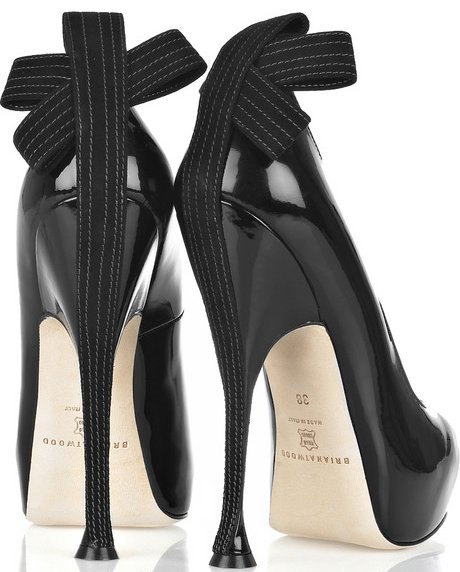
~ pump day #7: ribbon embellished ~
Be still my heart Brian Atwood...
~ Ciao
Black patent leather platforms with the most amazing ribbon detail up the back...oh yes please!
Guaranted your exit will look as good as your entrance in these!~ Ciao
...images via net-a-porter
Subscribe to:
Posts (Atom)