7.08.2011

Inspired By: Rainer Cherries

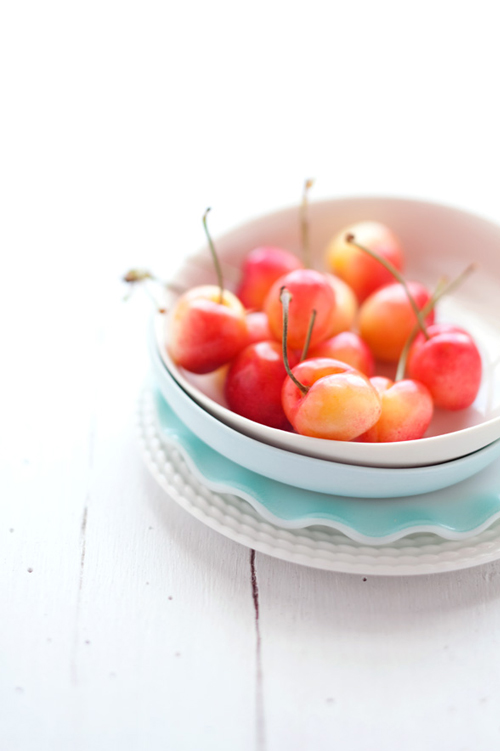
There is no cherry prettier and sweeter than the Rainer!  It is said that: "growing these cherries is like playing poker with God."  I guess that explains why they are kind of expensive ;-) 

Rainers make a brief appearance in June and July, and are definitely something I look forward to every Summer.  However, once you've had Rainers it's hard to have anything else.  To me, they are definitely inspiring!  Have a look-see at the lovely Rainers...
Inspired By
Pretty, no?  And the blue plate below adds just the perfect amount of contrast, to make the prettiest palette!  Wonder if this dessert table was inspired by them...
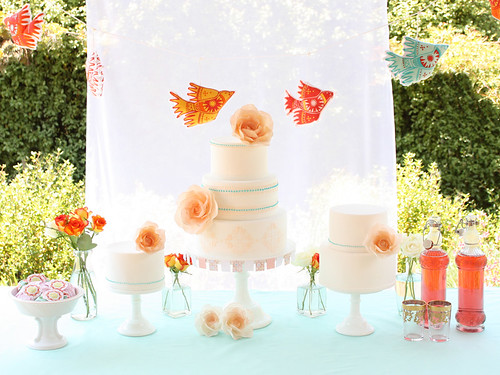
Mexican inspired cake table
Again, it's not just the color, but the feel here - summery, light, pretty and sweet - both the Rainer cherries and the dessert table!  Don't you just love how inspiration can come from anywhere - a chevron floor, chippy pink paint, an embroidered book cover and Rainer cherries are all perfect examples of just that!

~ Ciao

...images via cannelle et vanille & cake ink events

Take a Stand

With one of these...
Cake Stands

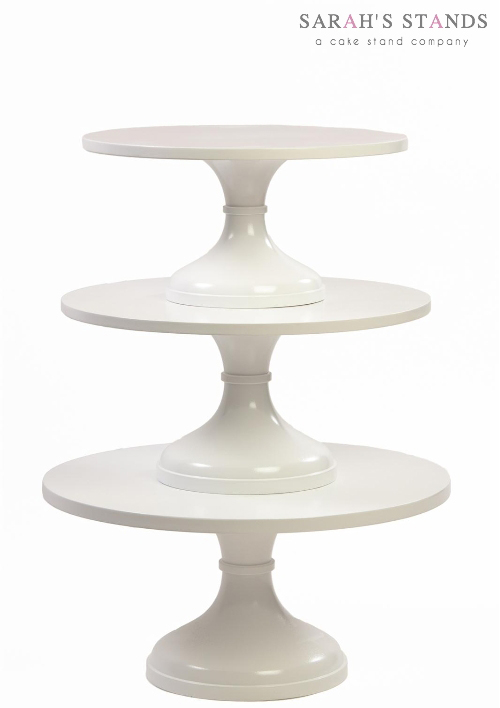
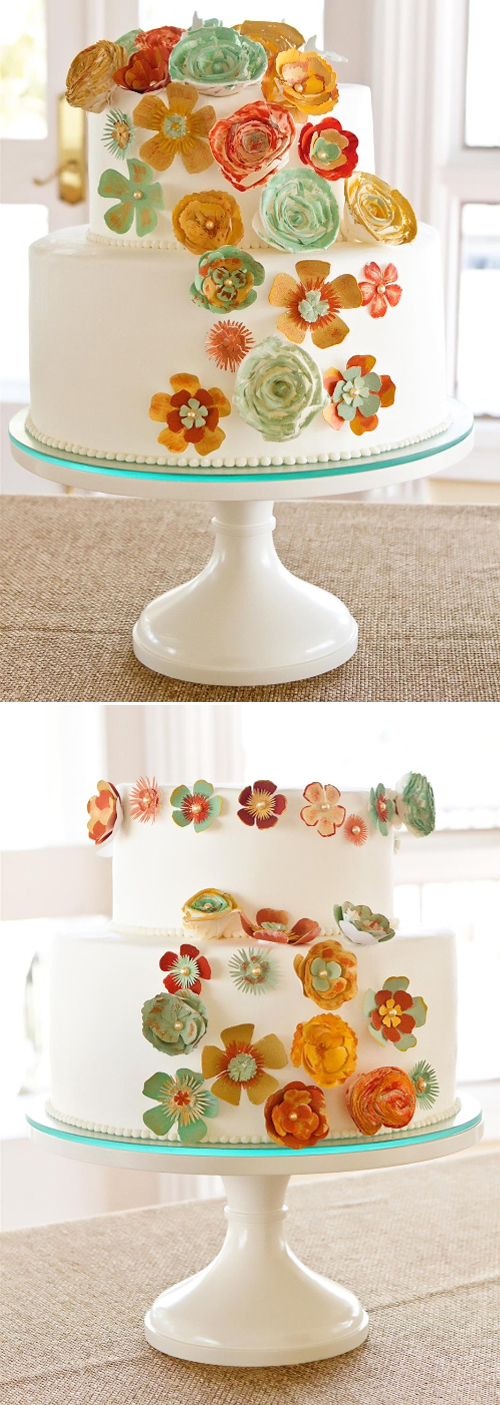
A cake stand by Sarah's Stands!  What a fabulous find this is my dears.  Of course I am ADORING the Vintage Lace colored one - the name alone is so perfect for me!  However, just have a look-see at how gorgeous cakes look on it...
Cake
So pretty, no?

The stands are handmade of maple (you know how I feel about handmade!), are sturdy and are able to hold the weight of a tiered cake.  They come in a variety of sizes and colors too.  But wait it gets even better...now they offer custom colors!  Just send them a swatch and voila - a custom colored cake stand for your event. 

I love that this stand can be used for just about anything at anytime...I just might have to pick one of these pretties up for myself!  And if you want one too, well click right here to get there quick ;-)

~ Ciao

...images via sarah's stands

7.07.2011

Inspiration to Creation 1: The Projects - Part 2

Hey darlings - are you ready for Part 2 of 'The Projects'?  Good.  Let's get started shall we?  As I have 2 projects for you again today!

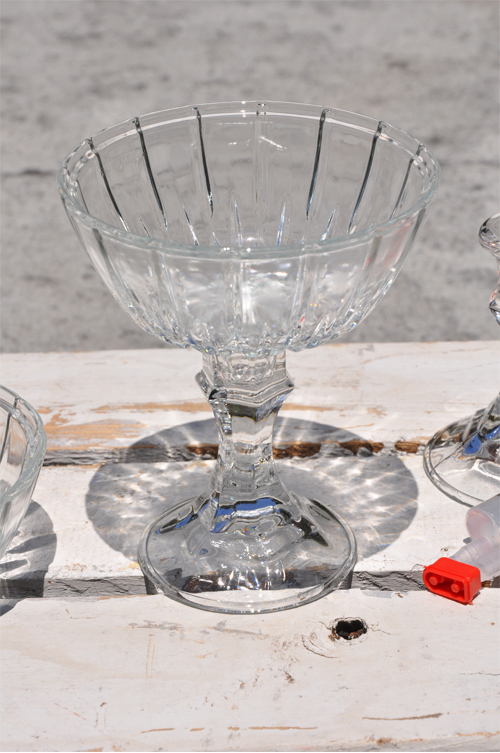
Do you remember me mentioning that one of the projects I said I would show you was using 2 dollar store items to create something?  Well the 2 items are a candlestick and a candy dish...and if you combine the two together you get this...
IC-5
A compote!  Pretty cool, no?  So here is what you need in order to make a compote...
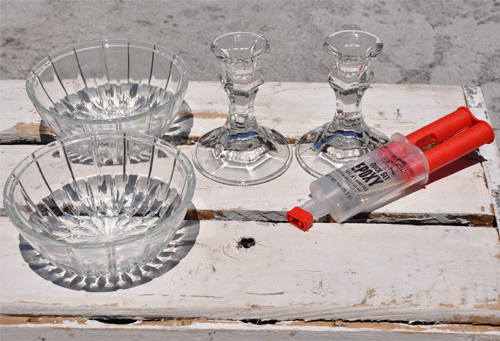
IC-6

  1. A glass candlestick - $1.00
  2. A glass candy dish (it comes with a lid) - $1.00
  3. Epoxy or other strong glue
Be extremely careful please if using epoxy, and follow directions exactly!  To make just place epoxy around top rim of candlestick and then place the candy dish on top.  Wipe off any excess glue if needed.  That's it my dears!

The reason I chose to make compotes is that I wanted to show you that you can make one for $2.00 and some epoxy.  So even if you wanted or needed 100 of them the cost is still pretty low...so a very cost effective idea to be used on wedding tables!  Granted, the candy dish bottom isn't very big, but it still works and still looks fabulous ;-)

And here is our second project for today...
Inspiration to Creation
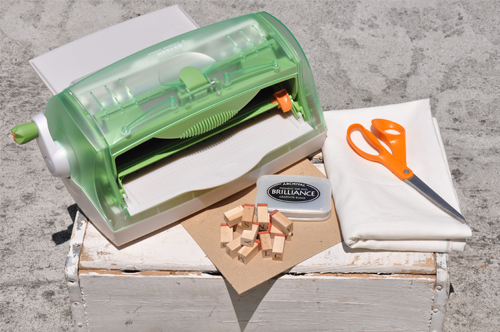
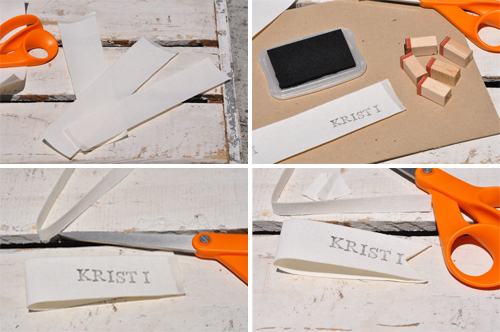
Fabric stamped ribbon posy tags (yep, that's what I'm calling them).  And below is the list of items you need to make them...
IC7
  1. A Xyron machine - however spray adhesive would work if you don't have one.  I do like using the Xyron machine as it gives the material a back and makes it much easier to cut.
  2. Fabric - I used linen
  3. Scissors
  4. Letter stamps
  5. Stamp pad
  6. Flowers - not pictured above
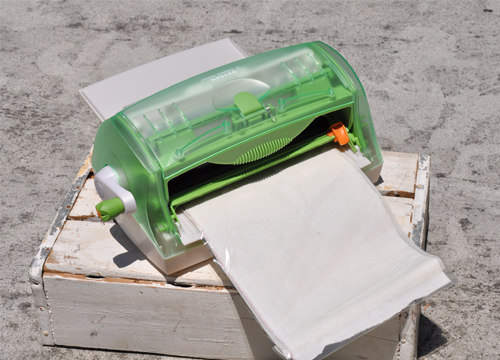
First, you might need to iron the material to make sure it is flat.  Cut a piece of material off, and run it through the Xyron machine.
IC-8
Once you have run the fabric through the machine, trim it off from the machine and remove the top protective film layer.  Next cut the material into strips, stamp a name onto one end, fold it over and trim off excess fabric so sides are even and then cut a sideways 'v' into it...
IC-9
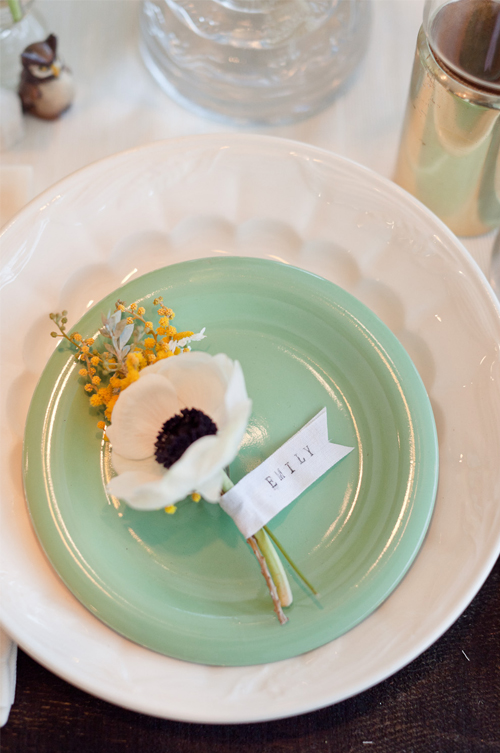
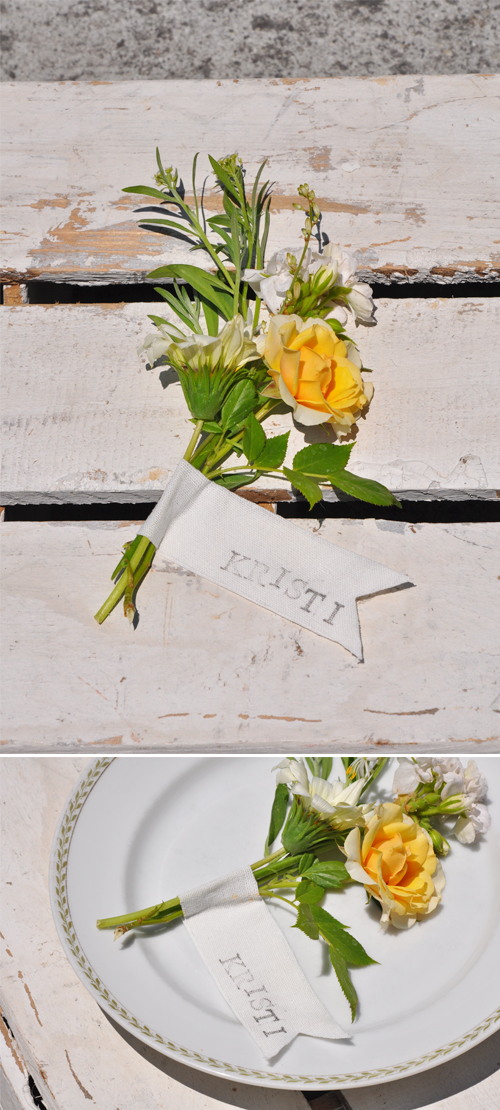
Next you will need to make a posy.  I just used flowers from around the yard for this photo shoot.  And lastly, remove the backing from the fabric (or now is the time to use fabric spray on the backside of the fabric if you are doing it that way), place your posy onto the sticky side, fold over the fabric and press to stick it together.  The end result should look something like this...
IC-10
Soooo CUTE. 

I have to tell you that I stamped both ends...as the first one, the one above on the plate that you see I didn't press quite hard enough and didn't center my name!  However, if you look at the one above where I show the stamps and cutting...I did a much better job the second time.  Just wished I would have remembered to use the better side when I made the posy - eeks, so sorry it's light and isn't centered! 

Anyhoo, I hope you enjoyed these fun projects today.  As always, I love doing them ;-).  I will see you tomorrow my dears - when I will pull all the elements together and finish the table.

~ Ciao

...concept, design, styling & photography by luna and chloe weddings except for image 3 with photography by our labor of love via honey and poppies

Homemade: Pin Cushions

Happy Thursday my darlings!  Today's 'Homemade' post is a spin off of this guest post I did for the oh so sweet Gaby of Cap Classique.  If you missed it you must have a look-see, as there are some simple and cute ideas ;-)

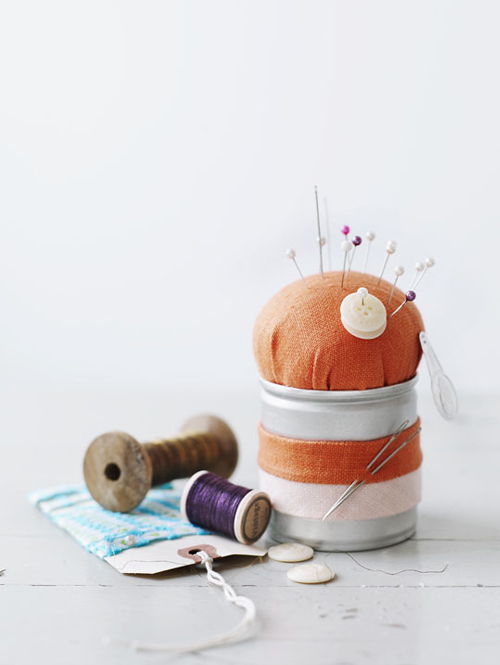
So as you might have guessed by the title (hehe) today's homemade project is pin cushions!  While I used store bought pin cushions as escort cards for the post I did for Gaby - I have to tell you...I am OVER THE MOON about the homemade ones I stumbled across on Sweet Paul's blog.  Just look at how adorable this homemade pin cushion is...
Tuesday Thought
Oh I think I need to make a couple of these!  And if you would like to make your own pin cushions too, click here for the how to.

I LOVE that you can make these in any color imaginable.  Ooh, pretty patterned ones would be fabulous - think chevron, floral, gingham, etc...  And you could even get a bit more creative and spray paint the can!

These pin cushions make a darling escort card or favor...or even stocking stuffer (okay, maybe I am getting a little ahead of myself with the last one)!

~ Ciao

...image via sweet paul

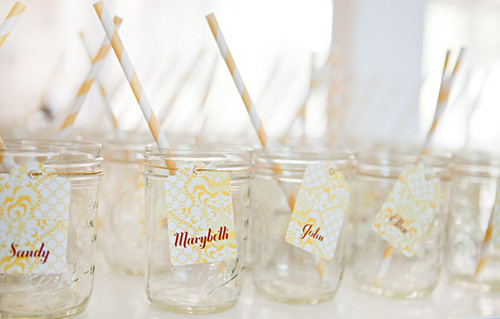
Darling Detail No. 16: Striped Straws

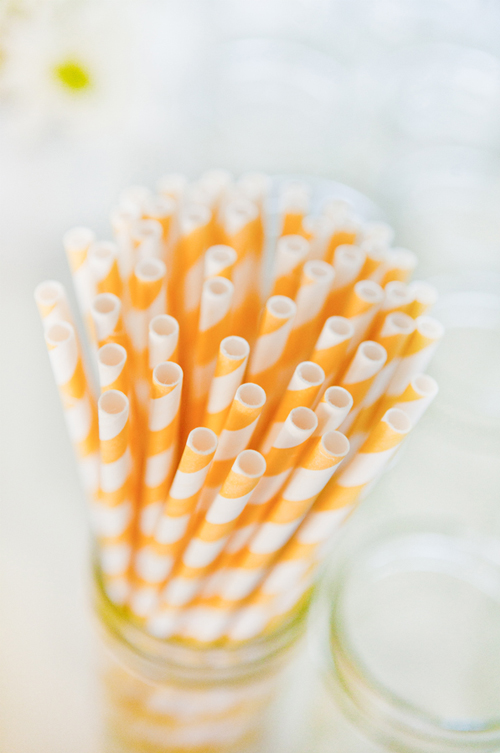
Oh these striped straws are darling in the most fabulous summery shade...
Darling Detail
And I have to tell you -  I am adoring the name tags on the mason jars too...
Darling Detail
Only one thing though - where's my glass, and the cocktails?

~ Ciao

...photography by souder via ruffled

7.06.2011

Inspiration to Creation 1: The Projects

So finally happy it's lunch time, as I am starving!  Goodness, this girl needs to eat...which I will be doing as soon as I get this post finished ;-)

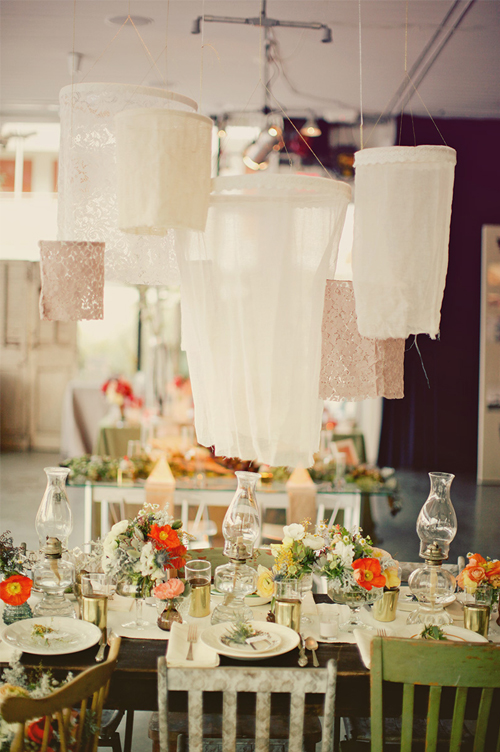
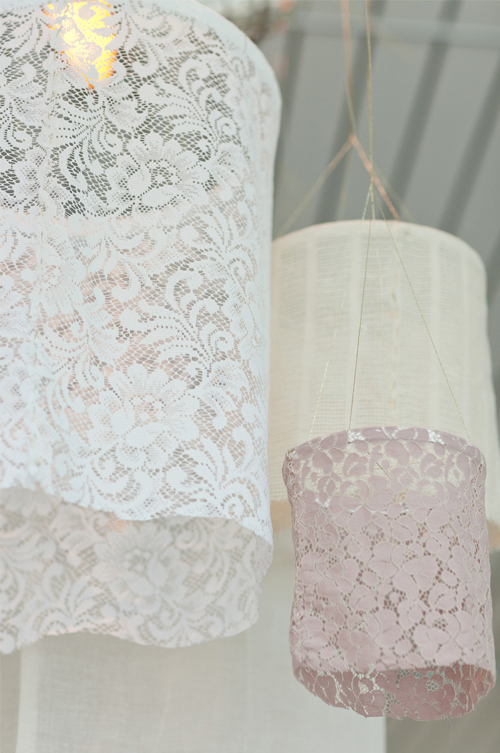
So today's part of the Inspiration to Creation series is 'The Projects' - better known around LCW as homemade.  There are two projects in particular that I wanted to do for you today.  The first one being the fabric chandeliers.  Remember, the inspiration...
Inspiration to Creation Projects
And a close up for you...
Inspiration to Creation Projects
I love them, don't you?

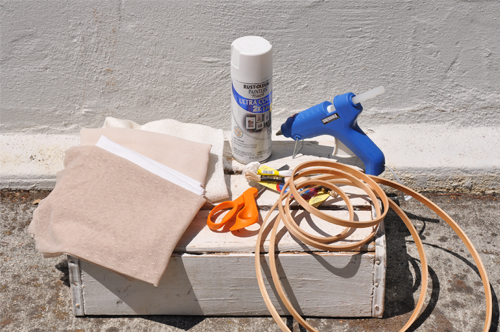
Alrighty - here is what you need to recreate them:
IC-2

  1. Embroidery Hoops - always an odd number
  2. White Spray Paint - optional
  3. Variety of different fabrics in sheer and lightweight materials
  4. Glue gun
  5. Thread/String
  6. Scissors
  7. Needle and Thread - optional
First:  Take apart your embroidery hoops - we are only going to be using the inner portion of the hoops for this project.  Once you have all your inner hoops, if you want to spray paint them like the hoops in the inspiration picture then now is the time to do so.  ***However, so that I can reuse my hoops again I am not going to spray paint mine.  I try and recycle as much as I can, and save some money at the same time.

Second:  When the paint is dry, working with one hoop at a time, take a piece of fabric and wrap it around one hoop.  Mark the spot on the fabric where it should be cut, then cut the fabric to size.  Do this for all the remaining hoops and fabric. 

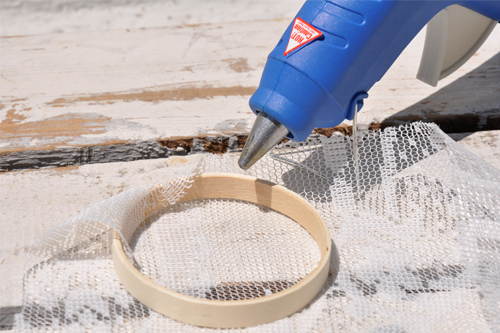
Third:  Once all hoops and fabrics are measured, run the glue gun around a portion of the inside of the hoop.  Working quickly so the glue doesn't dry, place the end of the fabric onto the glue from the outside of the hoop!  Remember - you want the outer portion of the hoop covered, so you MUST start from the outer side of the hoop and fold the fabric over to the glue on the inside.  Continue this process until all the fabric is glued to the inside of the hoop.
IC-3
Fourth:  When the glue is dry you are ready to add the string to hang the hoop from.

Fifth:  If you want you can stitch up the ends on the hoop so the fabric is attached together and doesn't hang open you can do so.  Just keep in mind you don't want to pull the thread too hard as you stitch otherwise it will pull the fabric and it will hang funny.  This is optional...you could always take a short cut and add a drop of glue or even a glue dot (I heart glue dots and this was my quick and easy way) in a couple spots to keep the fabric together.  But really, it's your choice loves :-)

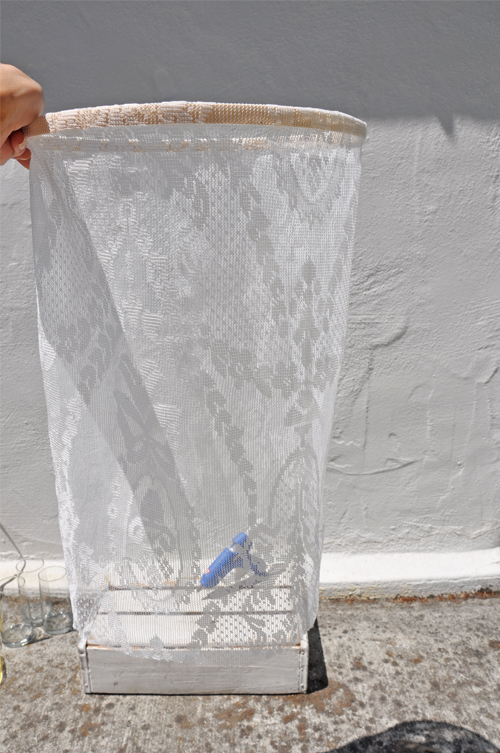
And here is your finished product...minus the thread/string to hang...oopsies forgot about that when I took the picture...
IC-4
So sorry about my hand in the picture - there was just no place to hang it from...so I thought I would just hold it ;-)  Hard to hold something and take a picture at the same time!  However, it really does look cute...and I can't wait to see it and more over the table!

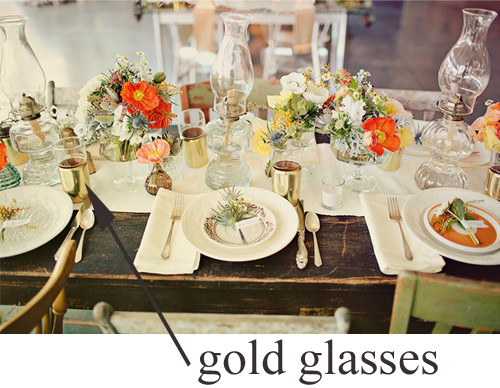
The second project is recreating the gold glasses...
Inspiration to Creation Projects
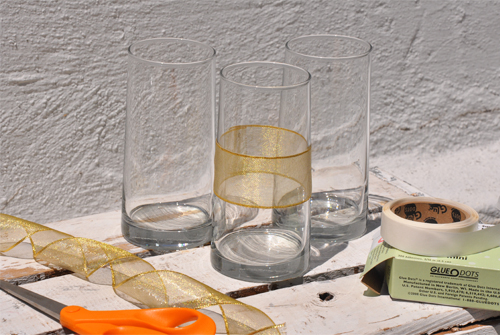
You can always look for glasses with gold detail(s) at garage sales and antique stores to use for your event.  However a super quick, easy and cost effective option is always to add a gold ribbon around plain clear glasses...
IC-1
Gotta admit - NOT my fave...but it works and will pull in a nice little pop of gold onto the table.  I was thinking of the option of painting them - which I did...but it was time consuming after a primer, two coats of paint and a sealer, and the end result looked like gold painted glasses.  Eeks - not the look I was going for.  I actually like the ribbon better, if you can believe that.  I have one other option that I will try tonight, and if I like I will share with you tomorrow! 

Tomorrow I am showing you two more projects to make in order to recreate this table...and then Friday I will be putting it all together for you!  I'm off to eat now...see you tomorrow with more goodness ;-)

~ Ciao

...images 1 and 6 photography brandon kidd, image 2 photography by our labor of love via honey and poppies, and all other photography by luna and chloe weddings

Who Says

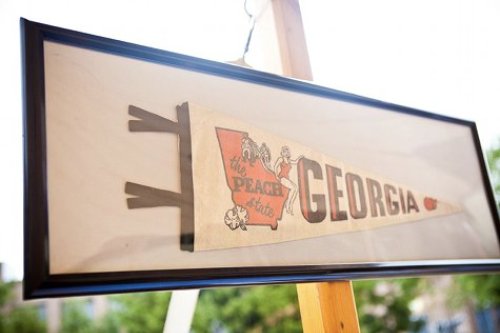
...you can't use pennants as your table markers?
Details
Details
I just adore this idea!  How cute would it be to use mini ones as escort cards and the large ones as your table marker?  So cute.  And you could easily make your own...hmm, I see a homemade post coming sometime soon?  Hehe ;-)

~ Ciao

...image via style me pretty

Guest Posting on Oh Lovely Day

Hi loves!  I am guest posting on Oh Lovely Day today while the ever so sweet Chandra is taking a vacay. 
Oh Lovely Day Banner
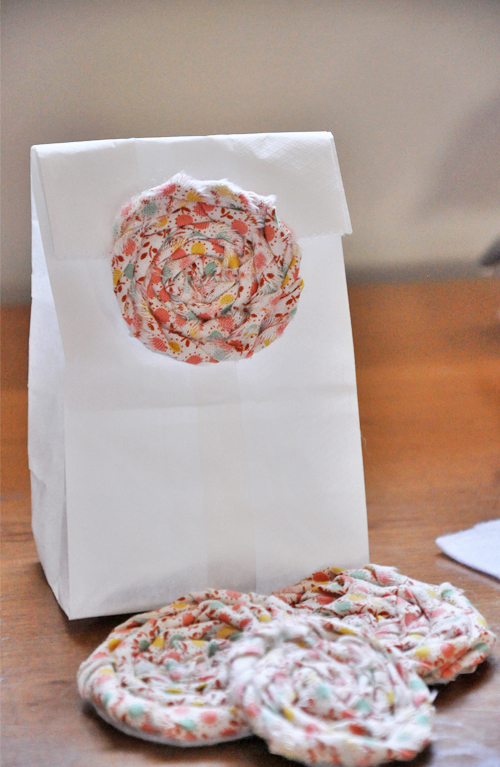
Come see the DIY I created just for her ;-)  Here's a sneak peek for you though...
Oh Lovely Day
~ Ciao

...image via oh lovely day & photography by luna and chloe weddings

Over the Moon

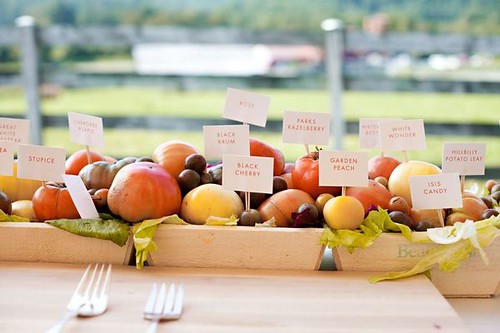
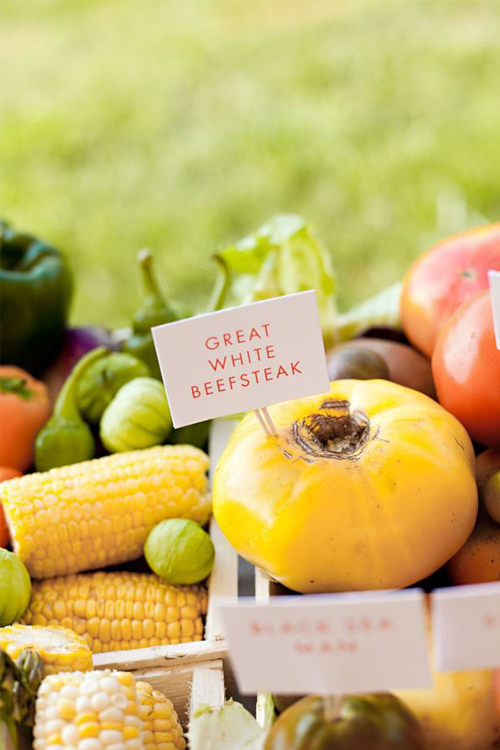
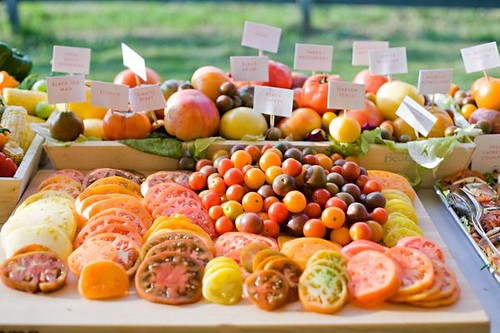
...about this tomato bar/buffet!
Over the Moon
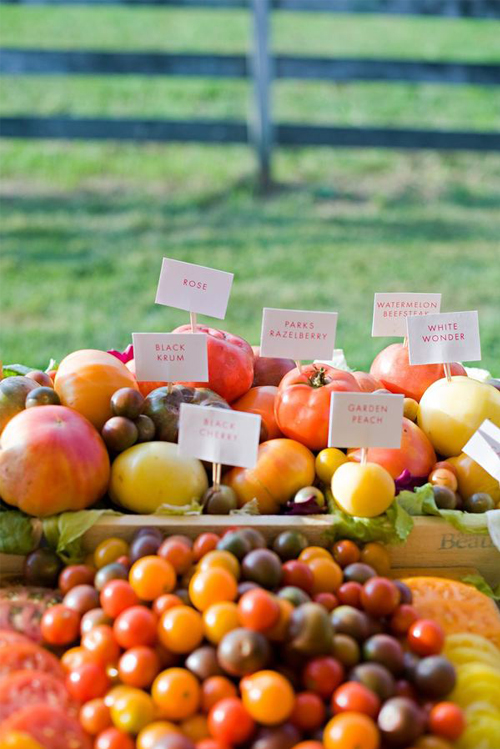
This is such a wonderful idea for a summer wedding!  I love how each different variety of tomato is marked with its own tag...
Over the Moon
And let's not forget the bite size cherry tomatoes too...
Over the Moon
Don't they look just gorgeous all sliced up?
Over the Moon
Yummy and oh so pretty! 

Okay, here is a little tidbit about me - I LOVE fresh tomatoes.  But they have to be fresh right off the vine (like above), and not in a salad or on a sandwich (unless it's a BLT)...thinly sliced with salt and pepper or some balsamic, fresh mozzarella and basil.  I am super picky about how I eat them...they have to be somewhat firm, not mushy and most definitely not mealy...oh the list goes on and on about how they have to be for me to REALLY enjoy them!  However, if I came to your house and you put them on a sandwich or in a salad or anything else, I would most definitely eat them...I just prefer them, or love them actually, a certain way.  And I could eat them every.single.day if they were just perfect!  Weird, huh? 

It's funny in a way, as I don't consider myself a picker eater at all...as I am the girl that LOVES beets, radishes, brussel sprouts, acorn squash, and all the other veggies most people don't really care for.  So tell me my dears are any of you particular about a certain food, like I am about tomatoes?

~ Ciao

...photography by kellan studios via style me pretty

7.05.2011

Inspiration to Creation No. 1: The Details

Goodness, you still with me? Three posts today is a lot!  However, this is the Inspiration to Creation post that I have been waiting all day for ;-)  I do think this is going to be an amazing series, and I hope you love it and find it helpful!  Can't wait to hear your feedback throughout the week.

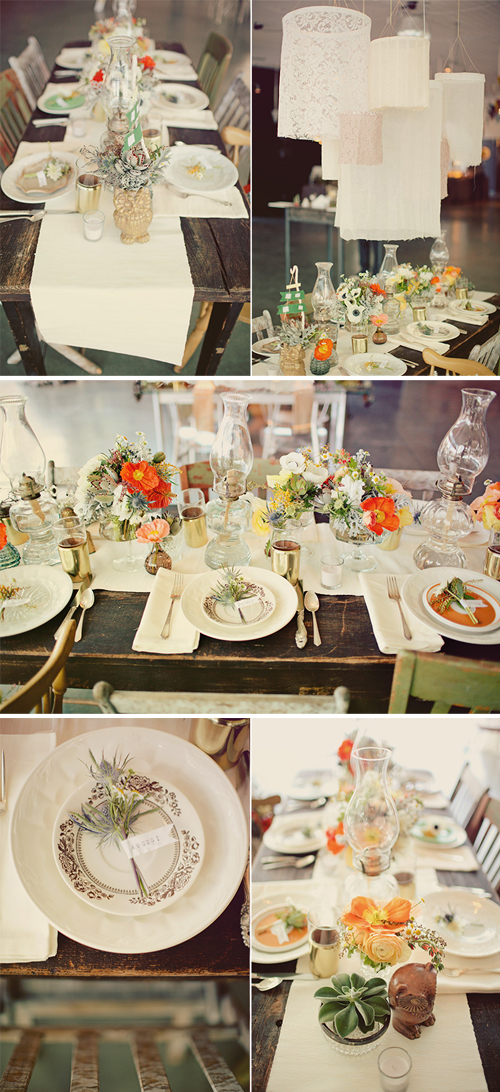
Okay first things first!  On Friday I showed you the inspiration pictures, so today I want to focus on the details.  Remember I am taking this step-by-step, and the first step is figuring out what makes up this gorgeous table decor.  My first step if I want to recreate a look is to study the picture(s) of the look and then jot down the details of the design.  So again, here are a couple of pictures for you...
Inspiration Creation Details
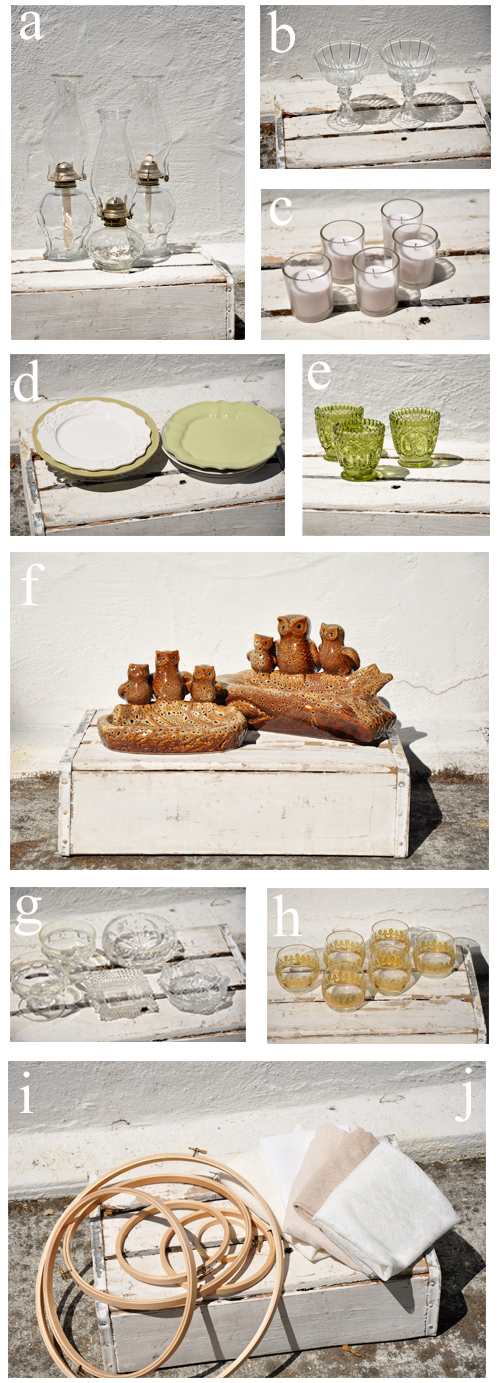
Did you study the pictures, and make some notes as to the details?  Yes, fabulous!  Here is a list of the details that I jotted down after I spent some time studying them:

     a.  3 oil lamps
     b.  2 clear glass compotes for the larger flower arrangements
     c.  small votives
     d.  6 mismatched salad plates
     e.  small colored glass vases to hold a couple of sprigs
     f.  owls
     g.  mismatched clear glass bowls for succulents
     h.  6 glasses with gold detail
     i.  7 embroidery hoops
     j.  a variety of sheer and lightweight fabrics
     k.  white table runner
     l.  6 white dinner plates
     m.  6 white napkins
     n.  6 sets of silverware

Did you see them all in the pictures?  A handful of them are obvious, but a couple of them you might have to go back and have another look to notice ;-)

And after looking through what I already had, and a quick trip to Home Goods (one of MY happiest places on earth - hehe) to pick up two green plates and a couple owls, here are most (a through j listed above) of the details I will be using to recreate the look...
Inspiration Creation 1 Detail
You will notice that not all of the details are identical, but they are similar.  The green votive holders (e above) I found at Michael's in the dollar bin for $1.50 each, and plan on using as vases on the table.  I know I have some owls...at the back of my storage unit, that I couldn't get too...but the two above I purchased from Home Goods (were they had bunches of them, in a couple other colors too), and I thought they would work well as I plan on putting succulents in them!  Also, the glasses are on loan from Aunt Millie (love her to pieces I do) and not only do they have gold on them, but a green color too.  However, I am working on another option for gold glasses...I'll have to let you know if it works out...so you'll just have to wait and see ;-) 

There will be more to come every day this week my dears - including a fabulous DIY using items from the dollar store - so be sure to check in everyday at noon as I have decided to do 3 posts a day this week!  See you tomorrow.

~ Ciao

...photography and images via brandon kidd & luna and chloe weddings

Tuesday Thought: Vintage Tape Dispenser

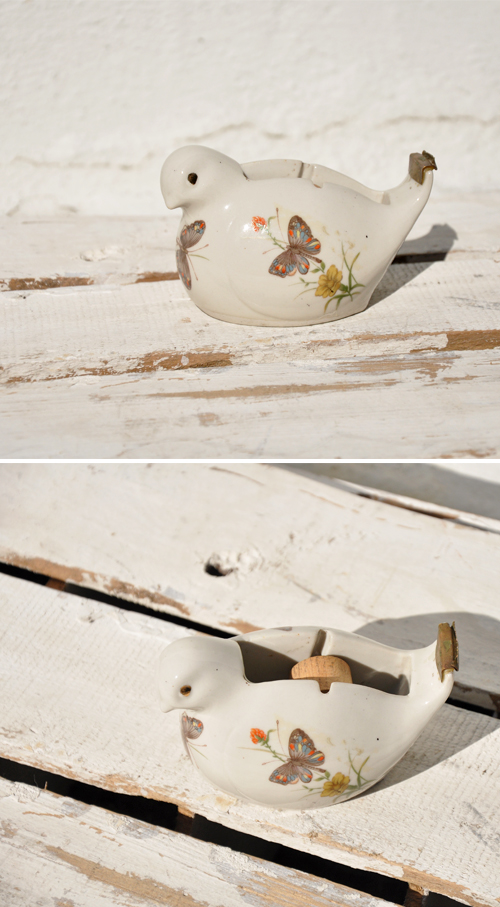
Oh dears - do I have a cute Tuesday Thought for you today!  I found this vintage porcelein bird tape dispenser and knew exactly how I wanted to use it - because I think by now you know I don't really ever use things as they are intended ;-)  Anyhoo, here is the bird in all of its cuteness...
Tuesday Thought
I am calling him 'Golden Eye' as his eyes are gold - hehe! 

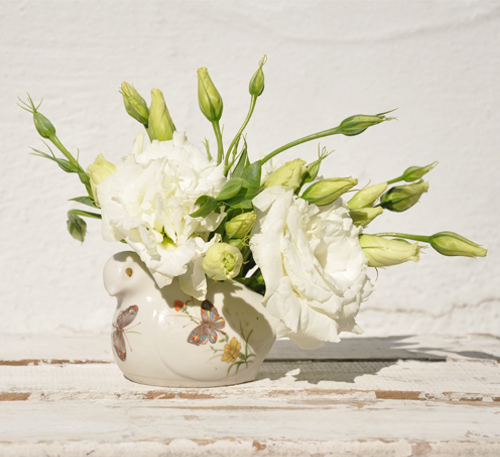
So here is your Tuesday Thought:  Remove the tape holder/spinner piece, and use the vintage tape dispenser as a vase and fill it with flowers!  Here, I made a little arrangement just for you...
Tuesday Thought
Oh tell me that isn't just CUTE!?!

~ Ciao

...concept, design, styling & photography by luna and chloe weddings

Tuesday Shoesday #31: A Darling Drape

Welcome back my loves!  Tell me - did you have a spectacular 4th?  I sure hope so.  Mine was fabulous ;-)  I worked, played, ate a piece of my favorite cake, drank sparkling apple juice for a breakfast treat one morning, puppy sat Gus for a night and put my creative cap on - all in all a fabulous weekend.  The only thing I didn't do was sleep in...so I'll just have to do that this coming weekend!

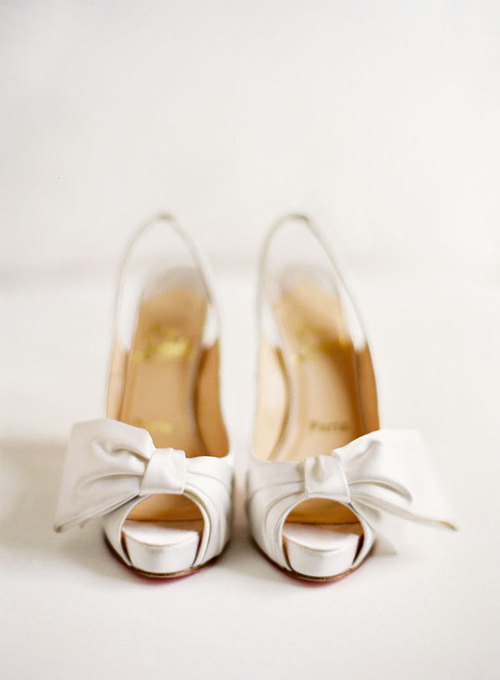
Anyhoo, I am ready to jump right into the swing of things here and get to this Tuesday Shoesday post.  Have a look-see at these ever so lovely Lou's...
Tuesday-Shoesday
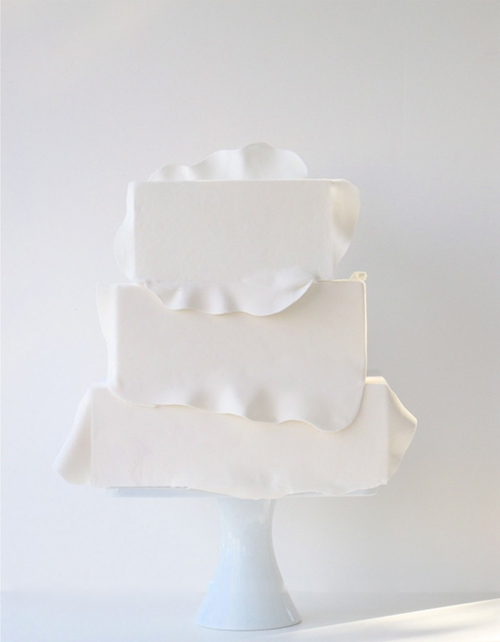
Oh me, oh my - le sigh!  I adore how the half bow, drapes off the side - kind of like the drapes on this cake by Maggie Austin...
Cake
Darling, no?

Be sure to check out these lovely blogs for more Tuesday Shoesday goodness:

~ Ciao

...photography by jose villa via style me pretty & image via maggie austin

7.01.2011

{Possible New Series} Inspiration to Creation: The Inspiration

Happy Friday my dears!  I am so tickled that this is a long weekend, as goodness knows I need one ;-)  So tell me - do you have any fabulous plans for the weekend?  Going anywhere?  Or staying home and hanging with friends and family?  Me? I am staying local this year, and have a variety of things to do ;-)

I have been doing some thinking around here lately.  And since LCW is in the process of getting a new look, I was thinking about adding another new series to the blog as well.  I know I just added 'Aisle Style'  which is fun, but I really want to add something that will really help readers (whether you are a bride or not) on how to recreate looks they love.  I know most of us heard the feedback about how brides felt about photo shoots, so I was thinking about taking a photo shoot and breaking it down, so anyone could recreate the look themselves.  A photo shoot all at once can always be overwhelming, but broken down by element, I think, makes it much easier, don't you?  

Since this is a 'possible' new series, I am hoping your feedback will provide me with whether I should make this a monthly series or not.  The way I was thinking of doing this new series was to do it over a week.  So the first day will be the inspiration, the next couple days will be taking an element and recreating it, of course with a DIY, if possible, thrown in as well, and the final day, Friday, will be putting it all together - a wrap of of the week so to speak.  Goodness, I hope that make sense! 

And with Monday being a Holiday for the 4th of July, I thought I would post the inspiration for you today, and then follow up with the rest of the series on Tuesday through Friday next week.  So are you ready for your inspiration?  Well here it is...
On the Table
I know I used a picture of this table in my Picture Perfect Palette No. 7 that I posted last Friday, however after seeing the picture again I remembered how much I ADORED the table decor, and would love to recreate it.  So off I went on a hunt to find more pictures for this series, and lucky me, I found a bunch!

Now keep in mind, I am just one person with a limited amount of money for this new series, so it isn't going to be a perfect match!  Goodness, I don't even have a table that looks like that...so you get the idea here.  Yet, I will break down the elements, and show you a DIY or two that would let you recreate something similar ;-)

So are you with me my dears?  I know I have a full line up of posts each week already, and am still trying to decide how to post this new series - add a third post a day for one week a month?  Cut out one of my normal posts one week a month?  Hmm, something I will be definitely thinking about over the weekend!  To me, that is the hardest part of this new series...well that - the name of the series (still might change it), and not have unlimited funds to recreate!

My dears, I hope you have a SPECTACULAR and SPARKLY 4th of July weekend! I will see you back here on Tuesday, as I am not planning on posting until then. So may you all find some sweetness of your own this weekend! Mwah.

P.S. - Also be on the lookout for LCW's First Annual Cake Week starting on July 18th with a fabulous cake posted every day.  That's five straight days of yummy goodness.  And I decided that every year from here on out on the week of my and my sister's birthday will be Cake Week!  Oh and do I have some pretty cakes lined up for you ;-)


~ Ciao

...images via & photography by brandon kidd
LCW Style: On the Bright Side

Happy July my dears!  July is one of my favorite months, and I am so happy it is finally here.  As this is the month that I get to see my sister, brother-in-law, niece, nephew and mom!  Yippee ;-)  I haven't seen them since December, and I am OVER THE MOON that they are coming to Cali!  So my summer sure is looking bright. 
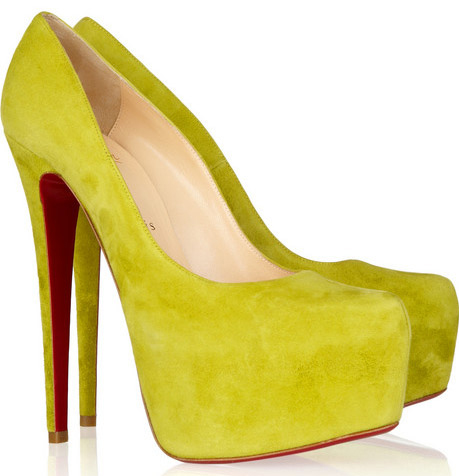
And speaking of bright - there is nothing like wearing a bright shade of yellow as soon as the temperature starts rising.  Granted, occasionally I will wear this color at other times during the year, but for some reason I really love it best in summer.  Maybe it's because I usually like to have a tan when wearing it so the color really pops, or maybe it's because I'm just a goofy girl!  Whatever the reason is, I thought I would share with you a couple of ways you could incorporate this color into your summer soiree.

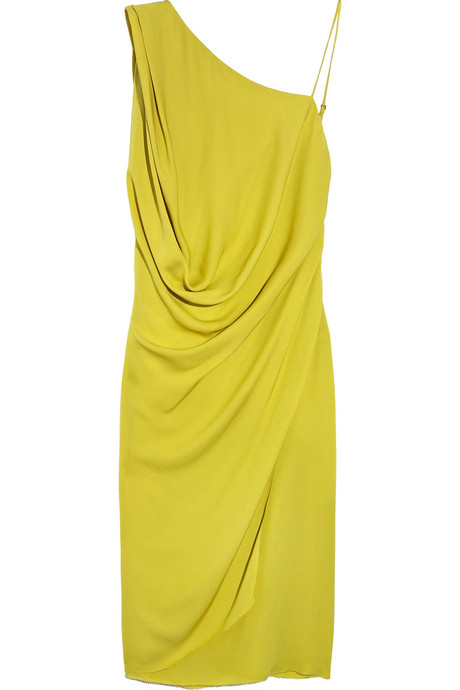
Let's start off decorating you and/or your bridesmaids, shall we?  This Max Azria dress would be fabulous to wear for a summer engagement party, bridal shower or rehearsal dinner.  Yet, it is also a wonderful option for your bridesmaids dresses too...
max azria
And the dress really looks darling with a belt!  However, if this is just too much color for you, an amazing pair of Christian Louboutin's peeking out from under your dress would be another fabulous option...
LCW
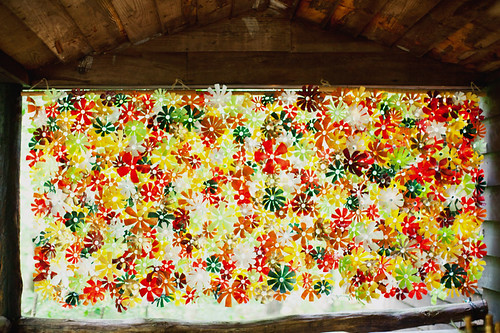
Eeks - tell me those stunners don't make a statement!  I would be wearing these all the way into fall.  And an easy way to incorporate this color into your decor?  Well a flower curtain, of course!..
Darling Detail
Darling Detail
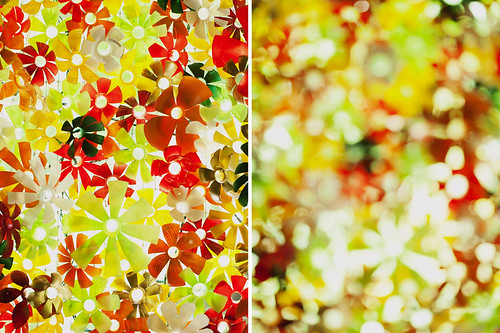
Amazing, right?  And to think that it's made out of spray painted plastic bottles...oh I so want to try this! 

Anyhoo, there are just a couple ways for you to incoporate a bright summery color.  At the very least, I sure do hope it's brightened your day ;-)  Happy Friday loves...I will be back with another post later today.

~ Ciao

...images via net-a-porter, & via jodi miller photography

6.30.2011

Homemade: S'mores Thumbprint Cookies

Happy Thursday loves!  Is everyone getting ready and gearing up for the 4th of July weekend?  OMGoodness - I still can't believe it's this weekend, and I have quite a busy weekend in store too.  Thanks oil light for coming on just before a holiday weekend (it flashed once at me last week, but I kept thinking it would go away...why do I do that, as I know it's not going to go away!)...now I have an appointment for an oil change at the dealership at 8 am on Saturday morning - ugh!  Anyone want to take my car in for me?  Anyone? 

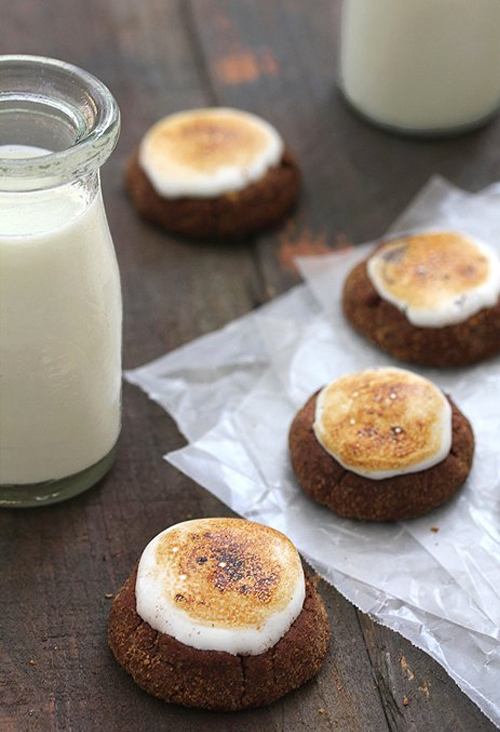
Okay - enough about my sad oil change on Saturday morning at 8 am story and onto yummier things like s'mores!  One popular thing to do over the 4th of July weekend, besides seeing/launching fireworks, is to have a bonfire and make some s'mores.  However, I will not be sitting around a bonfire and making s'mores at any point this weekend (not that I am aware of )...boo!  But I'm not to bummed actually, as I ran across a fabulous alternative.  Have a look-see at these S'mores Thumbprint Cookies...
Homemade
Yes, a fabulous alternative, no?

So for all the brides out there that want s'mores but, like me, have no bonfire in sight, you can always bake these up and serve at your soiree!  To make this deliciousness yourself, click here for the recipe. 

Happy baking my dears!

~ Ciao

...image via bakers royale

Aisle Style: In the Desert

About two weeks ago I told you darlings that I was starting a new series called 'Aisle Style' and I just wanted to say a few words before jumping right into pictures. I wanted to let you know that in most 'Aisle Style' posts I will be also be including the ceremony backdrop. To me the aisle leads up to this, so I might as well include it too...so you will usually find it at the bottom of each post ;-)

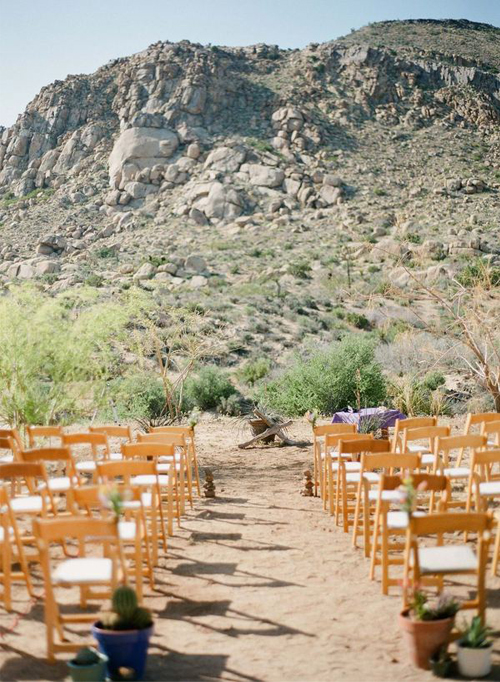
Anyhoo, I adore this desert style aisle! It's simple, but thoughtful and incorporates it's surroundings...
Aisle Style
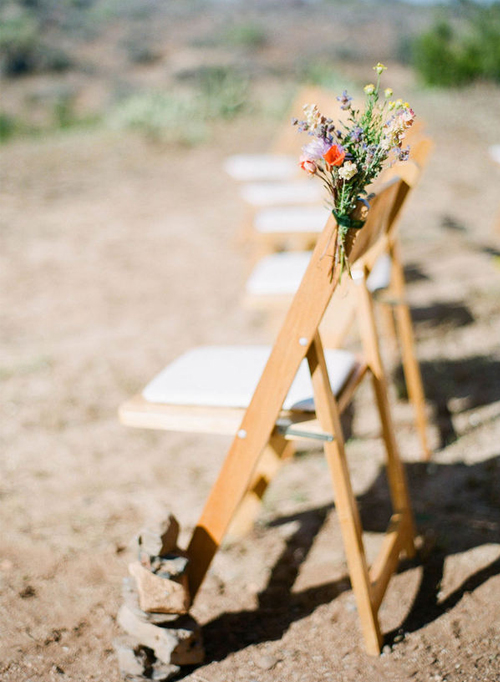
The first two and the last two chairs are decorated with little posies of flowers which are just sweet.  At the first row in front, they also did a little stack of rocks - which are just a wonderful touch don't you think?
Aisle Style
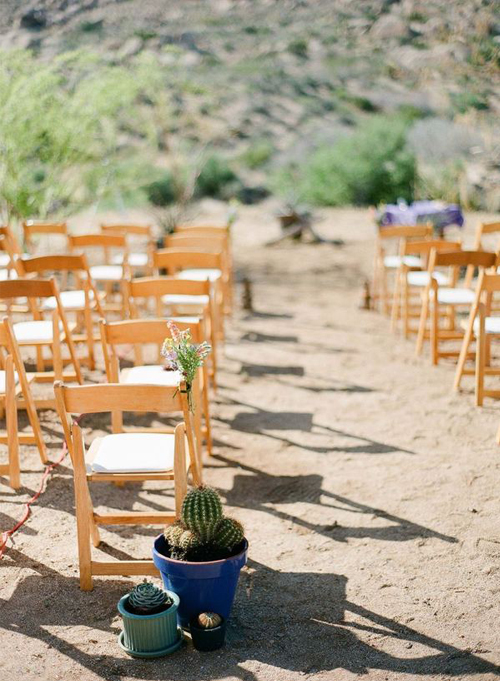
The back of the aisle was adorned with simple pots filled with succulents and cactus...
Aisle Style
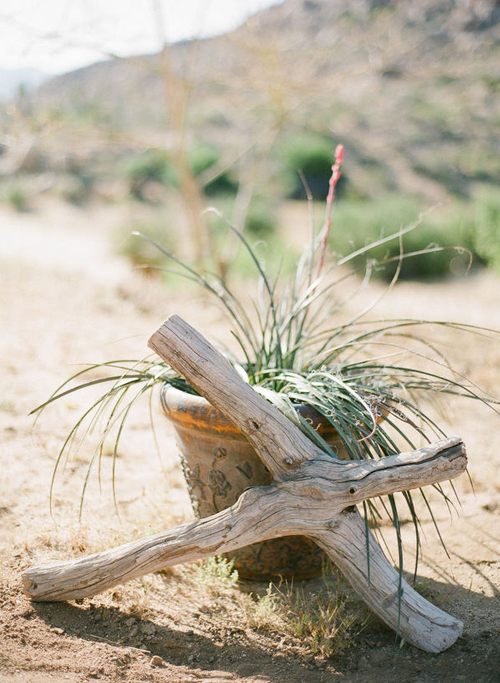
And for the ceremony location, one fabulous crossed piece of wood and a potted plant are all that's needed to mark the special spot...
Aisle Style
A simply gorgeous desert style aisle, no?

~ Ciao

...photography by kurt boomer via style me pretty

6.29.2011

Who Says

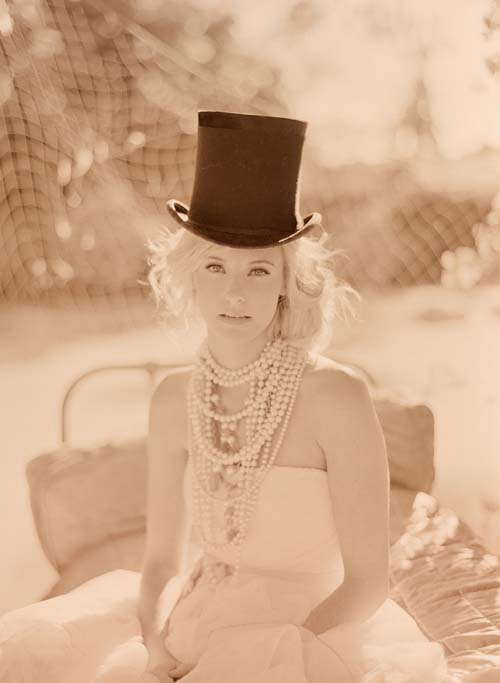
...you can't wear a top hat on your big day?
Who Says
Or at least for pictures.  L-O-V-E!!!  And I love all her necklaces too ;-)

~ Ciao

...photography by elizabeth messina

Darling Detail No. 15: Simply Sweet Sugar

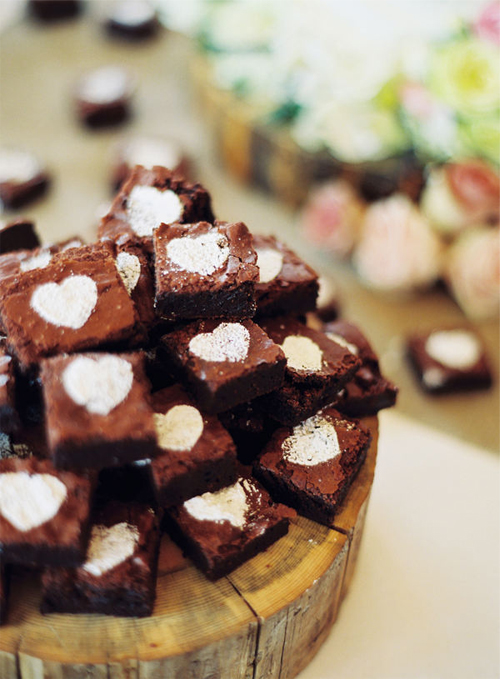
One of the simplest and sweetest details ever...
Darling Detail
Such a lovely way to make brownies even better, no?  Ah yes, these are the details that I heart!

~ Ciao

...photography by smitten via style my pretty

6.28.2011

Tuesday Thought: Painted Pots & Lots of Thoughts

So sorry my dears ~ I thought I had scheduled this for earlier today...and just realized I didn't!  Eeks...it's late, but here it is...

Hello loves!  How is your Tuesday going so far?  Fabulous, I hope.  Mine is busy, a good busy!  And can you believe it - we are supposed to get some rain today!  Rain in Northern California, in June - doesn't happen all that often...so will see if it actually does ;-)

So I have a super simple 'Tuesday Thought' for you today.  Have a look-see at my inspiration...
Tuesday Thought
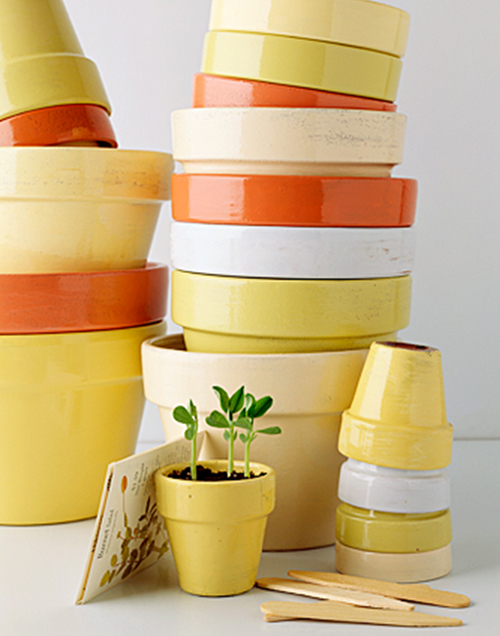
It's funny how things hit me sometimes.  And I know that we have all seen painted pots before, so I know this idea is nothing new.  But  I think they are a great idea to use at a wedding - easy and inexpensive.

So here are your 'Tuesday Thoughts'...yes, Thoughts - as you know I have a couple of them! 

First 'Thought': I think painting terra cotta pots in your wedding colors and then using them as centerpieces is a fabulous idea.  You can use a glossy paint, or a matte one - your choice as either would work, and you can paint them any color you want - either a variety of colors, or all one color for a more dramatic look.  Just have a bigger pot in the middle with some smaller pots around planted with flowers, herbs or plants.  You could always use the tiny ones to hold candles if you'd like.  Also, the tiny ones would look darling planted and use as place cards.  Plus, I like the idea of having a couple of the small pots stacked upside down (as they are above) on the table - they would be perfect to hold a table number that has been attached to a branch/stick...just stick the stick in the hole.  Or you could even stick a flag with the table number on it - just some extra fun, cute ideas.  And you know how much I LOVE moss!  I would love to see them filled with moss with pinwheels in the as a fun and whimsy centerpiece.  Granted you don't want painted pot overload so use care, but I do think they could be quite lovely. 

Second 'Thought':  I think the smaller pots would looking darling in your wedding colors, stacked upside down on your dessert table to have your guests fill with sweets and take home!  As for the hole in the bottom (if there is one), well I would just use a piece of paper in a coordinating color, punch using a circle punch and with a glue dot or two adhere to the bottom of the pot.

Third 'Thought':  They are always darling planted with flowers, herbs or plants and used as escort cards!

Fourth and final 'Thought' for today:  I would LOVE to see the small painted pots hanging as decor - they'd be a fabulous pop of color from above.  And for all the tall people, like me, just make sure to hang them high enough so people don't hit their heads!

There are lots of other darling ways these pots can be incorporated into weddings - like planted with flowers, herbs or a plant for a favor, filled with a pretty bag of dirt and some seeds for your guests to plant their own...  Get creative loves and see what 'thoughts' pop into your pretty little head!  Ooh, I'd love to hear about them too ;-)

~ Ciao

...photography by gabriella imperatori-penn

Tuesday Shoesday #30: Buckles & Butterflies

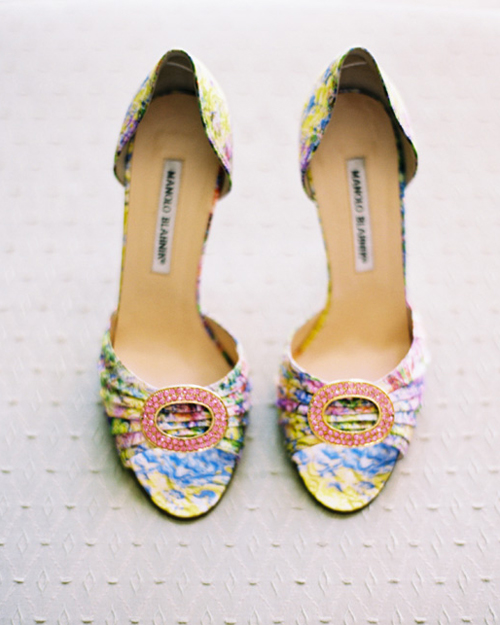
Oh Manolo - you sure do know your way to a woman's heart!  Have a look-see at these jewel buckle d'Orsay's...
Tuesday Shoesday
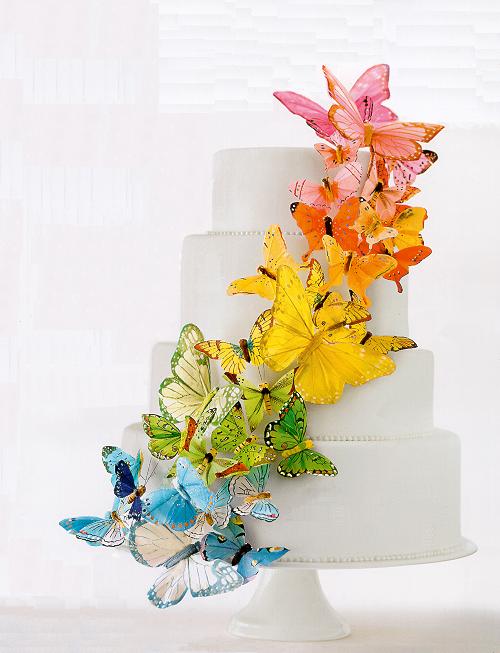
Gorgeous, no?  What a fabulous pair to wear on you wedding day.  I love all the colors, don't you? Those buckles?  Yep, love those too!  And I think a perfect match for these shoes is this wonderful butterfly wedding cake by Martha Stewart...you know, this one...
Cake
However, if the butterflies are too whimsy for you, this macaroon cake would be another fabulous option...
Cake
I don't think you could go wrong with either one.  Awww, shoes and cake - really does it get any better? 

Be sure to check out these lovely blogs for more Tuesday Shoesday goodness:

~ Ciao

...shoe photography by lane dittoe via wedding chicks, martha stewart butterfly cake via wedding cake pictures & macaroon cake by sweet merveilles found via elizabeth anne designs