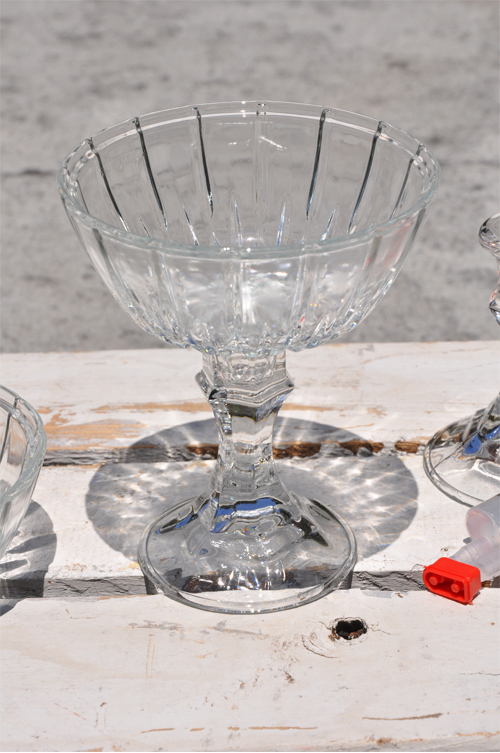
Do you remember me mentioning that one of the projects I said I would show you was using 2 dollar store items to create something? Well the 2 items are a candlestick and a candy dish...and if you combine the two together you get this...
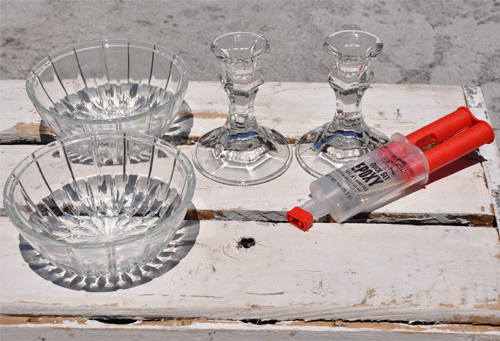
- A glass candlestick - $1.00
- A glass candy dish (it comes with a lid) - $1.00
- Epoxy or other strong glue
The reason I chose to make compotes is that I wanted to show you that you can make one for $2.00 and some epoxy. So even if you wanted or needed 100 of them the cost is still pretty low...so a very cost effective idea to be used on wedding tables! Granted, the candy dish bottom isn't very big, but it still works and still looks fabulous ;-)
And here is our second project for today...
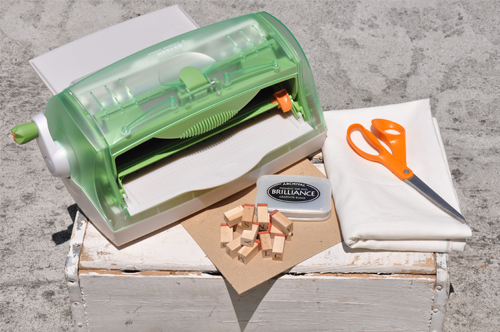
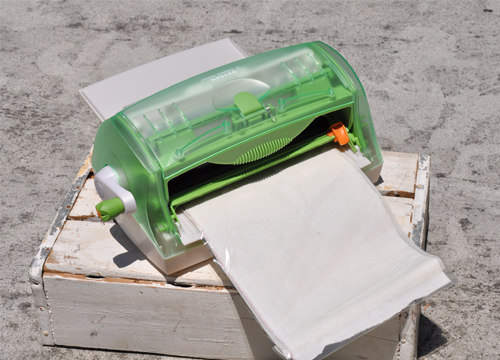
- A Xyron machine - however spray adhesive would work if you don't have one. I do like using the Xyron machine as it gives the material a back and makes it much easier to cut.
- Fabric - I used linen
- Scissors
- Letter stamps
- Stamp pad
- Flowers - not pictured above
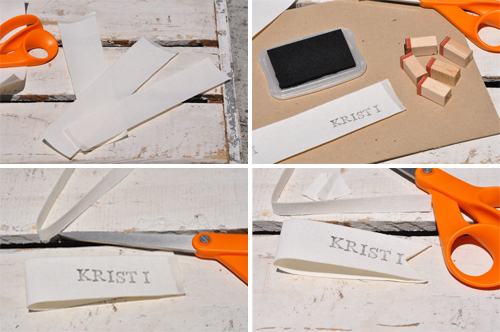

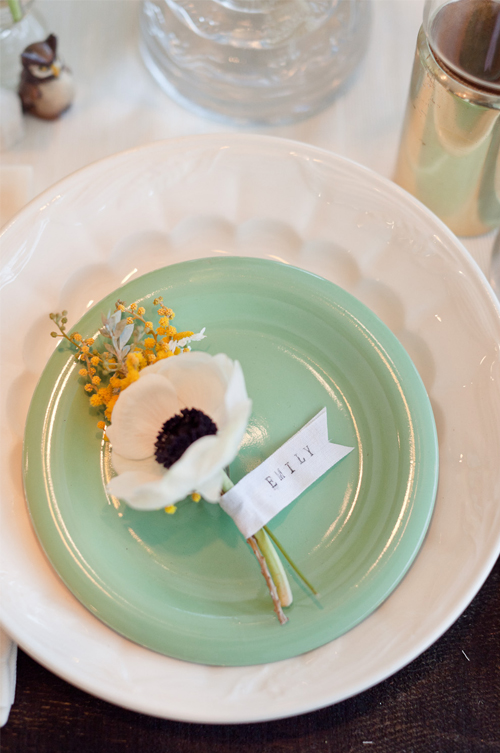
I have to tell you that I stamped both ends...as the first one, the one above on the plate that you see I didn't press quite hard enough and didn't center my name! However, if you look at the one above where I show the stamps and cutting...I did a much better job the second time. Just wished I would have remembered to use the better side when I made the posy - eeks, so sorry it's light and isn't centered!
Anyhoo, I hope you enjoyed these fun projects today. As always, I love doing them ;-). I will see you tomorrow my dears - when I will pull all the elements together and finish the table.
~ Ciao
...concept, design, styling & photography by luna and chloe weddings except for image 3 with photography by our labor of love via honey and poppies


So creative, Kristi!! I'm loving these ideas! Such a fun series.
ReplyDeletexoxo, chrissy from the perfect palette.
fabulous ideas, friend!!
ReplyDeleteYou are SO clever my friend!!
ReplyDelete